Introduction to Charcuterie Cups
As a busy mom, I know how challenging it can be to whip up something delicious and impressive in a pinch. That’s where Charcuterie Cups come to the rescue! These delightful little cups are not only a feast for the eyes but also a quick solution for any gathering. Imagine serving a variety of meats, cheeses, and fresh accompaniments in individual portions. It’s a fun way to please everyone, from picky eaters to gourmet lovers. Plus, they’re perfect for parties, picnics, or even a cozy night in. Let’s dive into this easy and satisfying recipe!
Why You’ll Love This Charcuterie Cups
These Charcuterie Cups are a game-changer for busy days! They’re incredibly easy to assemble, taking just 15 minutes from start to finish. The best part? You can customize them to suit your family’s tastes. Whether you’re hosting a gathering or just need a quick snack, these cups are sure to impress. Plus, they look beautiful on any table, making you feel like a culinary superstar without the stress!
Ingredients for Charcuterie Cups
Creating Charcuterie Cups is all about variety and personal preference. Here’s what you’ll need:
- Assorted cured meats: Think salami, prosciutto, or even pepperoni. These add a savory punch and are perfect for meat lovers.
- Assorted cheeses: Cheddar, brie, and gouda are fantastic choices. They bring creaminess and flavor, making each bite delightful.
- Olives: A mix of green and black olives adds a briny touch. They’re great for balancing the richness of the meats and cheeses.
- Cherry tomatoes: These juicy gems add freshness and a pop of color. They’re also a great way to sneak in some veggies!
- Nuts: Almonds or walnuts provide a satisfying crunch. They’re also a healthy addition, packed with protein and healthy fats.
- Fresh fruits: Grapes or apple slices bring sweetness and a refreshing contrast. Seasonal fruits can elevate the flavor and presentation.
- Crackers or breadsticks: These are essential for scooping up all the deliciousness. Choose your favorites for added texture.
- Fresh herbs: Optional, but a sprinkle of herbs like rosemary or thyme can add a lovely aroma and visual appeal.
Feel free to customize these ingredients based on your family’s preferences or dietary needs. You can find the exact quantities at the bottom of the article, ready for printing!
How to Make Charcuterie Cups
Step 1: Gather Your Ingredients
Before diving into the fun part, it’s essential to have everything ready. Gather all your ingredients and tools in one spot. This makes the assembly process smooth and enjoyable. Trust me, when you’re in the zone, having everything at hand saves time and keeps stress at bay!
Step 2: Prepare the Ingredients
Now, let’s get those ingredients ready! Slice your cheeses and cured meats into bite-sized pieces. Rinse the cherry tomatoes and olives, and dry them gently. If you’re using fresh fruits, cut them into manageable pieces. Arranging everything neatly will make assembly a breeze!
Step 3: Layer the Ingredients
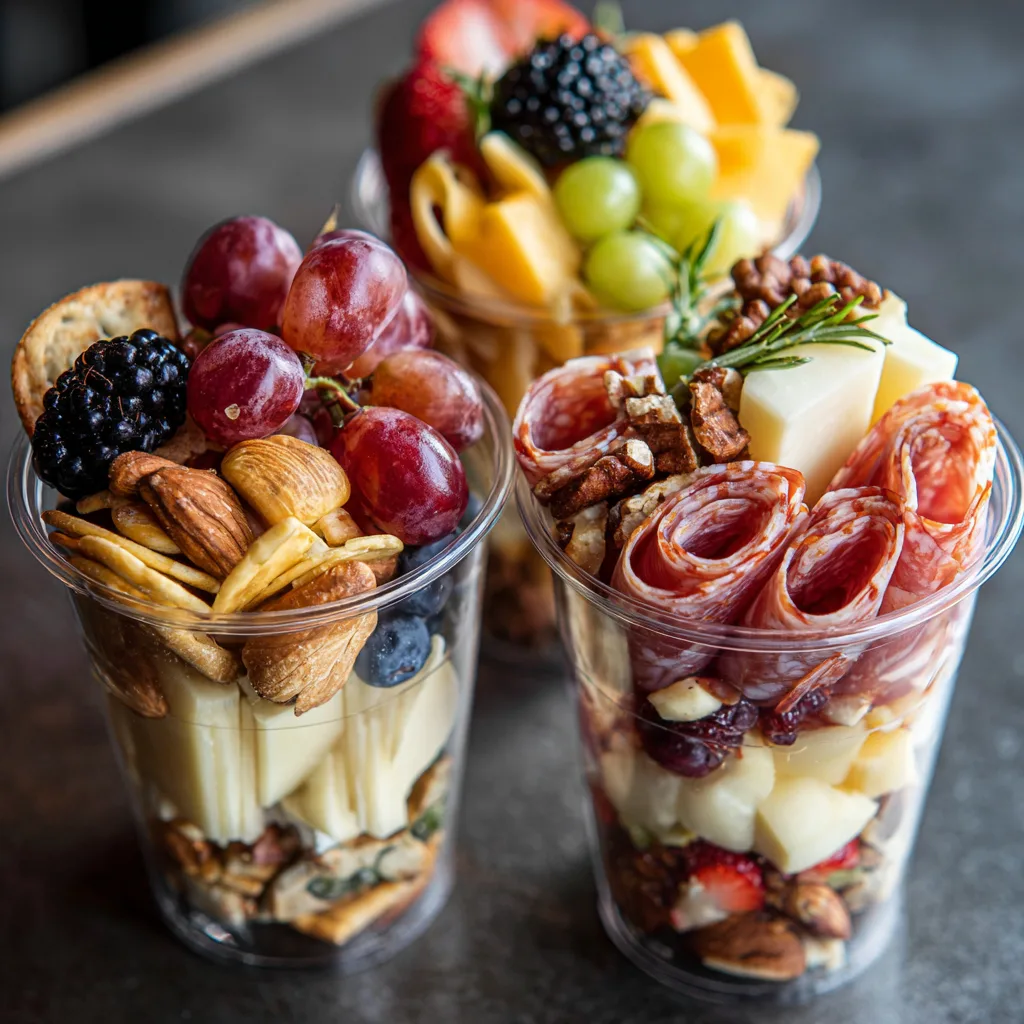
Here comes the fun part—layering! Start with a generous layer of cured meats at the bottom of your cup. This creates a savory base. Next, add a layer of cheese on top, allowing it to peek out. Then, fill the cup with olives, cherry tomatoes, and a handful of nuts for crunch. Finally, tuck in fresh fruits and crackers or breadsticks. The colors and textures should be vibrant and inviting, making each cup a mini masterpiece!
Step 4: Add the Final Touches
To elevate your Charcuterie Cups, consider garnishing with fresh herbs. A sprig of rosemary or a sprinkle of thyme adds a lovely aroma and a touch of elegance. You can also drizzle a bit of honey or balsamic glaze for an extra flavor boost. These little touches make a big difference!
Step 5: Serve or Store
Once your cups are beautifully assembled, it’s time to serve! Enjoy them immediately for the freshest taste. If you need to prepare ahead, cover them with plastic wrap and refrigerate. They can be made a few hours in advance, making them perfect for busy days!
Tips for Success
- Use a variety of colors and textures for visual appeal.
- Don’t be afraid to mix and match ingredients based on what you have on hand.
- Consider using small cups or jars for a charming presentation.
- Keep your ingredients fresh by storing them properly before assembly.
- Experiment with different herbs and spices to find your favorite flavor combinations.
Equipment Needed
- Small cups or containers: Use disposable cups for easy cleanup or small glass jars for a more elegant touch.
- Cutting board: A sturdy board is essential for slicing your ingredients safely.
- Sharp knife: A good knife makes slicing meats and cheeses a breeze.
- Serving platter: If you prefer, arrange the cups on a beautiful platter for a stunning display.
Variations of Charcuterie Cups
- Vegetarian Charcuterie Cups: Swap out the cured meats for roasted vegetables or marinated artichokes. Add more cheese varieties and include hummus for a creamy dip.
- Gluten-Free Options: Use gluten-free crackers or skip the crackers altogether. Instead, add more nuts and fresh veggies like cucumber slices for crunch.
- Sweet and Savory Cups: Incorporate sweet elements like dark chocolate pieces or honeycomb alongside the meats and cheeses for a delightful contrast.
- Spicy Charcuterie Cups: Add spicy salami or jalapeño-stuffed olives for a kick. Pair with pepper jack cheese for an extra layer of heat.
- Breakfast Charcuterie Cups: Use breakfast meats like bacon or sausage, and include mini muffins, yogurt, and fresh berries for a morning twist.
Serving Suggestions for Charcuterie Cups
- Pair with a refreshing white wine or sparkling water for a delightful drink option.
- Serve alongside a simple green salad for a balanced meal.
- Consider adding a selection of dips like hummus or tzatziki for extra flavor.
- Use colorful napkins and plates to enhance the presentation.
- Arrange cups on a tiered stand for an eye-catching display at parties.
FAQs about Charcuterie Cups
Can I make Charcuterie Cups in advance?
Absolutely! You can prepare these Charcuterie Cups a few hours ahead of time. Just cover them with plastic wrap and refrigerate until you’re ready to serve. This makes them a perfect option for busy days or last-minute gatherings!
What types of meats work best for Charcuterie Cups?
For the best flavor, I recommend using a mix of cured meats like salami, prosciutto, and pepperoni. Each brings its unique taste and texture, making your cups more exciting!
Can I customize the ingredients based on dietary restrictions?
Definitely! These Charcuterie Cups are highly customizable. You can easily swap out meats for veggies, use dairy-free cheese, or choose gluten-free crackers. Make them your own!
What should I serve with Charcuterie Cups?
These cups pair wonderfully with a refreshing drink, like white wine or sparkling water. You can also serve them alongside a simple salad or a selection of dips for added flavor.
How do I store leftover Charcuterie Cups?
If you have any leftovers, simply cover them tightly and store them in the refrigerator. They’re best enjoyed within a day or two for optimal freshness!
Final Thoughts
Creating Charcuterie Cups is more than just assembling a snack; it’s about bringing joy to your gatherings and making memories with loved ones. Each cup is a little work of art, bursting with flavors and colors that spark conversation and delight. I love how these cups can be tailored to fit any occasion, from casual family nights to elegant parties. Plus, they’re a fantastic way to get everyone involved in the fun of choosing their favorite ingredients. So, roll up your sleeves, gather your loved ones, and enjoy the deliciousness together!
Charcuterie Cups: Discover the Perfect Party Snack!
- Total Time: 15 minutes
- Yield: 4 servings 1x
- Diet: Vegetarian
Description
Charcuterie Cups are a delightful and convenient way to serve a variety of meats, cheeses, and accompaniments in individual portions, perfect for parties and gatherings.
Ingredients
- 1 cup assorted cured meats (salami, prosciutto, etc.)
- 1 cup assorted cheeses (cheddar, brie, gouda, etc.)
- 1/2 cup olives
- 1/2 cup cherry tomatoes
- 1/2 cup nuts (almonds, walnuts, etc.)
- 1/2 cup fresh fruits (grapes, apple slices, etc.)
- 1/4 cup crackers or breadsticks
- Fresh herbs for garnish (optional)
Instructions
- Gather all ingredients and prepare them by slicing cheeses and meats into bite-sized pieces.
- Take small cups or containers and start layering the ingredients.
- Begin with a layer of cured meats at the bottom.
- Add a layer of cheese on top of the meats.
- Fill the cup with olives, cherry tomatoes, and nuts.
- Add fresh fruits and crackers or breadsticks to the cup.
- Garnish with fresh herbs if desired.
- Serve immediately or refrigerate until ready to serve.
Notes
- Feel free to customize the ingredients based on personal preferences or dietary restrictions.
- These cups can be made a few hours in advance for convenience.
- Consider using seasonal fruits for added flavor and color.
- Prep Time: 15 minutes
- Cook Time: 0 minutes
- Category: Appetizer
- Method: No-cook
- Cuisine: International
Nutrition
- Serving Size: 1 cup
- Calories: 300
- Sugar: 5g
- Sodium: 600mg
- Fat: 20g
- Saturated Fat: 8g
- Unsaturated Fat: 10g
- Trans Fat: 0g
- Carbohydrates: 15g
- Fiber: 3g
- Protein: 12g
- Cholesterol: 30mg