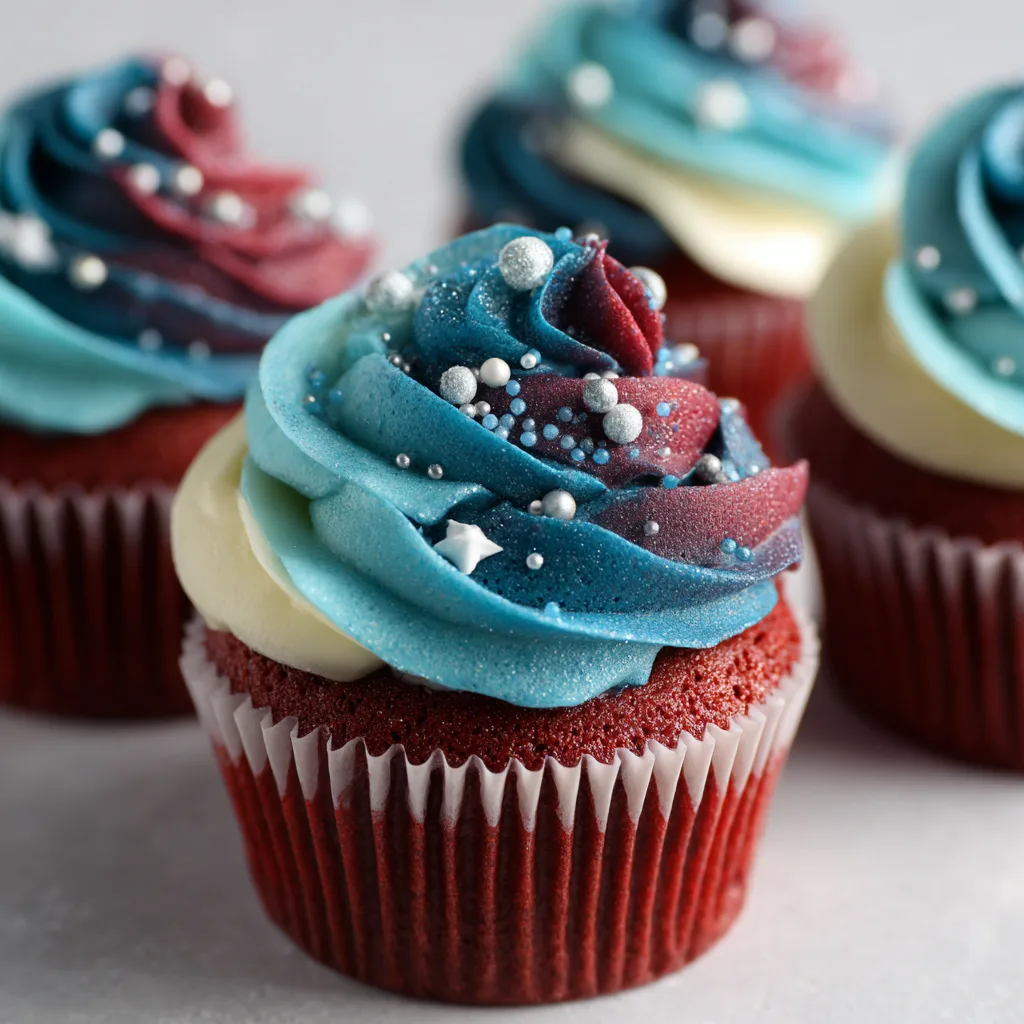
Introduction to Red Velvet Blue Velvet Cupcakes
As a busy mom, I know how important it is to find quick and delightful treats that can bring a smile to my family’s faces. That’s why I’m excited to share my recipe for Red Velvet Blue Velvet Cupcakes! These vibrant cupcakes are not just a feast for the eyes; they’re a delicious twist on the classic red velvet that everyone loves. Perfect for birthdays, holidays, or just a fun afternoon baking session, these cupcakes are sure to impress your loved ones and make any occasion feel special.
Why You’ll Love This Red Velvet Blue Velvet Cupcakes
These Red Velvet Blue Velvet Cupcakes are a dream come true for busy cooks like us! They’re quick to whip up, taking just 40 minutes from start to finish. The combination of rich chocolatey flavor and vibrant colors makes them a hit with both kids and adults. Plus, they’re versatile enough for any occasion, whether it’s a casual family dinner or a festive celebration. You’ll love how easy they are to make and how delightful they taste!
Ingredients for Red Velvet Blue Velvet Cupcakes
Gathering the right ingredients is the first step to creating these stunning Red Velvet Blue Velvet Cupcakes. Here’s what you’ll need:
- All-purpose flour: This is the base of your cupcakes, providing structure and a light texture.
- Granulated sugar: Sweetness is key! It balances the cocoa and enhances the overall flavor.
- Unsweetened cocoa powder: This adds a rich chocolate flavor, making the red velvet truly decadent.
- Baking soda: A leavening agent that helps the cupcakes rise and become fluffy.
- Salt: Just a pinch enhances the sweetness and balances the flavors.
- Vegetable oil: This keeps the cupcakes moist and tender, giving them that melt-in-your-mouth quality.
- Buttermilk: Adds a tangy flavor and helps create a soft texture. You can substitute with regular milk mixed with a bit of vinegar.
- Large eggs: They bind the ingredients together and add richness.
- Red food coloring: The star of the show! It gives the cupcakes their signature red hue.
- Blue food coloring: This adds a fun twist, creating a beautiful contrast with the red.
- Vanilla extract: A splash of vanilla enhances the overall flavor profile.
- White vinegar: This reacts with the baking soda, helping the cupcakes rise and adding a slight tang.
For exact measurements, check the bottom of the article where you can find everything listed for easy printing. Happy baking!
How to Make Red Velvet Blue Velvet Cupcakes
Step 1: Preheat and Prepare
First things first, let’s get that oven preheating to 350°F (175°C). While it warms up, grab your cupcake pan and line it with colorful cupcake liners. I love using festive colors to match the occasion! This simple step sets the stage for your delightful Red Velvet Blue Velvet Cupcakes. Trust me, the anticipation of that warm oven makes the whole process even more exciting!
Step 2: Mix Dry Ingredients
In a large mixing bowl, whisk together the all-purpose flour, granulated sugar, cocoa powder, baking soda, and salt. This is where the magic begins! Make sure everything is well combined, as this will ensure your cupcakes rise beautifully. I like to use a whisk for this step; it helps to aerate the mixture, giving your cupcakes that light and fluffy texture we all crave.
Step 3: Combine Wet Ingredients
In another bowl, mix together the vegetable oil, buttermilk, eggs, red food coloring, vanilla extract, and white vinegar. Whisk until everything is smooth and well blended. The vibrant colors will start to shine through, and it’s such a joy to see! This mixture is the heart of your cupcakes, adding moisture and flavor that will make them irresistible.
Step 4: Combine Wet and Dry Mixtures
Now, it’s time to bring the two mixtures together! Gradually add the wet ingredients to the dry ingredients, stirring gently until just combined. Be careful not to overmix; a few lumps are perfectly fine. This step is crucial for achieving that tender crumb we all love in our Red Velvet Blue Velvet Cupcakes. It’s like a dance—gentle and rhythmic!
Step 5: Color the Batter
Divide the batter evenly into two bowls. In one bowl, add the blue food coloring and mix until you reach your desired shade. The contrast between the red and blue is simply stunning! I often find myself smiling at the vibrant colors. This step is where the fun really begins, and it’s a great way to get the kids involved in the kitchen!
Step 6: Fill the Cupcake Liners
Using a spoon, alternate scoops of red and blue batter into each cupcake liner. I like to start with a scoop of red, followed by blue, and repeat until the liners are about two-thirds full. This creates a beautiful marbled effect when baked. It’s like painting with batter, and the excitement builds as you see the colors swirl together!
Step 7: Bake the Cupcakes
Place the cupcake pan in the preheated oven and bake for 18-20 minutes. Keep an eye on them! You’ll know they’re done when a toothpick inserted into the center comes out clean. The aroma wafting through your kitchen will be heavenly. It’s hard to resist peeking in, but patience is key for those perfect Red Velvet Blue Velvet Cupcakes!
Step 8: Cool and Frost
Once baked, remove the cupcakes from the oven and let them cool in the pan for about 5 minutes. Then, transfer them to a wire rack to cool completely. This step is essential before frosting! Once cooled, you can frost them with your favorite cream cheese frosting. I love to add sprinkles for that extra festive touch. Enjoy the delightful colors and flavors!
Tips for Success
- Measure your ingredients accurately for the best results.
- Don’t overmix the batter; it can lead to dense cupcakes.
- Use room temperature ingredients for a smoother batter.
- Experiment with different food coloring brands for vibrant hues.
- Let the cupcakes cool completely before frosting to prevent melting.
- Store leftovers in an airtight container to keep them fresh.
Equipment Needed
- Cupcake pan: A standard 12-cup pan works perfectly. You can also use silicone molds for easy removal.
- Mixing bowls: Use at least two—one for dry and one for wet ingredients.
- Whisk: A hand whisk is great, but an electric mixer can save time.
- Spoon or ice cream scoop: For filling the cupcake liners evenly.
- Wire rack: Essential for cooling the cupcakes properly.
Variations
- Gluten-Free: Substitute all-purpose flour with a gluten-free blend to make these cupcakes suitable for gluten-sensitive friends.
- Vegan: Replace eggs with flaxseed meal mixed with water and use plant-based milk and oil for a delicious vegan version.
- Chocolate Lovers: Add chocolate chips to the batter for an extra chocolatey treat that will satisfy any sweet tooth.
- Fruit-Infused: Incorporate mashed bananas or applesauce for a fruity twist that adds moisture and flavor.
- Spiced Up: Add a pinch of cinnamon or nutmeg to the dry ingredients for a warm, spiced flavor that complements the chocolate.
Serving Suggestions
- Pair these cupcakes with a tall glass of cold milk for a classic treat.
- Serve alongside fresh fruit for a refreshing contrast to the sweetness.
- Present on a colorful cake stand to showcase their vibrant colors.
- Top with edible glitter for an extra festive flair.
- Enjoy with a cup of coffee or tea for a delightful afternoon snack.
FAQs about Red Velvet Blue Velvet Cupcakes
Can I make these cupcakes ahead of time?
Absolutely! You can bake the Red Velvet Blue Velvet Cupcakes a day in advance. Just store them in an airtight container at room temperature. Frost them right before serving for the best taste and presentation.
What can I use instead of buttermilk?
If you don’t have buttermilk on hand, you can easily make a substitute. Just mix one cup of regular milk with a tablespoon of vinegar or lemon juice. Let it sit for about 5 minutes, and you’re good to go!
How do I store leftover cupcakes?
To keep your cupcakes fresh, store them in an airtight container at room temperature for up to three days. If you want to keep them longer, consider freezing them without frosting. Just thaw and frost when you’re ready to enjoy!
Can I use different food coloring?
Yes! Feel free to experiment with different brands or types of food coloring. Just remember that the amount you use may vary, so start with a small amount and adjust until you achieve your desired color.
What frosting pairs well with these cupcakes?
While cream cheese frosting is a classic choice, you can also try buttercream or whipped cream frosting. Each adds a unique flavor that complements the rich chocolatey taste of the Red Velvet Blue Velvet Cupcakes!
Final Thoughts
Creating these Red Velvet Blue Velvet Cupcakes is more than just baking; it’s about making memories. The vibrant colors and rich flavors bring joy to any gathering, whether it’s a birthday party or a simple family dinner. I love watching my kids’ faces light up as they take their first bite. This recipe is a reminder that even on the busiest days, we can find time to whip up something special. So, roll up your sleeves, gather your loved ones, and enjoy the delightful experience of baking together. Trust me, the smiles will be worth every moment!
Print
Red Velvet Blue Velvet Cupcakes: A Delicious Twist Awaits!
- Total Time: 40 minutes
- Yield: 12 cupcakes 1x
- Diet: Vegetarian
Description
Red Velvet Blue Velvet Cupcakes are a delightful twist on the classic red velvet recipe, featuring a vibrant blue color that adds a fun and festive touch to any occasion.
Ingredients
- 1 1/2 cups all-purpose flour
- 1 cup granulated sugar
- 1/2 cup unsweetened cocoa powder
- 1 teaspoon baking soda
- 1 teaspoon salt
- 1 cup vegetable oil
- 1 cup buttermilk
- 2 large eggs
- 2 tablespoons red food coloring
- 2 tablespoons blue food coloring
- 1 teaspoon vanilla extract
- 1 teaspoon white vinegar
Instructions
- Preheat the oven to 350°F (175°C) and line a cupcake pan with liners.
- In a large bowl, whisk together the flour, sugar, cocoa powder, baking soda, and salt.
- In another bowl, mix the vegetable oil, buttermilk, eggs, red food coloring, vanilla extract, and vinegar until well combined.
- Gradually add the wet ingredients to the dry ingredients, mixing until just combined.
- Divide the batter evenly into two bowls. In one bowl, add the blue food coloring and mix until the desired color is achieved.
- Using a spoon, alternate scoops of red and blue batter into each cupcake liner.
- Bake for 18-20 minutes or until a toothpick inserted into the center comes out clean.
- Allow the cupcakes to cool completely before frosting.
Notes
- For a cream cheese frosting, mix cream cheese, butter, powdered sugar, and vanilla extract until smooth.
- Store cupcakes in an airtight container at room temperature for up to 3 days.
- Feel free to decorate with sprinkles or edible glitter for an extra festive touch.
- Prep Time: 20 minutes
- Cook Time: 20 minutes
- Category: Dessert
- Method: Baking
- Cuisine: American
Nutrition
- Serving Size: 1 cupcake
- Calories: 250
- Sugar: 20g
- Sodium: 200mg
- Fat: 12g
- Saturated Fat: 2g
- Unsaturated Fat: 8g
- Trans Fat: 0g
- Carbohydrates: 35g
- Fiber: 1g
- Protein: 3g
- Cholesterol: 30mg