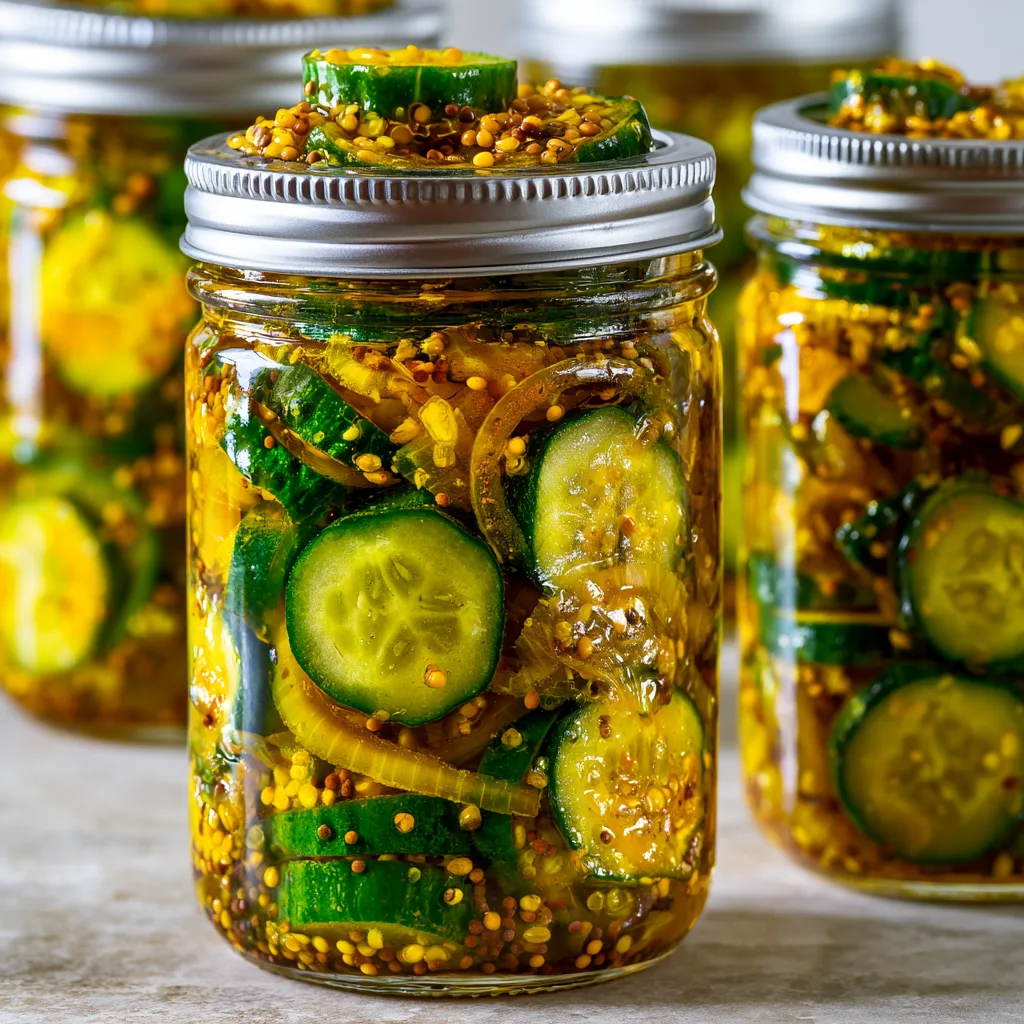
Introduction to Bread and Butter Pickles Canning Recipe
As summer rolls in, I find myself craving the sweet and tangy crunch of bread and butter pickles. This Bread and Butter Pickles Canning Recipe is my go-to for preserving that delightful taste. It’s a quick solution for busy days when you want to impress your loved ones with something homemade. Plus, there’s something magical about opening a jar of your own pickles in the middle of winter, reminding you of sunny days. Trust me, this recipe is not just easy; it’s a delicious way to savor summer all year round!
Why You’ll Love This Bread and Butter Pickles Canning Recipe
This Bread and Butter Pickles Canning Recipe is a breeze to make, even on the busiest of days. With just a handful of ingredients and minimal prep time, you can whip up a batch in under an hour. The sweet and tangy flavor is simply irresistible, making these pickles a perfect addition to sandwiches, burgers, or even as a snack. Plus, the satisfaction of canning your own food is unmatched!
Ingredients for Bread and Butter Pickles Canning Recipe
Gathering the right ingredients is the first step to creating your own delicious bread and butter pickles. Here’s what you’ll need:
- Cucumbers: Fresh, crisp cucumbers are the star of this recipe. Look for pickling cucumbers for the best crunch.
- Onions: Thinly sliced onions add a sweet bite. I prefer yellow onions, but you can use red for a pop of color.
- Apple cider vinegar: This tangy vinegar gives the pickles their signature flavor. It’s a must-have for that perfect balance.
- Sugar: The sweetness of sugar balances the acidity of the vinegar. It’s what makes these pickles so addictive!
- Mustard seeds: These tiny seeds add a subtle warmth and depth to the flavor. They’re a classic in pickling.
- Celery seeds: A little sprinkle of celery seeds brings a unique taste that complements the other ingredients beautifully.
- Turmeric: This vibrant spice not only adds color but also a hint of earthiness to the pickles.
- Salt: Essential for flavor and preservation, salt helps draw out moisture from the cucumbers.
For those looking to experiment, consider adding a pinch of red pepper flakes for a spicy kick. You can also substitute white vinegar if you prefer a sharper taste. Remember, the exact quantities for each ingredient are listed at the bottom of the article for easy printing!
How to Make Bread and Butter Pickles Canning Recipe
Now that you have your ingredients ready, let’s dive into the fun part: making your own bread and butter pickles! Follow these simple steps, and you’ll be savoring that sweet and tangy goodness in no time.
Step 1: Prepare the Cucumbers and Onions
Start by washing your cucumbers thoroughly. Then, slice them thinly—aim for about 1/8 inch thick. The thinner the slices, the better they’ll absorb the brine. Next, do the same with the onions. I like to use a sharp knife or a mandoline for even slices. Trust me, it makes a difference!
Step 2: Salt the Vegetables
In a large bowl, combine your sliced cucumbers and onions. Sprinkle them generously with salt and toss to coat. This step is crucial! Let them sit for about 2 hours. The salt draws out moisture, making your pickles crispier and enhancing their flavor. You’ll notice some liquid forming at the bottom of the bowl—that’s exactly what you want!
Step 3: Make the Pickling Brine
While your veggies are salting, it’s time to whip up the pickling brine. In a saucepan, combine the apple cider vinegar, sugar, mustard seeds, celery seeds, turmeric, and a bit of salt. Bring this mixture to a boil over medium heat, stirring until the sugar dissolves. The aroma will be heavenly! This brine is what gives your pickles that signature flavor.
Step 4: Pack the Jars
After the cucumbers and onions have sat, drain them well. Now, it’s time to pack them into sterilized jars. I like to layer them for a pretty presentation. Make sure to leave about half an inch of headspace at the top of each jar. This space is important for the brine to circulate properly.
Step 5: Pour the Brine
Carefully pour the hot brine over the packed vegetables, ensuring they’re fully submerged. Use a clean utensil to push down any floating pieces. Once filled, wipe the rims of the jars with a clean cloth to ensure a good seal. This step is key to preventing spoilage!
Step 6: Process the Jars
Now, let’s seal those jars! Place them in a water bath canner, ensuring they’re covered by at least an inch of water. Bring the water to a gentle boil and process for 10-15 minutes. This step is essential for preserving your pickles and ensuring they last. Keep an eye on the timer!
Step 7: Cool and Store
Once the time is up, carefully remove the jars and let them cool on a clean towel or cooling rack. You’ll hear the satisfying “pop” of the lids sealing as they cool. Once completely cool, store your jars in a cool, dark place. For the best flavor, let them sit for at least 24 hours before diving in. Enjoy your homemade bread and butter pickles!
Tips for Success
- Always use fresh, firm cucumbers for the best crunch.
- Don’t skip the salting step; it’s key for flavor and texture.
- Make sure your jars are properly sterilized to prevent spoilage.
- Label your jars with the date so you can enjoy them at their best.
- Experiment with spices to create your own unique flavor profile!
Equipment Needed
- Water bath canner: A large pot works too, just ensure it can hold jars.
- Jars: Use pint-sized canning jars; recycled jars can work if they’re sterilized.
- Lids and bands: Always use new lids for a proper seal.
- Jar lifter: A pair of tongs can substitute, but a jar lifter is safer.
- Funnel: A wide-mouth funnel helps pour the brine without mess.
Variations of Bread and Butter Pickles Canning Recipe
- Spicy Bread and Butter Pickles: Add a teaspoon of red pepper flakes or sliced jalapeños for a fiery kick.
- Garlic Dill Pickles: Incorporate minced garlic and fresh dill for a zesty twist on the classic recipe.
- Sweet and Sour Pickles: Substitute half of the sugar with brown sugar for a deeper, caramel-like flavor.
- Herbed Pickles: Experiment with fresh herbs like thyme or basil for a unique aromatic profile.
- Low-Sugar Option: Use a sugar substitute or reduce the sugar amount for a healthier version.
Serving Suggestions for Bread and Butter Pickles
- Serve alongside grilled burgers for a delightful crunch.
- Pair with sandwiches or wraps for a sweet and tangy contrast.
- Use as a topping on charcuterie boards for a pop of color.
- Enjoy with a refreshing glass of iced tea or lemonade.
- Garnish salads for an unexpected burst of flavor.
FAQs about Bread and Butter Pickles Canning Recipe
How long do bread and butter pickles last?
When stored properly in a cool, dark place, your homemade bread and butter pickles can last up to a year. Just make sure to check for any signs of spoilage before enjoying!
Can I use regular cucumbers instead of pickling cucumbers?
While pickling cucumbers are ideal for their crunch, you can use regular cucumbers in a pinch. Just keep in mind they may not hold up as well in the brine.
What if I don’t have apple cider vinegar?
No worries! You can substitute white vinegar for a sharper taste. Just remember, it will alter the flavor slightly, but your pickles will still be delicious!
Can I adjust the sugar in the recipe?
Absolutely! If you prefer a less sweet pickle, feel free to reduce the sugar. Just keep in mind that it may affect the overall balance of flavors.
Is it necessary to process the jars in a water bath?
Yes, processing the jars in a water bath is crucial for sealing and preserving your pickles. It helps prevent spoilage and ensures your pickles stay fresh for months to come!
Final Thoughts
Making your own bread and butter pickles is more than just a recipe; it’s a delightful journey back to summer days filled with sunshine and laughter. Each jar you open brings a burst of flavor and a wave of nostalgia, reminding you of family gatherings and picnics. The joy of canning is in the process, the aromas wafting through your kitchen, and the satisfaction of creating something delicious from scratch. So, roll up your sleeves, gather your ingredients, and dive into this Bread and Butter Pickles Canning Recipe. You’ll be savoring summer long after the season has passed!
Print
Bread and Butter Pickles Canning Recipe Made Easy!
- Total Time: 45 minutes
- Yield: 4 pint jars 1x
- Diet: Vegetarian
Description
A simple and delicious recipe for canning bread and butter pickles, perfect for preserving the taste of summer.
Ingredients
- 4 cups cucumbers, sliced
- 1 cup onions, thinly sliced
- 1 cup apple cider vinegar
- 1 cup sugar
- 1 tablespoon mustard seeds
- 1 tablespoon celery seeds
- 1 teaspoon turmeric
- 1 teaspoon salt
Instructions
- Prepare the cucumbers and onions by slicing them thinly.
- In a large bowl, combine the cucumbers and onions, sprinkle with salt, and let sit for 2 hours.
- In a saucepan, combine vinegar, sugar, mustard seeds, celery seeds, turmeric, and salt. Bring to a boil.
- Drain the cucumbers and onions, then pack them into sterilized jars.
- Pour the hot vinegar mixture over the cucumbers and onions, leaving a little headspace.
- Seal the jars with lids and process in a water bath for 10-15 minutes.
- Allow the jars to cool completely before storing them in a cool, dark place.
Notes
- For extra flavor, you can add a pinch of red pepper flakes.
- Let the pickles sit for at least 24 hours before tasting for the best flavor.
- These pickles can last up to a year if stored properly.
- Prep Time: 30 minutes
- Cook Time: 15 minutes
- Category: Canning
- Method: Water Bath Canning
- Cuisine: American
Nutrition
- Serving Size: 1 pickle
- Calories: 30
- Sugar: 6g
- Sodium: 150mg
- Fat: 0g
- Saturated Fat: 0g
- Unsaturated Fat: 0g
- Trans Fat: 0g
- Carbohydrates: 8g
- Fiber: 0g
- Protein: 0g
- Cholesterol: 0mg