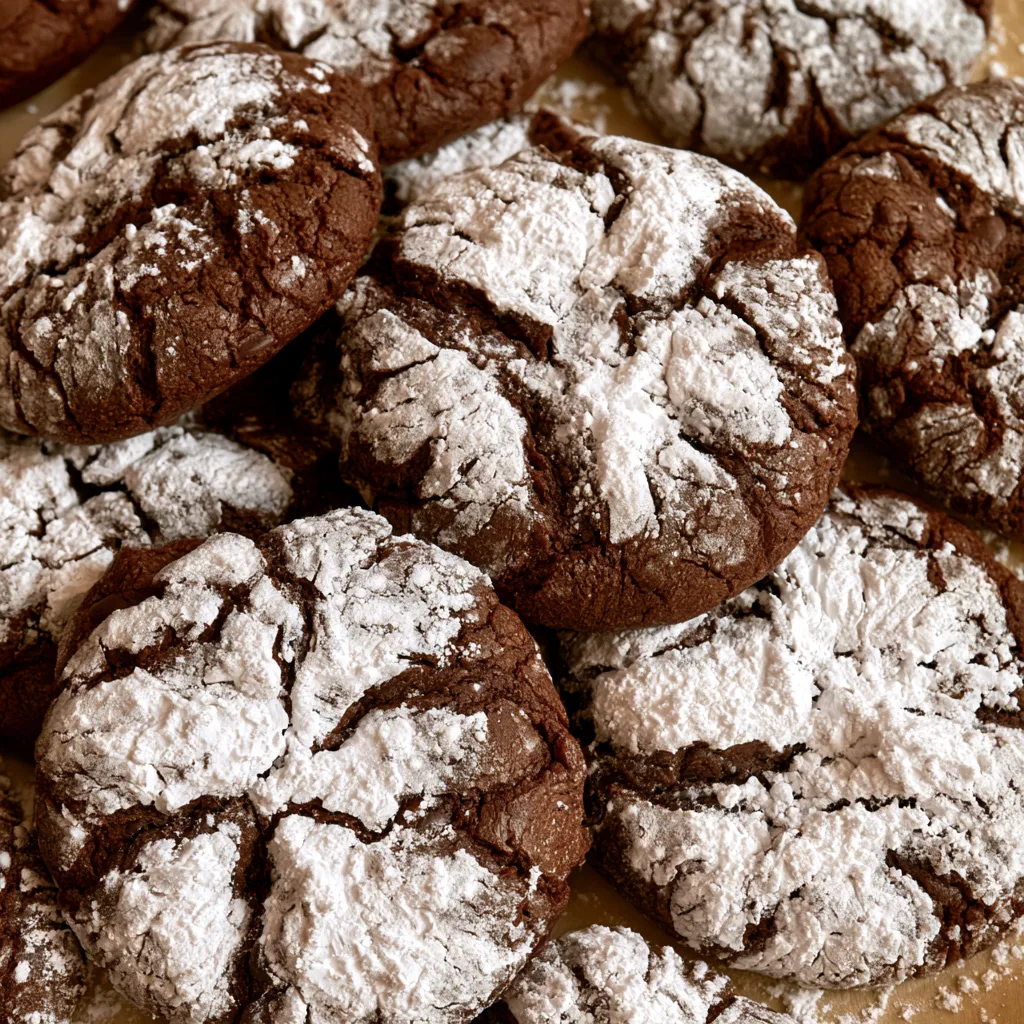
Introduction to Peppermint Chocolate Crinkle Cookies
As the holiday season approaches, I find myself craving the delightful flavors of Peppermint Chocolate Crinkle Cookies. These cookies are not just a treat; they’re a warm hug on a chilly day. With their rich chocolatey goodness and a refreshing hint of peppermint, they’re perfect for busy moms like us who want to impress loved ones without spending hours in the kitchen. Whether you’re hosting a festive gathering or simply indulging after a long day, these cookies are a quick solution that brings joy and comfort to any occasion.
Why You’ll Love This Peppermint Chocolate Crinkle Cookies
These Peppermint Chocolate Crinkle Cookies are a dream come true for busy schedules. They come together in just a few simple steps, making them perfect for last-minute holiday baking. The combination of rich chocolate and refreshing peppermint creates a flavor explosion that will have everyone asking for seconds. Plus, the crinkly tops dusted with powdered sugar add a festive touch that’s sure to impress your family and friends!
Ingredients for Peppermint Chocolate Crinkle Cookies
Gathering the right ingredients is the first step to creating these delightful Peppermint Chocolate Crinkle Cookies. Here’s what you’ll need:
- All-purpose flour: This is the base of your cookies, providing structure and a soft texture.
- Unsweetened cocoa powder: It adds that rich chocolate flavor we all love, making these cookies a chocolate lover’s dream.
- Granulated sugar: This sweetens the dough and helps create that lovely crinkle effect.
- Brown sugar: It adds moisture and a hint of caramel flavor, enhancing the overall taste.
- Vegetable oil: This keeps the cookies moist and chewy, making them irresistible.
- Large eggs: They bind the ingredients together and help the cookies rise.
- Vanilla extract: A splash of this adds warmth and depth to the flavor profile.
- Peppermint extract: This is the star of the show, giving your cookies that refreshing holiday twist.
- Baking powder: It helps the cookies rise and become fluffy.
- Salt: Just a pinch enhances all the flavors, balancing the sweetness.
- Powdered sugar: This is for coating the cookies, giving them that beautiful snowy appearance.
For those who want to experiment, you can increase the peppermint extract for a stronger flavor or substitute coconut oil for a different twist. If you’re looking for a gluten-free option, try using a gluten-free flour blend. The exact quantities for each ingredient are available at the bottom of the article for easy printing!
How to Make Peppermint Chocolate Crinkle Cookies
Now that we have our ingredients ready, let’s dive into the fun part: making these Peppermint Chocolate Crinkle Cookies! Follow these simple steps, and you’ll have a batch of festive cookies in no time.
Step 1: Preheat the Oven
First things first, preheat your oven to 350°F (175°C). Preheating is crucial because it ensures that your cookies bake evenly. If the oven isn’t hot enough, your cookies might spread too much or not rise properly. Trust me, a well-preheated oven is the secret to cookie perfection!
Step 2: Mix Dry Ingredients
In a large bowl, combine the all-purpose flour, unsweetened cocoa powder, granulated sugar, brown sugar, baking powder, and salt. Whisk them together until they’re well blended. This step is important because it helps distribute the leavening agent evenly, ensuring your cookies rise beautifully. Plus, the aroma of cocoa will make your kitchen feel like a cozy chocolate haven!
Step 3: Combine Wet Ingredients
In another bowl, whisk together the vegetable oil, large eggs, vanilla extract, and peppermint extract. Make sure everything is well combined. The oil gives the cookies their moist texture, while the eggs help bind everything together. And let’s not forget that peppermint extract—it’s what makes these cookies sing with holiday cheer!
Step 4: Mix Wet and Dry Ingredients
Now, it’s time to combine the wet and dry ingredients. Pour the wet mixture into the bowl with the dry ingredients. Stir gently until everything is just combined. Be careful not to overmix; we want our cookies to be soft and chewy, not tough. The dough will be thick and a little sticky, which is just perfect!
Step 5: Chill the Dough
Cover the bowl with plastic wrap and chill the dough in the refrigerator for about 30 minutes. Chilling is essential because it firms up the dough, making it easier to handle. Plus, it helps the flavors meld together, resulting in a richer taste. While you wait, you can sip on some hot cocoa and dream about those cookies!
Step 6: Shape the Cookies
Once the dough is chilled, it’s time to shape the cookies. Scoop out tablespoon-sized portions of dough and roll them into balls. I like to use a cookie scoop for this—it makes the process quick and easy! Make sure to roll them gently; we want them to be smooth and round for that perfect crinkle effect.
Step 7: Coat in Powdered Sugar
Next, roll each ball in powdered sugar until they’re fully coated. This step is what gives our Peppermint Chocolate Crinkle Cookies their signature snowy appearance. It’s like dressing them up for a festive party! Don’t be shy with the sugar; the more, the merrier!
Step 8: Bake the Cookies
Place the cookies on a baking sheet lined with parchment paper, spacing them about 2 inches apart. Bake them in your preheated oven for 10-12 minutes. You’ll know they’re done when the edges are set, and the tops are crinkled. The smell wafting through your kitchen will be heavenly, and you’ll be counting down the seconds until you can taste them!
Step 9: Cool and Enjoy
Once baked, allow the cookies to cool on the baking sheet for a few minutes before transferring them to a wire rack. This cooling time is crucial; it allows the cookies to firm up a bit. The anticipation of tasting these delightful treats is half the fun! Once they’re cool, grab a glass of milk and enjoy your Peppermint Chocolate Crinkle Cookies!
Tips for Success
- Measure your ingredients accurately for the best results.
- Don’t skip the chilling step; it’s key for texture.
- Use a cookie scoop for uniform cookie sizes.
- Experiment with different extracts for unique flavors.
- Store cookies in an airtight container to keep them fresh.
- For a festive touch, add crushed candy canes to the dough!
Equipment Needed
- Mixing bowls: A set of various sizes is handy; you can use any large bowl you have.
- Whisk: A standard whisk works great, but a fork can do the job too.
- Cookie scoop: This makes portioning easy; a tablespoon works as an alternative.
- Baking sheet: Use any flat baking tray; just line it with parchment paper.
- Wire rack: Essential for cooling; a plate can work in a pinch.
Variations of Peppermint Chocolate Crinkle Cookies
- Mint Chocolate Chip: Add a cup of mini chocolate chips to the dough for extra chocolatey goodness.
- Gluten-Free: Substitute all-purpose flour with a gluten-free flour blend for a delicious gluten-free option.
- Dark Chocolate: Use dark cocoa powder instead of unsweetened for a richer flavor.
- Vegan: Replace eggs with flax eggs and use a plant-based oil to make these cookies vegan-friendly.
- Crushed Candy Canes: Fold in crushed candy canes for a festive crunch and extra peppermint flavor.
Serving Suggestions for Peppermint Chocolate Crinkle Cookies
- Pair these cookies with a warm cup of hot cocoa for a cozy treat.
- Serve alongside a scoop of vanilla ice cream for a delightful dessert.
- Present them on a festive platter, garnished with fresh mint leaves.
- Enjoy with a glass of cold milk for the ultimate indulgence.
FAQs about Peppermint Chocolate Crinkle Cookies
Can I make these Peppermint Chocolate Crinkle Cookies ahead of time?
Absolutely! You can prepare the dough in advance and chill it in the refrigerator for up to 3 days. Just roll the dough into balls and coat them in powdered sugar right before baking for the best results.
How should I store leftover cookies?
To keep your Peppermint Chocolate Crinkle Cookies fresh, store them in an airtight container at room temperature. They’ll stay delicious for about a week. If you want to keep them longer, you can freeze them for up to 3 months!
Can I use different extracts in this recipe?
Yes! While peppermint extract is the star, you can experiment with other flavors like almond or orange extract for a unique twist. Just remember to adjust the amount to your taste preference.
Why are my cookies not crinkling?
If your cookies aren’t crinkling, it could be due to overmixing the dough or not chilling it long enough. Make sure to follow the steps carefully for that perfect crinkle effect!
Can I add chocolate chips to the dough?
Definitely! Adding mini chocolate chips will enhance the chocolate flavor and add a delightful texture. Just fold them in gently after mixing the wet and dry ingredients.
Final Thoughts
Making Peppermint Chocolate Crinkle Cookies is more than just baking; it’s about creating memories and sharing joy with loved ones. The delightful aroma that fills your kitchen, the anticipation as they bake, and the smiles when you serve them are all part of the experience. These cookies are a festive treat that brings warmth and cheer to any gathering. Whether you’re enjoying them with family or gifting them to friends, each bite is a reminder of the magic of the holiday season. So, roll up your sleeves and let the holiday spirit shine through your baking!
Print
Peppermint Chocolate Crinkle Cookies: A Festive Delight!
- Total Time: 42 minutes
- Yield: 24 cookies 1x
- Diet: Vegetarian
Description
Peppermint Chocolate Crinkle Cookies are a festive treat that combines rich chocolate flavor with a refreshing hint of peppermint, perfect for holiday celebrations.
Ingredients
- 1 cup all-purpose flour
- 1/2 cup unsweetened cocoa powder
- 1 cup granulated sugar
- 1/2 cup brown sugar
- 1/2 cup vegetable oil
- 2 large eggs
- 1 teaspoon vanilla extract
- 1 teaspoon peppermint extract
- 1/2 teaspoon baking powder
- 1/4 teaspoon salt
- 1 cup powdered sugar for coating
Instructions
- Preheat your oven to 350°F (175°C).
- In a large bowl, mix together the flour, cocoa powder, granulated sugar, brown sugar, baking powder, and salt.
- In another bowl, whisk together the vegetable oil, eggs, vanilla extract, and peppermint extract.
- Combine the wet ingredients with the dry ingredients and mix until well combined.
- Chill the dough in the refrigerator for about 30 minutes.
- Once chilled, scoop out tablespoon-sized portions of dough and roll them into balls.
- Roll each ball in powdered sugar until fully coated.
- Place the cookies on a baking sheet lined with parchment paper, spacing them about 2 inches apart.
- Bake for 10-12 minutes, or until the edges are set and the tops are crinkled.
- Allow to cool on the baking sheet for a few minutes before transferring to a wire rack to cool completely.
Notes
- For a stronger peppermint flavor, increase the peppermint extract to 1.5 teaspoons.
- Store cookies in an airtight container to maintain freshness.
- These cookies can be frozen for up to 3 months.
- Prep Time: 30 minutes
- Cook Time: 12 minutes
- Category: Dessert
- Method: Baking
- Cuisine: American
Nutrition
- Serving Size: 1 cookie
- Calories: 120
- Sugar: 10g
- Sodium: 50mg
- Fat: 5g
- Saturated Fat: 1g
- Unsaturated Fat: 4g
- Trans Fat: 0g
- Carbohydrates: 18g
- Fiber: 1g
- Protein: 2g
- Cholesterol: 20mg