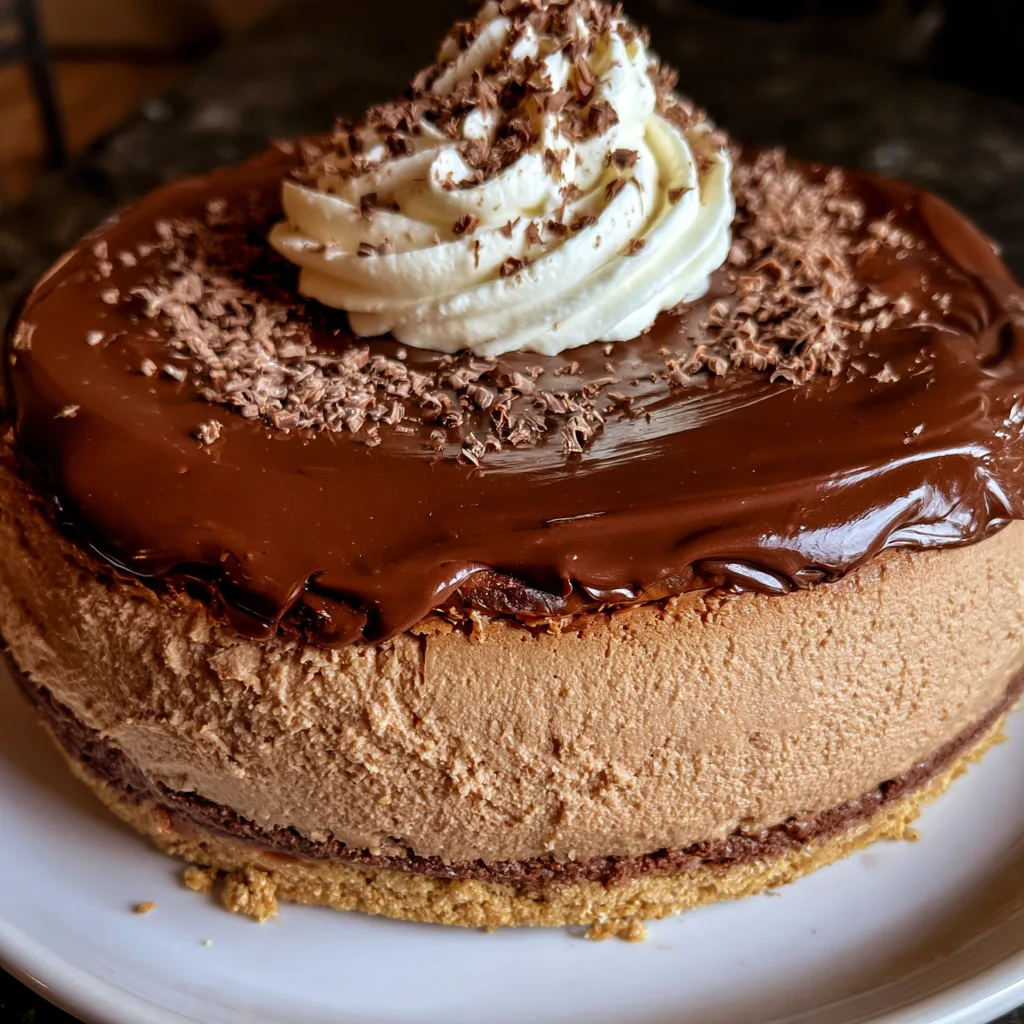
Introduction to Hot Chocolate Cheesecake
As the chill of winter settles in, there’s nothing quite like a slice of Hot Chocolate Cheesecake to warm your heart. This rich and creamy dessert is a delightful twist on a classic favorite, perfect for busy moms and professionals like us. Whether you’re looking to impress guests or simply treat yourself after a long day, this cheesecake is your go-to solution. With its luscious flavors and easy preparation, it’s a sweet escape that brings joy to any occasion. Trust me, once you take a bite, you’ll be hooked!
Why You’ll Love This Hot Chocolate Cheesecake
This Hot Chocolate Cheesecake is a dream come true for busy lives. It’s incredibly easy to whip up, taking just a little over an hour of your time, plus chilling. The taste? Oh, it’s like a warm hug on a plate! Rich, creamy, and chocolatey, it satisfies your sweet tooth without overwhelming you. Plus, it’s a showstopper that will have your family and friends raving. What’s not to love?
Ingredients for Hot Chocolate Cheesecake
Gathering the right ingredients is the first step to creating your Hot Chocolate Cheesecake masterpiece. Here’s what you’ll need:
- Graham cracker crumbs: These form the base of your cheesecake crust, providing a sweet and crunchy texture.
- Unsalted butter: Melted butter binds the crumbs together, ensuring a firm crust that holds its shape.
- Cream cheese: The star of the show! Softened cream cheese gives the cheesecake its rich and creamy texture.
- Granulated sugar: This sweetens the filling, balancing the flavors beautifully.
- Sour cream: Adds a tangy flavor and creaminess, enhancing the overall richness of the cheesecake.
- Heavy cream: Whipped into the batter, it contributes to a light and airy texture.
- Hot chocolate mix: This is where the magic happens! It infuses the cheesecake with that beloved hot chocolate flavor.
- Large eggs: Eggs help bind the ingredients together and provide structure to the cheesecake.
- Vanilla extract: A splash of vanilla enhances the flavors, making every bite more delightful.
- Whipped cream: For topping, it adds a light and fluffy finish that complements the rich cheesecake.
- Chocolate shavings: These are the perfect garnish, adding a touch of elegance and extra chocolatey goodness.
For those looking to switch things up, consider using dark chocolate hot cocoa mix for a richer flavor. Remember, all ingredient quantities are listed at the bottom of the article for your convenience, ready for printing!
How to Make Hot Chocolate Cheesecake
Now that you have all your ingredients ready, let’s dive into the delightful process of making your Hot Chocolate Cheesecake. Follow these simple steps, and you’ll be on your way to creating a dessert that’s sure to impress!
Step 1: Preheat the Oven
First things first, preheat your oven to 325°F (160°C). Preheating is crucial because it ensures that your cheesecake bakes evenly. A hot oven helps set the structure of the cheesecake, giving it that perfect creamy texture. Trust me, you don’t want to skip this step!
Step 2: Prepare the Crust
In a mixing bowl, combine your graham cracker crumbs with the melted butter. Stir until the crumbs are fully coated. This mixture should resemble wet sand. Now, press it firmly into the bottom of your springform pan. Make sure it’s compact; this will create a sturdy base for your cheesecake. A well-pressed crust means no crumbling when you slice into it!
Step 3: Make the Cheesecake Filling
In a large mixing bowl, beat the softened cream cheese and granulated sugar together until smooth. This step is vital! Room temperature cream cheese blends better, preventing lumps. You want a silky filling that will melt in your mouth. Take your time here; a few extra minutes of mixing can make a world of difference.
Step 4: Combine Ingredients
Next, add in the sour cream, heavy cream, hot chocolate mix, eggs, and vanilla extract. Mix everything until well combined. Be careful not to overmix, as this can introduce too much air into the batter. You want a smooth, rich mixture that captures all those delicious hot chocolate flavors!
Step 5: Pour and Bake
Now it’s time to pour the cheesecake batter over your prepared crust. Spread it evenly with a spatula. Bake in the preheated oven for 50-60 minutes. The center should be set but still slightly jiggly. To check for doneness, gently shake the pan. If the edges are firm and the center has a slight wobble, you’re good to go!
Step 6: Cooling Process
Once baked, turn off the oven and let the cheesecake cool inside with the door ajar for about an hour. This gradual cooling helps prevent cracks on the surface. It’s a little trick I learned that makes a big difference in presentation!
Step 7: Refrigerate
After the cheesecake has cooled, transfer it to the refrigerator. Chill for at least 4 hours, or overnight if you can wait. This step is essential for achieving that perfect creamy texture. Plus, it allows the flavors to meld beautifully!
Step 8: Garnish and Serve
When you’re ready to serve, top your cheesecake with a generous dollop of whipped cream and sprinkle chocolate shavings on top. This not only adds a beautiful touch but also enhances the chocolatey goodness. Slice, serve, and watch your loved ones swoon over this decadent treat!
Tips for Success
- Always use room temperature ingredients for a smoother batter.
- Don’t skip the cooling step; it helps prevent cracks.
- For a richer flavor, opt for dark chocolate hot cocoa mix.
- Use a water bath while baking to keep the cheesecake moist.
- Let the cheesecake chill overnight for the best flavor and texture.
Equipment Needed
- Springform pan: Essential for easy removal; a regular cake pan works in a pinch.
- Mixing bowls: Use a large bowl for the filling; any sturdy bowl will do.
- Electric mixer: A hand mixer is great; a whisk can work if you’re up for a workout!
- Spatula: Perfect for spreading the batter; a wooden spoon can also do the trick.
- Measuring cups and spoons: Accurate measurements are key; use any standard measuring tools you have.
Variations of Hot Chocolate Cheesecake
- Dark Chocolate Delight: Swap the hot chocolate mix for dark chocolate cocoa powder for a richer, more intense flavor.
- Minty Fresh: Add a teaspoon of peppermint extract to the filling for a refreshing mint chocolate twist.
- Nutty Crunch: Incorporate crushed nuts, like pecans or walnuts, into the crust for added texture and flavor.
- Gluten-Free Option: Use gluten-free graham crackers or almond flour for the crust to make it suitable for gluten-sensitive friends.
- Vegan Version: Substitute cream cheese with a vegan cream cheese alternative and use flax eggs for a plant-based treat.
Serving Suggestions for Hot Chocolate Cheesecake
- Pair with a steaming cup of hot cocoa for a cozy dessert experience.
- Serve alongside fresh berries for a pop of color and tartness.
- Drizzle with chocolate or caramel sauce for an extra indulgent touch.
- Garnish with a sprinkle of sea salt to enhance the chocolate flavor.
- Present on a decorative platter for a stunning display at gatherings.
FAQs about Hot Chocolate Cheesecake
Can I make Hot Chocolate Cheesecake ahead of time?
Absolutely! In fact, making it a day in advance is ideal. This allows the flavors to meld beautifully and ensures a creamy texture. Just remember to keep it refrigerated until you’re ready to serve.
What can I use instead of cream cheese?
If you’re looking for a substitute, try using mascarpone cheese for a similar creamy texture. For a lighter option, Greek yogurt can work, but it will change the flavor slightly.
How do I store leftovers?
Store any leftover Hot Chocolate Cheesecake in an airtight container in the refrigerator. It should stay fresh for up to five days. Just be prepared for the temptation to finish it all in one sitting!
Can I freeze Hot Chocolate Cheesecake?
Yes, you can freeze it! Wrap the cheesecake tightly in plastic wrap and then in aluminum foil. It can be frozen for up to three months. Just thaw it in the fridge overnight before serving.
What’s the best way to slice the cheesecake?
To get clean slices, use a sharp knife dipped in hot water. Wipe the knife clean between cuts for perfect presentation. Your guests will appreciate those beautiful slices!
Final Thoughts
Creating this Hot Chocolate Cheesecake is more than just baking; it’s about crafting a moment of joy. Each slice is a celebration of flavors that brings warmth to chilly days and smiles to faces. Whether you’re sharing it with family or savoring it solo, this dessert transforms any occasion into something special. I hope you find as much happiness in making it as I do. So, roll up your sleeves, embrace the chocolatey goodness, and let this cheesecake be your sweet escape. Trust me, it’s a delicious journey you won’t want to miss!
Hot Chocolate Cheesecake: Indulge in Decadent Bliss!
- Total Time: 5 hours 20 minutes
- Yield: 12 servings 1x
- Diet: Vegetarian
Description
A rich and creamy cheesecake infused with the delightful flavors of hot chocolate, topped with whipped cream and chocolate shavings.
Ingredients
- 1 ½ cups graham cracker crumbs
- ½ cup unsalted butter, melted
- 2 cups cream cheese, softened
- 1 cup granulated sugar
- 1 cup sour cream
- 1 cup heavy cream
- 1 cup hot chocolate mix
- 4 large eggs
- 1 teaspoon vanilla extract
- Whipped cream for topping
- Chocolate shavings for garnish
Instructions
- Preheat the oven to 325°F (160°C).
- In a bowl, mix graham cracker crumbs and melted butter until combined. Press into the bottom of a springform pan.
- In a large mixing bowl, beat cream cheese and sugar until smooth.
- Add sour cream, heavy cream, hot chocolate mix, eggs, and vanilla extract. Mix until well combined.
- Pour the cheesecake batter over the crust in the springform pan.
- Bake for 50-60 minutes or until the center is set but slightly jiggly.
- Turn off the oven and let the cheesecake cool in the oven with the door ajar for 1 hour.
- Refrigerate for at least 4 hours or overnight before serving.
- Top with whipped cream and chocolate shavings before serving.
Notes
- For a richer chocolate flavor, use dark chocolate hot cocoa mix.
- Ensure all ingredients are at room temperature for a smoother batter.
- Store leftovers in the refrigerator for up to 5 days.
- Prep Time: 20 minutes
- Cook Time: 1 hour
- Category: Dessert
- Method: Baking
- Cuisine: American
Nutrition
- Serving Size: 1 slice
- Calories: 450
- Sugar: 30g
- Sodium: 300mg
- Fat: 30g
- Saturated Fat: 18g
- Unsaturated Fat: 8g
- Trans Fat: 0g
- Carbohydrates: 40g
- Fiber: 2g
- Protein: 6g
- Cholesterol: 100mg