Introduction to Black Velvet Halloween Cake
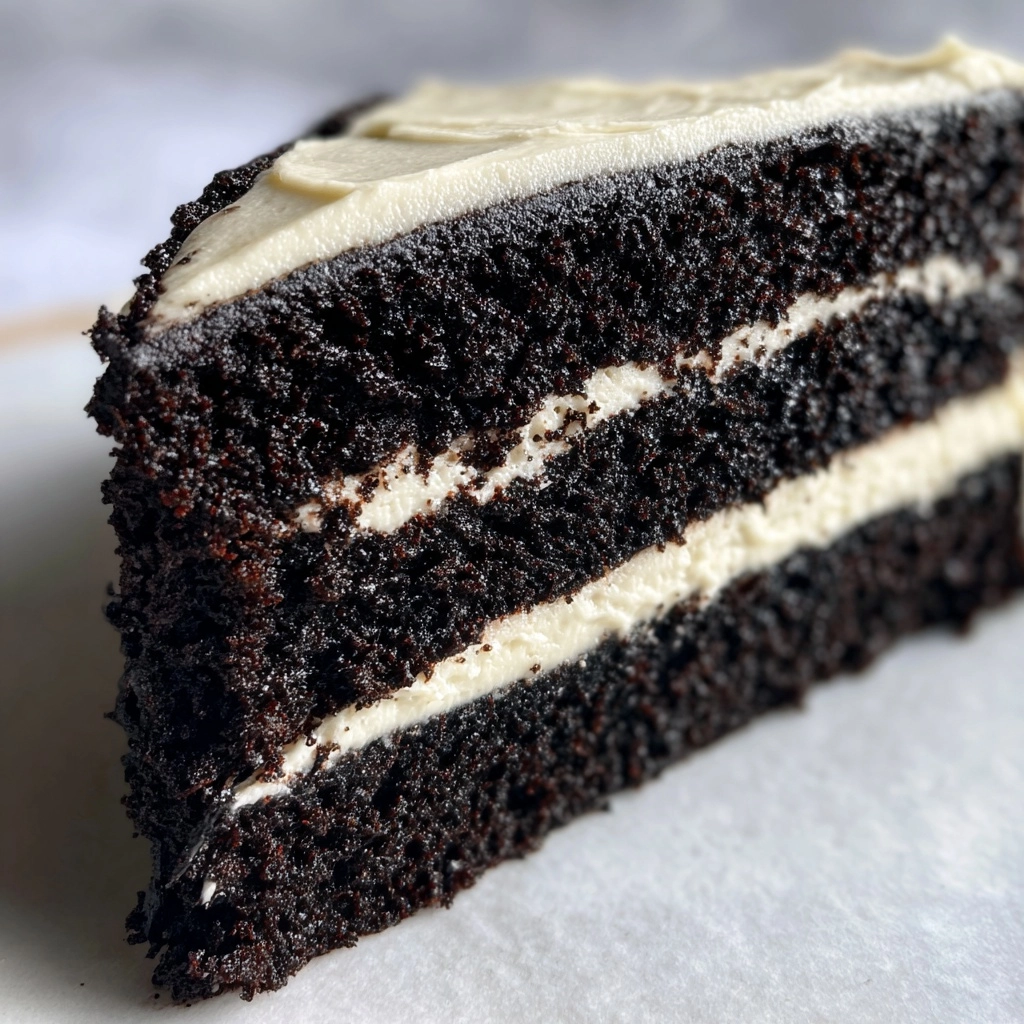
As the leaves turn and the air gets crisp, I find myself dreaming of spooky treats that bring joy to my family. This Black Velvet Halloween Cake is not just a dessert; it’s a delightful centerpiece for your Halloween celebrations. With its rich chocolate flavor and striking color, it’s sure to impress your loved ones. Plus, it’s a quick solution for busy days when you want to whip up something special without spending hours in the kitchen. Trust me, this cake will make your Halloween festivities even sweeter!
Why You’ll Love This Black Velvet Halloween Cake
This Black Velvet Halloween Cake is a dream come true for busy moms and professionals alike. It’s easy to make, requiring just a handful of ingredients and minimal prep time. The rich, velvety chocolate flavor will have everyone coming back for seconds. Plus, its striking appearance makes it a showstopper at any Halloween gathering. You’ll love how it brings smiles to faces without the stress of complicated baking!
Ingredients for Black Velvet Halloween Cake
Gathering the right ingredients is the first step to creating your Black Velvet Halloween Cake. Here’s what you’ll need:
- All-purpose flour: This forms the base of your cake, giving it structure and a light texture.
- Granulated sugar: Sweetness is key! It balances the rich cocoa flavor and helps the cake rise.
- Unsweetened cocoa powder: This is where the chocolate magic happens. It adds depth and richness to your cake.
- Baking soda: A leavening agent that helps the cake rise, creating that fluffy texture we all love.
- Baking powder: Works alongside baking soda to ensure your cake is light and airy.
- Salt: Just a pinch enhances the flavors and balances the sweetness.
- Vegetable oil: This keeps the cake moist and tender, making each bite melt in your mouth.
- Buttermilk: Adds a tangy flavor and helps to create a soft crumb. You can substitute with regular milk mixed with a bit of vinegar.
- Large eggs: They bind the ingredients together and add richness to the cake.
- Vanilla extract: A splash of vanilla elevates the flavor profile, making it even more delicious.
- White vinegar: This reacts with the baking soda to create a lighter texture. Don’t skip it!
- Black food coloring: This gives the cake its signature spooky hue. Adjust the amount to achieve your desired darkness.
- Buttercream frosting: Essential for decoration! You can use store-bought or homemade, depending on your time.
For exact measurements, check the bottom of the article where you can find everything listed for easy printing. Happy baking!
How to Make Black Velvet Halloween Cake
Step 1: Preheat and Prepare
Let’s kick things off by preheating your oven to 350°F (175°C). This step is crucial for ensuring your Black Velvet Halloween Cake bakes evenly. While the oven warms up, grab two 9-inch round cake pans and grease them well. I like to use a bit of vegetable oil or butter, followed by a light dusting of flour. This prevents any sticky situations later on. Trust me, there’s nothing worse than a cake that won’t come out of the pan! Once prepped, set the pans aside and get ready for the fun part.
Step 2: Mix Dry Ingredients
In a large mixing bowl, sift together the all-purpose flour, granulated sugar, cocoa powder, baking soda, baking powder, and salt. Sifting is key here; it helps to aerate the flour and ensures a smooth batter. I always find that this little step makes a big difference in the final texture of the cake. As you mix, take a moment to enjoy the rich chocolate aroma wafting up. It’s like a warm hug for your senses! Once everything is well combined, set this bowl aside while we tackle the wet ingredients.
Step 3: Combine Wet Ingredients
In another bowl, it’s time to mix the wet ingredients. Combine the vegetable oil, buttermilk, eggs, vanilla extract, and white vinegar. Whisk them together until they’re well blended. This mixture is where the magic happens! The oil keeps the cake moist, while the buttermilk adds a delightful tang. I always make sure to mix thoroughly, as this ensures a rich flavor throughout the cake. Once you’ve got a smooth blend, it’s time to unite the wet and dry ingredients!
Step 4: Combine and Color
Now, pour the wet mixture into the bowl of dry ingredients. Gently fold them together until just combined. Be careful not to overmix; we want a tender cake, not a tough one! As you mix, add in the black food coloring. This is where the cake gets its signature spooky hue. I usually start with a few drops and add more until I reach my desired darkness. It’s like painting a masterpiece, but with cake batter! Once you’re satisfied with the color, it’s time to divide the batter.
Step 5: Bake the Cakes
Divide the batter evenly between the two prepared cake pans. Give them a gentle shake to level the batter out. Now, pop them into your preheated oven and set a timer for 30-35 minutes. The cakes are done when a toothpick inserted in the center comes out clean. I always peek through the oven door to watch them rise; it’s like a little baking show right in my kitchen! Once baked, let them cool in the pans for about 10 minutes before transferring them to wire racks.
Step 6: Cool and Frost
After the cakes have cooled in the pans, carefully transfer them to wire racks to cool completely. This step is crucial; frosting a warm cake can lead to a melty mess! Once cooled, it’s time to unleash your creativity with the buttercream frosting. Spread it generously between the layers and on top of the cake. I love to add some fun Halloween decorations, like sprinkles or edible eyes, to make it extra festive. Your Black Velvet Halloween Cake is now ready to steal the show!
Tips for Success
- Always sift your dry ingredients for a smoother batter.
- Let your cakes cool completely before frosting to avoid melting.
- Use dark cocoa powder for a richer chocolate flavor.
- Adjust the black food coloring to achieve your desired spooky hue.
- Get creative with Halloween-themed decorations for a festive touch!
Equipment Needed
- 9-inch round cake pans (or use square pans for a different shape)
- Mixing bowls (a large one for dry ingredients and a medium one for wet)
- Whisk (or a hand mixer for quicker blending)
- Sifter (a fine mesh strainer works too)
- Spatula (for folding and frosting)
Variations
- Gluten-Free: Substitute all-purpose flour with a gluten-free blend to make this cake suitable for gluten-sensitive friends.
- Vegan: Replace eggs with flaxseed meal (1 tablespoon flaxseed mixed with 2.5 tablespoons water per egg) and use plant-based milk instead of buttermilk.
- Spicy Twist: Add a teaspoon of cinnamon or a pinch of cayenne pepper for a warm, spicy kick that complements the chocolate.
- Chocolate Chip Surprise: Fold in some chocolate chips into the batter for an extra chocolatey treat!
- Layered Delight: Create a layered cake by adding a layer of raspberry or cherry jam between the cake layers for a fruity contrast.
Serving Suggestions
- Pair your Black Velvet Halloween Cake with a scoop of vanilla ice cream for a delightful contrast.
- Serve with a side of fresh berries to add a pop of color and freshness.
- For drinks, consider a spooky punch or hot apple cider to complement the cake.
- Present the cake on a festive platter, adorned with Halloween-themed decorations for an extra touch.
FAQs about Black Velvet Halloween Cake
Can I make this cake ahead of time?
Absolutely! You can bake the Black Velvet Halloween Cake a day in advance. Just store the cooled cakes in an airtight container at room temperature. Frost them the day you plan to serve for the best results.
What can I use instead of buttermilk?
If you don’t have buttermilk on hand, you can easily make a substitute. Just mix one cup of regular milk with one tablespoon of white vinegar or lemon juice. Let it sit for about 5 minutes, and you’re good to go!
How do I store leftovers?
To keep your cake fresh, store any leftovers in an airtight container at room temperature for up to three days. If you want to keep it longer, refrigerate it for up to a week. Just remember to bring it back to room temperature before serving!
Can I freeze the Black Velvet Halloween Cake?
Yes, you can freeze the cake! Wrap the cooled layers tightly in plastic wrap and then in aluminum foil. They can be frozen for up to three months. Just thaw them in the fridge overnight before frosting and serving.
What decorations work best for Halloween?
Get creative! I love using edible eyes, spooky sprinkles, or even fondant decorations. You can also add a drizzle of chocolate ganache for an extra touch of elegance. The options are endless!
Final Thoughts
Creating this Black Velvet Halloween Cake is more than just baking; it’s about making memories with your loved ones. The joy of watching their faces light up as they take that first bite is priceless. This cake brings a touch of magic to your Halloween celebrations, combining rich flavors with a spooky twist. Whether you’re hosting a party or enjoying a cozy night in, this cake is sure to be a hit. So roll up your sleeves, embrace the fun, and let this delightful treat add sweetness to your Halloween festivities!
Print
Black Velvet Halloween Cake: Delightful Treats Await!
- Total Time: 55 minutes
- Yield: 12 servings 1x
- Diet: Vegetarian
Description
A spooky yet delicious Black Velvet Halloween Cake that is perfect for Halloween celebrations.
Ingredients
- 2 cups all-purpose flour
- 1 1/2 cups granulated sugar
- 1 cup unsweetened cocoa powder
- 1 1/2 teaspoons baking soda
- 1 teaspoon baking powder
- 1 teaspoon salt
- 1 cup vegetable oil
- 1 cup buttermilk
- 2 large eggs
- 2 teaspoons vanilla extract
- 1 tablespoon white vinegar
- Black food coloring (as needed)
- Buttercream frosting (for decoration)
Instructions
- Preheat the oven to 350°F (175°C) and grease two 9-inch round cake pans.
- In a large bowl, sift together the flour, sugar, cocoa powder, baking soda, baking powder, and salt.
- In another bowl, mix the vegetable oil, buttermilk, eggs, vanilla extract, and vinegar.
- Combine the wet and dry ingredients, mixing until smooth. Add black food coloring until desired color is achieved.
- Divide the batter evenly between the prepared cake pans.
- Bake for 30-35 minutes or until a toothpick inserted in the center comes out clean.
- Let the cakes cool in the pans for 10 minutes, then transfer to wire racks to cool completely.
- Once cooled, frost with buttercream frosting and decorate as desired for Halloween.
Notes
- For a richer chocolate flavor, use dark cocoa powder.
- Ensure the cakes are completely cool before frosting to prevent melting.
- Feel free to add Halloween-themed decorations like sprinkles or edible eyes.
- Prep Time: 20 minutes
- Cook Time: 35 minutes
- Category: Dessert
- Method: Baking
- Cuisine: American
Nutrition
- Serving Size: 1 slice
- Calories: 350
- Sugar: 30g
- Sodium: 200mg
- Fat: 18g
- Saturated Fat: 5g
- Unsaturated Fat: 10g
- Trans Fat: 0g
- Carbohydrates: 45g
- Fiber: 2g
- Protein: 4g
- Cholesterol: 30mg