Introduction to Pumpkin Patch Dirt Cups: Fun Halloween Treat Recipes!
As the leaves turn and the air gets crisp, I find myself craving cozy, festive treats. That’s where these Pumpkin Patch Dirt Cups come in! They’re not just a dessert; they’re a delightful experience for both kids and adults. Perfect for busy moms like us, this recipe is a quick solution for a fun Halloween gathering or a sweet surprise after dinner. With layers of chocolate pudding and crushed cookies, these cups are sure to impress your loved ones. Let’s dive into this easy and enjoyable treat that brings a little magic to your kitchen!
Why You’ll Love This Pumpkin Patch Dirt Cups: Fun Halloween Treat Recipes!
These Pumpkin Patch Dirt Cups are a breeze to whip up, making them perfect for our busy lives. In just 15 minutes, you can create a festive dessert that’s as delicious as it is fun. The combination of creamy chocolate pudding and crunchy cookie layers is a crowd-pleaser. Plus, kids love the playful gummy worms and mini pumpkins, making it a treat that brings smiles all around!
Ingredients for Pumpkin Patch Dirt Cups: Fun Halloween Treat Recipes!
Gathering the right ingredients is half the fun! Here’s what you’ll need to create these delightful Pumpkin Patch Dirt Cups:
- Chocolate pudding mix: This is the star of the show, providing a rich and creamy base that everyone loves.
- Milk: Essential for preparing the pudding. You can use whole, skim, or even a non-dairy alternative like almond milk.
- Chocolate sandwich cookies: Crushed to create the ‘dirt’ layer. They add a delightful crunch and chocolatey flavor.
- Gummy worms: These playful candies add a fun touch, making your dessert look like a real pumpkin patch!
- Miniature pumpkins: You can use candy or chocolate pumpkins to decorate. They’re the perfect finishing touch for your cups.
- Whipped cream (optional): A dollop on top adds a creamy texture and makes the dessert even more indulgent.
For those looking for a healthier option, consider using sugar-free pudding mix. And if you’re short on time, these cups can be made a day in advance, making them a convenient choice for busy schedules. Feel free to customize with other Halloween-themed candies to make it your own!
Exact quantities for each ingredient are available at the bottom of the article for easy printing.
How to Make Pumpkin Patch Dirt Cups: Fun Halloween Treat Recipes!
Now that we have our ingredients ready, let’s get to the fun part—making these delightful Pumpkin Patch Dirt Cups! Follow these simple steps, and you’ll have a festive treat that’s sure to impress.
Step 1: Prepare the Chocolate Pudding
Start by grabbing a mixing bowl. Combine the chocolate pudding mix with the milk according to the package instructions. Whisk it together until it’s smooth and creamy. This step is where the magic begins! The rich chocolate flavor will set the stage for our delicious dessert.
Step 2: Create the ‘Dirt’ Layer
Next, take your chocolate sandwich cookies and crush them into fine crumbs. You can use a food processor or simply place them in a zip-top bag and crush them with a rolling pin. Layer the bottom of clear cups with these cookie crumbs. This will create the ‘dirt’ layer that makes our cups look like a real pumpkin patch!
Step 3: Layer the Pudding
Once your ‘dirt’ layer is ready, it’s time to pour in the prepared chocolate pudding. Fill the cups about halfway, allowing the cookie crumbs to peek through. This creamy layer adds a delightful contrast to the crunchy cookies below. It’s like a little surprise waiting to be discovered!
Step 4: Add More ‘Dirt’
Now, it’s time to add another layer of crushed cookies on top of the pudding. This not only enhances the visual appeal but also adds more texture. The combination of creamy and crunchy is what makes these Pumpkin Patch Dirt Cups so irresistible!
Step 5: Decorate with Gummy Worms and Pumpkins
Here comes the fun part! Decorate your cups with gummy worms, letting them peek out from the ‘dirt.’ Then, place miniature pumpkins on top. This playful decoration transforms your dessert into a festive Halloween treat. It’s a great way to get the kids involved, too!
Step 6: Optional Whipped Cream Topping
If you want to take your cups to the next level, add a dollop of whipped cream on top. This creamy addition not only looks beautiful but also adds a delightful richness. It’s like the cherry on top of your Halloween masterpiece!
Step 7: Chill Before Serving
Finally, pop your Pumpkin Patch Dirt Cups in the refrigerator for at least 30 minutes. This chilling time allows the flavors to meld together and makes the pudding even more delicious. Plus, it gives you a moment to relax before the fun begins!
Tips for Success
- Use clear cups to showcase the layers; it makes the dessert visually appealing.
- For a smoother pudding, whisk thoroughly to eliminate any lumps.
- Crush cookies in advance to save time on busy days.
- Get creative with decorations—try adding candy corn or chocolate spiders!
- Chill the cups longer for a firmer texture if desired.
Equipment Needed for Pumpkin Patch Dirt Cups: Fun Halloween Treat Recipes!
- Mixing bowl: A medium-sized bowl works best for preparing the pudding.
- Whisk: Essential for mixing the pudding smoothly; a fork can work in a pinch.
- Clear cups: Use any clear cups or jars to showcase the layers beautifully.
- Food processor or rolling pin: For crushing cookies; a zip-top bag and a heavy object can substitute.
Variations of Pumpkin Patch Dirt Cups: Fun Halloween Treat Recipes!
- Healthier Option: Use sugar-free chocolate pudding mix and low-fat milk for a lighter version.
- Gluten-Free: Substitute chocolate sandwich cookies with gluten-free cookies to accommodate dietary needs.
- Vegan Delight: Opt for plant-based pudding and non-dairy milk, and use vegan cookies for a completely vegan treat.
- Flavor Twist: Experiment with different pudding flavors like vanilla or butterscotch for a unique taste.
- Fruit Addition: Add layers of sliced bananas or strawberries for a fruity surprise in your cups.
Serving Suggestions for Pumpkin Patch Dirt Cups: Fun Halloween Treat Recipes!
- Pair with spooky-themed cookies for a delightful dessert spread.
- Serve alongside warm apple cider or pumpkin spice lattes for a cozy vibe.
- Use festive plates and napkins to enhance the Halloween spirit.
- Consider adding a sprinkle of edible glitter for a magical touch.
- Display on a decorative tray for an eye-catching presentation.
FAQs about Pumpkin Patch Dirt Cups: Fun Halloween Treat Recipes!
Can I make Pumpkin Patch Dirt Cups in advance?
Absolutely! These cups can be made a day ahead. Just keep them covered in the refrigerator until you’re ready to serve. This makes them a perfect option for busy moms!
What can I use instead of chocolate sandwich cookies?
If you’re looking for alternatives, try using graham crackers or even crushed Oreos. They’ll still give you that delightful ‘dirt’ effect!
How can I make these cups healthier?
For a healthier twist, use sugar-free pudding mix and low-fat milk. You can also add fresh fruit layers for added nutrition!
Can I customize the decorations?
Definitely! Get creative with your toppings. Use candy corn, chocolate spiders, or even edible glitter to make your Pumpkin Patch Dirt Cups uniquely yours!
Are these cups suitable for kids?
Yes! Kids love the fun presentation and the playful gummy worms. It’s a great way to get them excited about dessert!
Final Thoughts on Pumpkin Patch Dirt Cups: Fun Halloween Treat Recipes!
Creating these Pumpkin Patch Dirt Cups is more than just making a dessert; it’s about crafting joyful memories with your loved ones. The smiles on your kids’ faces as they dig into their own little pumpkin patches are priceless. This recipe is a delightful blend of simplicity and creativity, perfect for busy days when you want to add a touch of fun to your routine. Whether it’s a Halloween party or a cozy family dinner, these cups bring a festive spirit that everyone can enjoy. So, roll up your sleeves and let the Halloween magic unfold in your kitchen!

Pumpkin Patch Dirt Cups: Create Fun Halloween Treats!
- Total Time: 30 minutes (including chilling time)
- Yield: 4 servings 1x
- Diet: Vegetarian
Description
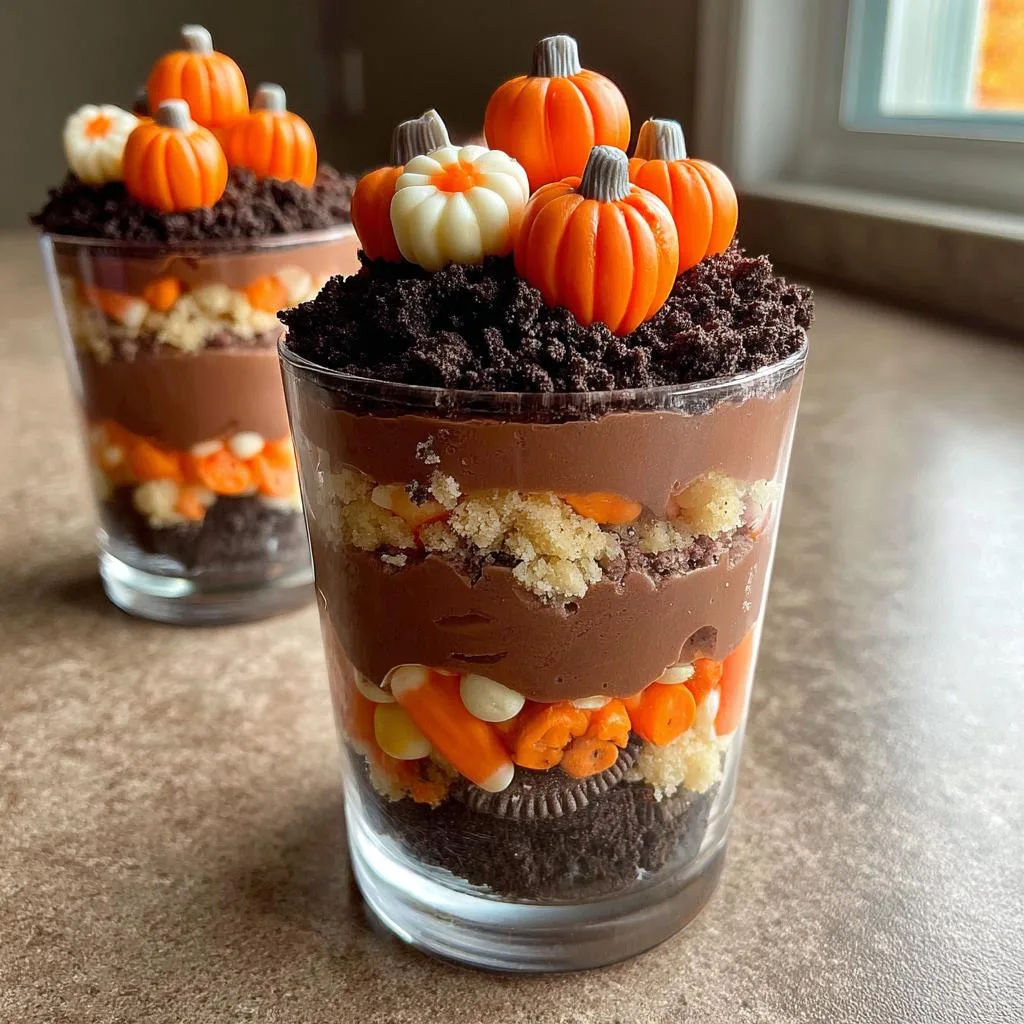
Pumpkin Patch Dirt Cups are a fun and festive Halloween treat that combines chocolate pudding, crushed cookies, and gummy candies to create a delightful dessert that resembles a pumpkin patch.
Ingredients
- 1 package chocolate pudding mix
- 2 cups milk
- 1 package chocolate sandwich cookies, crushed
- Gummy worms
- Miniature pumpkins (candy or chocolate)
- Whipped cream (optional)
Instructions
- In a mixing bowl, prepare the chocolate pudding according to package instructions using milk.
- In clear cups, layer the bottom with crushed chocolate cookies to create the ‘dirt’ layer.
- Pour the prepared chocolate pudding over the cookie layer.
- Add another layer of crushed cookies on top of the pudding.
- Decorate with gummy worms and place miniature pumpkins on top.
- Top with whipped cream if desired.
- Chill in the refrigerator for at least 30 minutes before serving.
Notes
- For a healthier option, consider using sugar-free pudding mix.
- These cups can be made a day in advance for convenience.
- Feel free to customize with other Halloween-themed candies.
- Prep Time: 15 minutes
- Cook Time: 0 minutes
- Category: Dessert
- Method: No-bake
- Cuisine: American
Nutrition
- Serving Size: 1 cup
- Calories: 250
- Sugar: 20g
- Sodium: 150mg
- Fat: 10g
- Saturated Fat: 3g
- Unsaturated Fat: 5g
- Trans Fat: 0g
- Carbohydrates: 35g
- Fiber: 2g
- Protein: 4g
- Cholesterol: 10mg