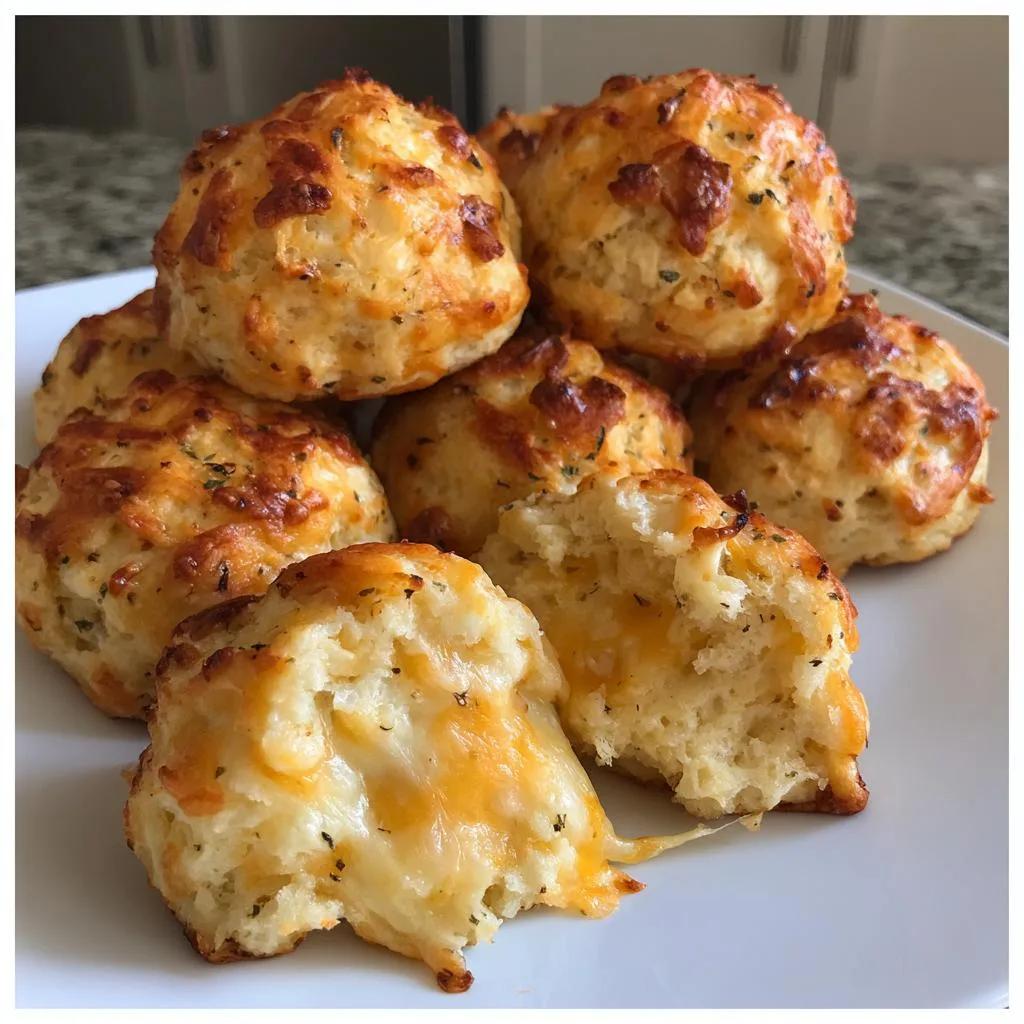
Introduction to Cheesy Garlic Butter Bombs: The Perfect Snack or Side
As a busy mom, I know how challenging it can be to whip up something delicious in a hurry. That’s where these Cheesy Garlic Butter Bombs: The Perfect Snack or Side come in! They’re not just a treat; they’re a burst of flavor wrapped in a warm, buttery embrace. Whether you need a quick snack for the kids or a side dish to impress your guests, these little bites are a game-changer. Trust me, once you try them, you’ll wonder how you ever lived without this easy recipe in your kitchen arsenal!
Why You’ll Love This Cheesy Garlic Butter Bombs: The Perfect Snack or Side
These Cheesy Garlic Butter Bombs: The Perfect Snack or Side are a lifesaver for busy days! They come together in just 35 minutes, making them a quick solution for unexpected guests or hungry kids. The gooey cheese and rich garlic butter create a flavor explosion that will have everyone coming back for more. Plus, they’re versatile enough to serve as a snack, appetizer, or side dish. What’s not to love?
Ingredients for Cheesy Garlic Butter Bombs: The Perfect Snack or Side
Gathering the right ingredients is the first step to creating these delightful Cheesy Garlic Butter Bombs: The Perfect Snack or Side. Here’s what you’ll need:
- Refrigerated biscuit dough: This is the base of our bombs, providing a fluffy, buttery exterior. You can use any brand you like, or even make your own if you’re feeling adventurous!
- Shredded mozzarella cheese: The star of the show! Its gooey texture melts beautifully, creating that irresistible cheesy center. Feel free to mix in other cheeses like cheddar for a twist.
- Unsalted butter: This adds richness and helps the garlic flavor shine. Unsalted is best, as it allows you to control the saltiness of the dish.
- Garlic: Freshly minced garlic brings a punch of flavor. If you’re in a pinch, garlic powder can work, but fresh is always better!
- Fresh parsley: This adds a pop of color and freshness. You can substitute it with dried parsley if that’s what you have on hand.
- Salt: A little seasoning goes a long way in enhancing the flavors. Adjust to your taste!
- Black pepper: This adds a subtle kick. You can use white pepper for a milder flavor.
For exact measurements, check the bottom of the article where you can find everything listed for easy printing. Now that you have your ingredients ready, let’s dive into the fun part—making these cheesy delights!
How to Make Cheesy Garlic Butter Bombs: The Perfect Snack or Side
Now that you have your ingredients ready, let’s get cooking! Making these Cheesy Garlic Butter Bombs: The Perfect Snack or Side is a fun and straightforward process. Follow these steps, and you’ll have a delicious treat in no time!
Step 1: Preheat the Oven
First things first, preheat your oven to 375°F (190°C). Preheating is crucial because it ensures even baking. If you skip this step, your bombs might end up unevenly cooked. Trust me, you want that golden-brown perfection!
Step 2: Prepare the Garlic Butter Mixture
In a mixing bowl, combine the melted butter, minced garlic, chopped parsley, salt, and black pepper. This garlic butter mixture is the heart of the flavor! The butter adds richness, while the garlic and parsley bring a fresh, aromatic touch. Mix it well until everything is combined.
Step 3: Prepare the Biscuit Dough
Open your package of refrigerated biscuit dough and separate it into individual biscuits. Gently flatten each biscuit with your hands or a rolling pin. Aim for about a 3-inch circle. This will create a nice pocket for the cheesy goodness!
Step 4: Fill the Biscuits
Now comes the fun part! Place a tablespoon of shredded mozzarella cheese in the center of each flattened biscuit. Carefully wrap the biscuit around the cheese, pinching the edges to seal it tightly. Make sure there are no gaps; otherwise, the cheese might ooze out while baking!
Step 5: Dip in Garlic Butter
Take each cheese-filled biscuit and dip it into the garlic butter mixture. This step is essential for adding that rich flavor and a beautiful golden color. Make sure to coat each bomb well, as this will enhance the overall taste and texture.
Step 6: Bake the Bombs
Place the dipped biscuits on a baking sheet lined with parchment paper. Bake them in the preheated oven for 15-20 minutes or until they are golden brown. Keep an eye on them; you’ll know they’re done when they look irresistible and smell heavenly!
Once baked, let them cool for a few minutes before serving. Enjoy your Cheesy Garlic Butter Bombs: The Perfect Snack or Side warm, and watch them disappear!
Tips for Success
- Use fresh garlic for the best flavor; it makes a world of difference!
- Don’t overfill the biscuits; a tablespoon of cheese is just right.
- For extra crunch, sprinkle some grated Parmesan on top before baking.
- Let the bombs cool slightly before serving to avoid burning your mouth!
- Experiment with different cheeses for unique flavor combinations.
Equipment Needed for Cheesy Garlic Butter Bombs: The Perfect Snack or Side
- Baking sheet: A standard baking sheet works perfectly. If you don’t have one, a cast-iron skillet can do the trick!
- Parchment paper: This helps prevent sticking. If you’re out, a light greasing of the baking sheet will suffice.
- Mixing bowl: Any bowl will do for mixing the garlic butter. A large measuring cup can work in a pinch!
- Rolling pin: If you don’t have one, use a wine bottle or your hands to flatten the biscuits.
Variations of Cheesy Garlic Butter Bombs: The Perfect Snack or Side
- Herb-Infused: Add dried Italian herbs like oregano or basil to the garlic butter for an aromatic twist.
- Spicy Kick: Mix in some crushed red pepper flakes or diced jalapeños for a spicy version that packs a punch!
- Cheesy Medley: Combine mozzarella with other cheeses like cheddar, gouda, or pepper jack for a flavor explosion.
- Vegetable Delight: Add finely chopped spinach or sun-dried tomatoes to the cheese filling for a nutritious boost.
- Gluten-Free Option: Use gluten-free biscuit dough to make these bombs suitable for those with dietary restrictions.
Serving Suggestions for Cheesy Garlic Butter Bombs: The Perfect Snack or Side
- Serve with a side of marinara sauce for dipping; it adds a delightful tang!
- Pair with a fresh garden salad for a balanced meal.
- Enjoy alongside a glass of chilled white wine for a cozy evening.
- Garnish with extra parsley for a pop of color and freshness.
- Present on a rustic wooden board for a charming touch at gatherings.
FAQs about Cheesy Garlic Butter Bombs: The Perfect Snack or Side
Can I make Cheesy Garlic Butter Bombs ahead of time?
Absolutely! You can prepare the bombs and freeze them before baking. Just pop them in the oven when you’re ready for a quick snack or side dish!
What can I serve with Cheesy Garlic Butter Bombs?
These delightful bites pair wonderfully with marinara sauce for dipping. You can also serve them alongside a fresh salad or as an appetizer at parties.
Can I use different types of cheese?
Yes! Feel free to mix and match cheeses. Cheddar, gouda, or pepper jack can add a unique twist to your Cheesy Garlic Butter Bombs: The Perfect Snack or Side.
How do I store leftovers?
Store any leftovers in an airtight container in the fridge for up to three days. Reheat them in the oven for the best texture!
Are these bombs suitable for kids?
Definitely! Kids love the gooey cheese and buttery flavor. Just keep an eye on the garlic level if your little ones are sensitive to strong flavors.
Final Thoughts on Cheesy Garlic Butter Bombs: The Perfect Snack or Side
Making Cheesy Garlic Butter Bombs: The Perfect Snack or Side is more than just cooking; it’s about creating joyful moments in the kitchen. The aroma of garlic and melted cheese fills your home, inviting everyone to gather around. These little bites are perfect for sharing, whether it’s a family movie night or a gathering with friends. Plus, they’re so easy to whip up that you’ll find yourself making them again and again. So, roll up your sleeves, embrace the mess, and enjoy the deliciousness that comes from your oven. Happy cooking!
Print
Cheesy Garlic Butter Bombs: Enjoy the Ultimate Flavor Burst!
- Total Time: 35 minutes
- Yield: 12 servings 1x
- Diet: Vegetarian
Description
Cheesy Garlic Butter Bombs are delicious, bite-sized snacks filled with gooey cheese and flavored with garlic butter, perfect for any occasion.
Ingredients
- 1 package of refrigerated biscuit dough
- 1 cup shredded mozzarella cheese
- 1/2 cup unsalted butter, melted
- 4 cloves garlic, minced
- 1/4 cup fresh parsley, chopped
- 1/2 teaspoon salt
- 1/4 teaspoon black pepper
Instructions
- Preheat the oven to 375°F (190°C).
- In a bowl, mix melted butter, minced garlic, chopped parsley, salt, and pepper.
- Open the biscuit dough and separate it into individual biscuits.
- Flatten each biscuit and place a tablespoon of shredded mozzarella cheese in the center.
- Wrap the biscuit around the cheese and seal it tightly.
- Dip each cheese-filled biscuit in the garlic butter mixture.
- Place the biscuits on a baking sheet lined with parchment paper.
- Bake for 15-20 minutes or until golden brown.
- Serve warm and enjoy!
Notes
- For extra flavor, add Italian seasoning to the garlic butter mixture.
- These can be made ahead of time and frozen before baking.
- Serve with marinara sauce for dipping.
- Prep Time: 15 minutes
- Cook Time: 20 minutes
- Category: Snack
- Method: Baking
- Cuisine: American
Nutrition
- Serving Size: 1 bomb
- Calories: 150
- Sugar: 1g
- Sodium: 300mg
- Fat: 10g
- Saturated Fat: 5g
- Unsaturated Fat: 3g
- Trans Fat: 0g
- Carbohydrates: 12g
- Fiber: 0g
- Protein: 4g
- Cholesterol: 20mg