Introduction to Best Cranberry Orange Scones
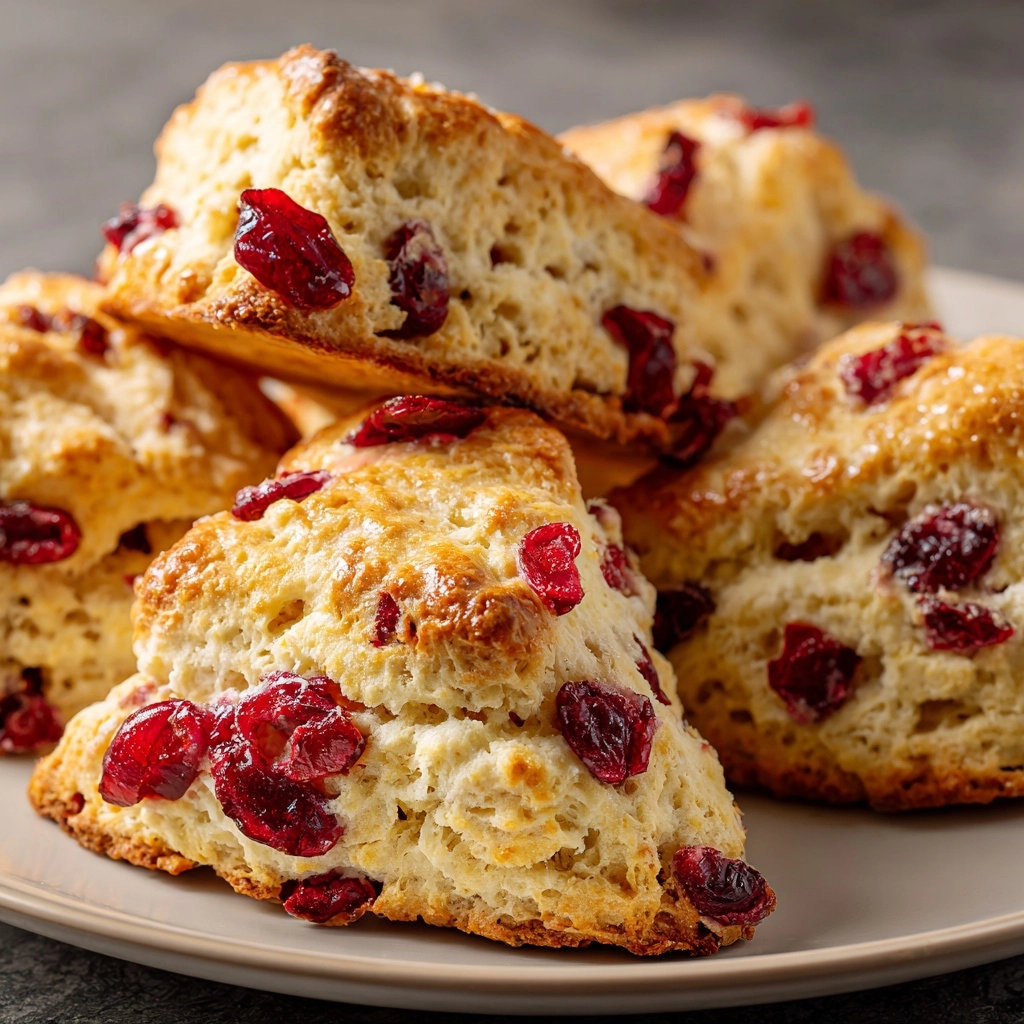
There’s something magical about the aroma of freshly baked scones wafting through the kitchen, isn’t there? These Best Cranberry Orange Scones are not just a treat; they’re a delightful way to start your day. Perfect for busy mornings or a cozy weekend brunch, they combine the tartness of cranberries with the zesty brightness of orange. Whether you’re looking to impress guests or simply enjoy a moment of indulgence, this recipe is your go-to. Trust me, once you try these scones, they’ll become a cherished part of your breakfast routine!
Why You’ll Love This Best Cranberry Orange Scones
These Best Cranberry Orange Scones are a dream come true for busy moms and professionals alike. They come together in just 35 minutes, making them a quick solution for hectic mornings. The combination of sweet cranberries and zesty orange creates a flavor explosion that will brighten your day. Plus, they’re versatile enough to serve at brunch or as a delightful afternoon snack. Who wouldn’t love that?
Ingredients for Best Cranberry Orange Scones
Gathering the right ingredients is the first step to creating these delightful Best Cranberry Orange Scones. Here’s what you’ll need:
- All-purpose flour: The foundation of your scones, providing structure and a tender crumb.
- Granulated sugar: Adds sweetness and helps achieve that lovely golden color.
- Baking powder: This leavening agent gives the scones their light and fluffy texture.
- Salt: Enhances the flavors and balances the sweetness.
- Unsalted butter: Cold and cubed, it creates those flaky layers we all love in scones.
- Fresh cranberries: The star of the show! Their tartness pairs beautifully with the sweetness of the scones.
- Orange zest: Adds a burst of citrus flavor, brightening up the overall taste.
- Heavy cream: Provides richness and moisture, making the scones tender.
- Large egg: Binds the ingredients together and adds a bit of richness.
- Vanilla extract: A touch of warmth and sweetness that rounds out the flavors.
Feel free to get creative! You can swap in whole wheat flour for a healthier option or use dried cranberries if fresh ones aren’t available. For a sweeter scone, consider adding a bit more sugar. Remember, the exact measurements are at the bottom of the article for your convenience!
How to Make Best Cranberry Orange Scones
Making these Best Cranberry Orange Scones is a delightful journey that’s easier than you might think. Follow these simple steps, and you’ll have a batch of warm, fragrant scones ready to enjoy in no time!
Step 1: Preheat the Oven
First things first, preheat your oven to 400°F (200°C). This step is crucial because it ensures your scones bake evenly and rise beautifully. While the oven warms up, line a baking sheet with parchment paper. This will prevent sticking and make cleanup a breeze!
Step 2: Mix Dry Ingredients
In a large bowl, whisk together the all-purpose flour, granulated sugar, baking powder, and salt. This combination is the backbone of your scones. Mixing these dry ingredients well helps distribute the baking powder evenly, ensuring your scones rise perfectly.
Step 3: Incorporate Butter
Now, it’s time to add the cold, cubed butter. Using a pastry cutter or your fingers, mix the butter into the dry ingredients until the mixture resembles coarse crumbs. This step is key for achieving those flaky layers we all love in scones. Don’t overmix; you want to see small bits of butter throughout!
Step 4: Add Cranberries and Zest
Next, stir in the chopped fresh cranberries and orange zest. These ingredients are what make your scones sing with flavor! The tartness of the cranberries combined with the bright citrus notes from the zest will have your taste buds dancing.
Step 5: Combine Wet Ingredients
In a separate bowl, whisk together the heavy cream, large egg, and vanilla extract. This mixture adds moisture and richness to your scones. Make sure everything is well combined; you want a smooth blend before adding it to the dry ingredients.
Step 6: Mix Wet and Dry Ingredients
Pour the wet ingredients into the dry mixture. Gently stir until just combined. Be careful not to overmix; a few lumps are perfectly fine. This will keep your scones tender and light, rather than tough.
Step 7: Knead the Dough
Turn the dough out onto a floured surface. Gently knead it a few times, just until it comes together. Remember, you’re not making bread here! Too much kneading can lead to dense scones, and we want them light and fluffy.
Step 8: Shape and Cut the Scones
Pat the dough into a circle about 1 inch thick. Using a sharp knife or a pizza cutter, cut the dough into wedges. You can make them as big or small as you like, but I usually aim for eight scones. Place them on the prepared baking sheet, leaving a little space between each one.
Step 9: Bake the Scones
Pop the scones into your preheated oven and bake for 15-20 minutes. Keep an eye on them! You’ll know they’re done when they’re golden brown on top. A toothpick inserted into the center should come out clean. The aroma will be irresistible!
Step 10: Cool and Serve
Once baked, let the scones cool slightly on the baking sheet. This step is important; it allows the flavors to settle. Serve them warm, perhaps with a pat of butter or a drizzle of icing for an extra touch of sweetness. Enjoy every bite!
Tips for Success
- Use cold butter for flaky scones; it’s a game changer!
- Don’t overmix the dough; a few lumps are okay.
- For extra flavor, consider adding a pinch of cinnamon.
- Experiment with different fruits like blueberries or raspberries.
- Let the scones cool slightly before serving to enhance their flavor.
- Store leftovers in an airtight container to keep them fresh.
Equipment Needed
- Mixing bowls: A large bowl for dry ingredients and a smaller one for wet ingredients.
- Whisk: Essential for combining ingredients; a fork works in a pinch!
- Pastry cutter: Great for cutting in butter; your fingers can do the job too.
- Baking sheet: A standard one will do; consider using a silicone mat for easy cleanup.
- Sharp knife or pizza cutter: Perfect for cutting scones into wedges.
Variations
- Whole Wheat Flour: Swap half of the all-purpose flour for whole wheat flour for a nuttier flavor and added fiber.
- Dried Cranberries: If fresh cranberries aren’t available, use dried cranberries for a sweeter twist.
- Chocolate Chips: Add a handful of dark chocolate chips for a decadent touch that pairs beautifully with the orange zest.
- Gluten-Free Option: Use a gluten-free all-purpose flour blend to make these scones suitable for gluten-sensitive diets.
- Spices: Experiment with spices like cinnamon or nutmeg for a warm, cozy flavor profile.
- Nut Additions: Toss in some chopped walnuts or pecans for added crunch and richness.
Serving Suggestions
- Pair your Best Cranberry Orange Scones with a steaming cup of coffee or tea for a delightful morning ritual.
- Serve with a dollop of clotted cream or butter for added richness.
- For a festive touch, drizzle with a simple icing made from powdered sugar and orange juice.
- Present them on a beautiful platter, garnished with fresh cranberries and orange slices for a pop of color.
FAQs about Best Cranberry Orange Scones
Can I use frozen cranberries instead of fresh?
Absolutely! Frozen cranberries work just as well in these Best Cranberry Orange Scones. Just make sure to chop them while still frozen to prevent them from becoming mushy.
How do I store leftover scones?
To keep your scones fresh, store them in an airtight container at room temperature for up to three days. You can also freeze them for longer storage; just thaw and reheat when you’re ready to enjoy!
Can I make the dough ahead of time?
Yes! You can prepare the dough and shape the scones, then refrigerate them for up to 24 hours before baking. This is a great time-saver for busy mornings!
What can I serve with these scones?
These Best Cranberry Orange Scones pair wonderfully with clotted cream, butter, or even a light drizzle of icing. A cup of tea or coffee makes the perfect accompaniment!
Can I substitute the heavy cream?
If you’re looking for a lighter option, you can substitute the heavy cream with half-and-half or whole milk. Just keep in mind that the texture may be slightly different.
Final Thoughts
Making these Best Cranberry Orange Scones is more than just baking; it’s about creating moments of joy. The delightful aroma fills your kitchen, wrapping you in warmth and comfort. Each bite is a burst of flavor, reminding you of cozy mornings and cherished gatherings. Whether you’re enjoying them solo with a cup of tea or sharing them with loved ones, these scones bring a little magic to your day. So, roll up your sleeves and dive into this recipe. I promise, you’ll find happiness in every crumb!
Best Cranberry Orange Scones for a Delicious Morning Treat
- Total Time: 35 minutes
- Yield: 8 scones 1x
- Diet: Vegetarian
Description
These Best Cranberry Orange Scones are a delightful morning treat, bursting with the flavors of fresh cranberries and zesty orange.
Ingredients
- 2 cups all-purpose flour
- 1/2 cup granulated sugar
- 1 tablespoon baking powder
- 1/2 teaspoon salt
- 1/2 cup unsalted butter, cold and cubed
- 1 cup fresh cranberries, chopped
- 1 tablespoon orange zest
- 1/2 cup heavy cream
- 1 large egg
- 1 teaspoon vanilla extract
Instructions
- Preheat the oven to 400°F (200°C) and line a baking sheet with parchment paper.
- In a large bowl, whisk together the flour, sugar, baking powder, and salt.
- Add the cold butter and mix until the mixture resembles coarse crumbs.
- Stir in the chopped cranberries and orange zest.
- In a separate bowl, whisk together the heavy cream, egg, and vanilla extract.
- Pour the wet ingredients into the dry ingredients and mix until just combined.
- Turn the dough onto a floured surface and gently knead it a few times.
- Pat the dough into a circle about 1 inch thick and cut into wedges.
- Place the scones on the prepared baking sheet and bake for 15-20 minutes or until golden brown.
- Let cool slightly before serving.
Notes
- For a sweeter scone, add a bit more sugar.
- These scones can be frozen before baking; just add a few extra minutes to the baking time if baking from frozen.
- Serve with butter or a drizzle of icing for extra flavor.
- Prep Time: 15 minutes
- Cook Time: 20 minutes
- Category: Breakfast
- Method: Baking
- Cuisine: American
Nutrition
- Serving Size: 1 scone
- Calories: 250
- Sugar: 10g
- Sodium: 200mg
- Fat: 12g
- Saturated Fat: 7g
- Unsaturated Fat: 3g
- Trans Fat: 0g
- Carbohydrates: 32g
- Fiber: 1g
- Protein: 3g
- Cholesterol: 40mg