Introduction to Retro Pineapple Upside-Down Cake (Back and Better Than Ever)
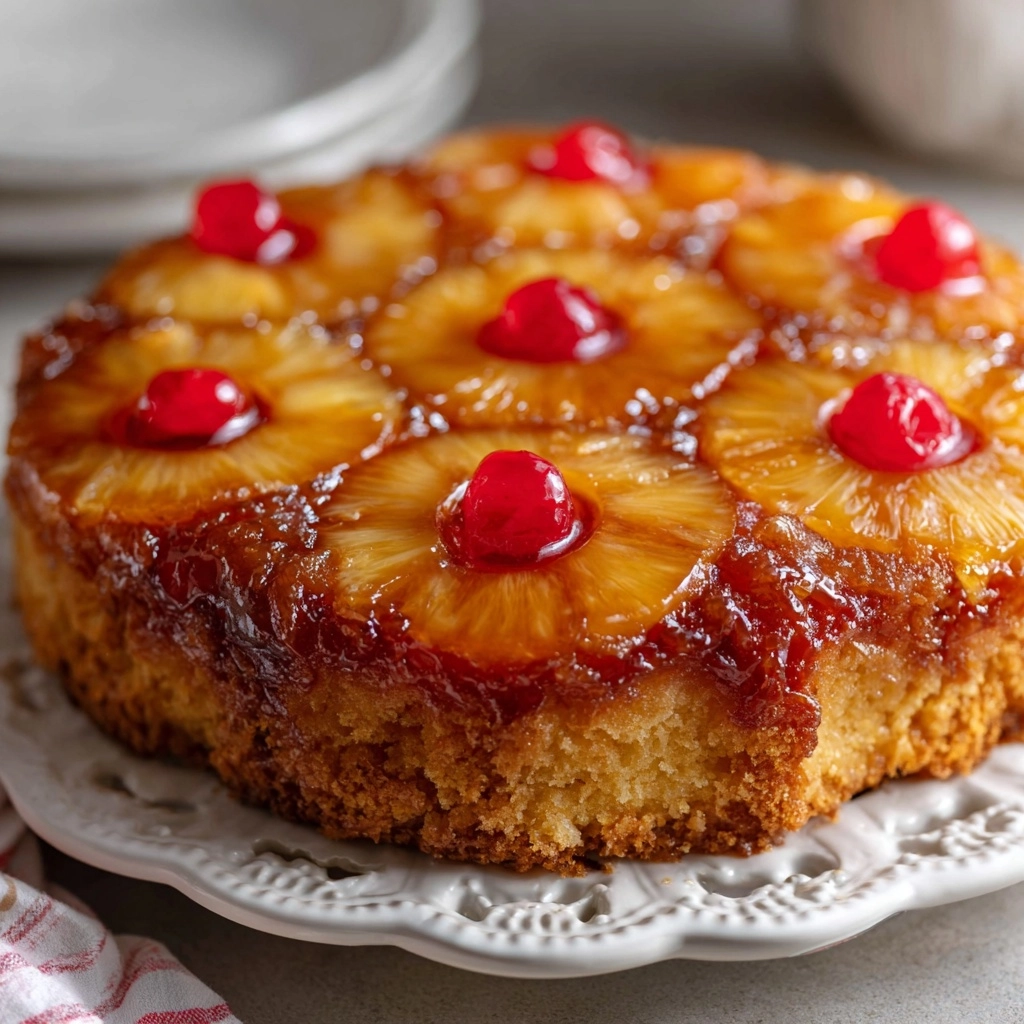
Ah, the Retro Pineapple Upside-Down Cake! It’s like a warm hug from the past, bringing back those nostalgic flavors that remind us of simpler times. If you’re a busy mom or a professional juggling a million things, this cake is your secret weapon. It’s quick to whip up and sure to impress your loved ones. Imagine their faces lighting up as they dig into that caramelized pineapple and cherry goodness! Trust me, this delightful dessert is not just a treat; it’s a slice of happiness that fits perfectly into your hectic life.
Why You’ll Love This Retro Pineapple Upside-Down Cake (Back and Better Than Ever)
This Retro Pineapple Upside-Down Cake is a delightful blend of ease and flavor. It comes together in just over an hour, making it perfect for those busy weeknights or last-minute gatherings. The sweet, caramelized pineapple and cherries create a stunning presentation that will wow your family and friends. Plus, it’s a classic dessert that evokes warm memories, making every bite feel like a celebration of life’s little joys.
Ingredients for Retro Pineapple Upside-Down Cake (Back and Better Than Ever)
Gathering the right ingredients is the first step to creating this nostalgic delight. Here’s what you’ll need:
- Unsalted butter: This adds richness and moisture to the cake. It’s best to use unsalted to control the saltiness.
- Brown sugar: This is the star of the caramelization process, giving the cake its sweet, deep flavor.
- Sliced pineapple: Canned pineapple works perfectly here. It’s sweet and juicy, making it a classic choice.
- Maraschino cherries: These little gems add a pop of color and sweetness, making the cake visually appealing.
- All-purpose flour: The backbone of the cake, providing structure and a soft crumb.
- Granulated sugar: This sweetens the batter and helps create a lovely texture.
- Milk: It adds moisture and richness, making the cake tender.
- Large eggs: Eggs help bind the ingredients together and add moisture.
- Vanilla extract: A splash of vanilla enhances the overall flavor, making it even more delightful.
- Baking powder: This is the leavening agent that helps the cake rise, giving it that fluffy texture.
- Salt: Just a pinch enhances the flavors and balances the sweetness.
For those looking to mix things up, consider adding chopped nuts for a delightful crunch or using fresh pineapple if you prefer. You can find the exact quantities for each ingredient at the bottom of the article, ready for printing!
How to Make Retro Pineapple Upside-Down Cake (Back and Better Than Ever)
Now that you have all your ingredients ready, let’s dive into the fun part—making this Retro Pineapple Upside-Down Cake! Follow these simple steps, and you’ll have a delicious dessert that’s sure to impress.
Step 1: Preheat the Oven
First things first, preheat your oven to 350°F (175°C). Preheating is crucial because it ensures that your cake bakes evenly. A hot oven helps the batter rise properly, giving you that fluffy texture we all love.
Step 2: Prepare the Cake Pan
Next, grab your round cake pan. Place it on the stove over low heat to melt the butter. Once melted, sprinkle the brown sugar evenly over the butter. This creates a sweet caramel layer that will be the base of your cake. Make sure it’s spread out nicely for even caramelization.
Step 3: Arrange the Pineapple and Cherries
Now comes the fun part—arranging the pineapple slices and cherries! Lay the pineapple slices in a circular pattern over the brown sugar. Then, place a cherry in the center of each pineapple slice. This not only looks beautiful but also ensures every slice has a cherry on top!
Step 4: Mix the Dry Ingredients
In a mixing bowl, combine the all-purpose flour, granulated sugar, baking powder, and salt. Whisk them together until they’re well blended. This step is important because it helps distribute the baking powder evenly, ensuring your cake rises perfectly.
Step 5: Combine Wet Ingredients
In another bowl, whisk together the milk, eggs, and vanilla extract. Make sure to beat them well until they’re fully combined. This mixture adds moisture and flavor to your cake, making it rich and delicious.
Step 6: Combine Wet and Dry Mixtures
Now, it’s time to bring the two mixtures together! Gradually add the wet ingredients to the dry ingredients. Stir gently until the batter is smooth. Be careful not to overmix; a few lumps are perfectly fine!
Step 7: Pour the Batter
Pour the batter over the arranged pineapple and cherries in the cake pan. Use a spatula to spread it evenly. This ensures that every bite is filled with that delightful fruit topping. Don’t worry if it looks a bit messy; it’ll all come together in the oven!
Step 8: Bake the Cake
Place the cake in the preheated oven and bake for 40-45 minutes. To check for doneness, insert a toothpick into the center. If it comes out clean, your cake is ready! The aroma will fill your kitchen, making it hard to wait.
Step 9: Cool and Invert
Once baked, let the cake cool in the pan for about 10 minutes. This helps it set. Then, carefully invert it onto a serving plate. Give it a gentle shake to release the cake. The beautiful pineapple and cherries will be on top, ready to impress!
Tips for Success
- Use room temperature ingredients for a smoother batter.
- Don’t skip the cooling time; it helps the cake release easily.
- For a richer flavor, try browning the butter before adding the sugar.
- Keep an eye on the baking time; ovens can vary.
- Serve warm for the best taste, and don’t forget the whipped cream!
Equipment Needed
- Round cake pan: A 9-inch pan works best, but any similar size will do.
- Mixing bowls: Use one large and one medium for convenience.
- Whisk: A hand whisk or electric mixer will make blending easier.
- Spatula: A rubber spatula helps in pouring and spreading the batter.
- Toothpick: Essential for checking the cake’s doneness.
Variations of Retro Pineapple Upside-Down Cake (Back and Better Than Ever)
- Nutty Delight: Add chopped walnuts or pecans to the batter for a delightful crunch.
- Coconut Twist: Mix in shredded coconut for a tropical flair that complements the pineapple.
- Spiced Version: Incorporate cinnamon or nutmeg into the dry ingredients for a warm, cozy flavor.
- Gluten-Free Option: Substitute all-purpose flour with a gluten-free blend to accommodate dietary needs.
- Fruit Medley: Experiment with other fruits like peaches or cherries for a unique twist on the classic.
Serving Suggestions for Retro Pineapple Upside-Down Cake (Back and Better Than Ever)
- Serve warm with a dollop of whipped cream or a scoop of vanilla ice cream for extra indulgence.
- Pair with a refreshing fruit salad to balance the sweetness.
- For drinks, consider a light sparkling wine or a tropical fruit punch.
- Garnish with fresh mint leaves for a pop of color and freshness.
FAQs about Retro Pineapple Upside-Down Cake (Back and Better Than Ever)
Can I use fresh pineapple instead of canned?
Absolutely! Fresh pineapple can add a vibrant flavor. Just make sure to slice it evenly for even cooking. It’s a great way to elevate this Retro Pineapple Upside-Down Cake!
How do I store leftovers?
Store any leftover cake in an airtight container at room temperature for up to three days. If you want to keep it longer, refrigerate it. Just remember to let it come to room temperature before serving!
Can I make this cake ahead of time?
Yes! You can bake the cake a day in advance. Just cool it completely, cover it tightly, and store it in the fridge. When you’re ready to serve, warm it up slightly for that fresh-baked taste.
What can I serve with this cake?
This cake pairs wonderfully with whipped cream, vanilla ice cream, or even a scoop of yogurt. A side of fresh fruit salad can also balance the sweetness beautifully!
Is this cake suitable for special diets?
For a gluten-free option, simply swap the all-purpose flour with a gluten-free blend. You can also reduce the sugar for a lighter version, but keep in mind it may alter the texture slightly.
Final Thoughts on Retro Pineapple Upside-Down Cake (Back and Better Than Ever)
Making this Retro Pineapple Upside-Down Cake is more than just baking; it’s about creating memories. Each slice brings a wave of nostalgia, reminding us of family gatherings and joyful celebrations. The combination of caramelized pineapple and cherries creates a symphony of flavors that dances on your palate. Plus, it’s a simple recipe that fits seamlessly into our busy lives. Whether you’re serving it at a special occasion or enjoying a quiet evening at home, this cake is sure to bring smiles and warmth to your table. So, grab your ingredients and let the baking adventure begin!
Print
Retro Pineapple Upside-Down Cake: A Must-Try Delight!
- Total Time: 1 hour 5 minutes
- Yield: 8 servings 1x
- Diet: Vegetarian
Description
A classic dessert featuring caramelized pineapple and cherries atop a moist cake, bringing back nostalgic flavors.
Ingredients
- 1/2 cup unsalted butter
- 1 cup brown sugar
- 1 can (20 oz) sliced pineapple, drained
- Maraschino cherries
- 1 1/2 cups all-purpose flour
- 1 cup granulated sugar
- 1/2 cup milk
- 2 large eggs
- 1 tsp vanilla extract
- 2 tsp baking powder
- 1/2 tsp salt
Instructions
- Preheat the oven to 350°F (175°C).
- In a round cake pan, melt the butter and sprinkle brown sugar evenly over it.
- Arrange the pineapple slices and cherries on top of the brown sugar mixture.
- In a mixing bowl, combine flour, granulated sugar, baking powder, and salt.
- In another bowl, whisk together milk, eggs, and vanilla extract.
- Gradually add the wet ingredients to the dry ingredients, mixing until smooth.
- Pour the batter over the pineapple and cherries in the cake pan.
- Bake for 40-45 minutes or until a toothpick inserted in the center comes out clean.
- Let it cool for a few minutes, then invert onto a serving plate.
Notes
- Serve warm with whipped cream for added indulgence.
- Can be stored in an airtight container for up to 3 days.
- For a twist, add chopped nuts to the batter.
- Prep Time: 20 minutes
- Cook Time: 45 minutes
- Category: Dessert
- Method: Baking
- Cuisine: American
Nutrition
- Serving Size: 1 slice
- Calories: 250
- Sugar: 20g
- Sodium: 200mg
- Fat: 10g
- Saturated Fat: 5g
- Unsaturated Fat: 3g
- Trans Fat: 0g
- Carbohydrates: 35g
- Fiber: 1g
- Protein: 3g
- Cholesterol: 50mg