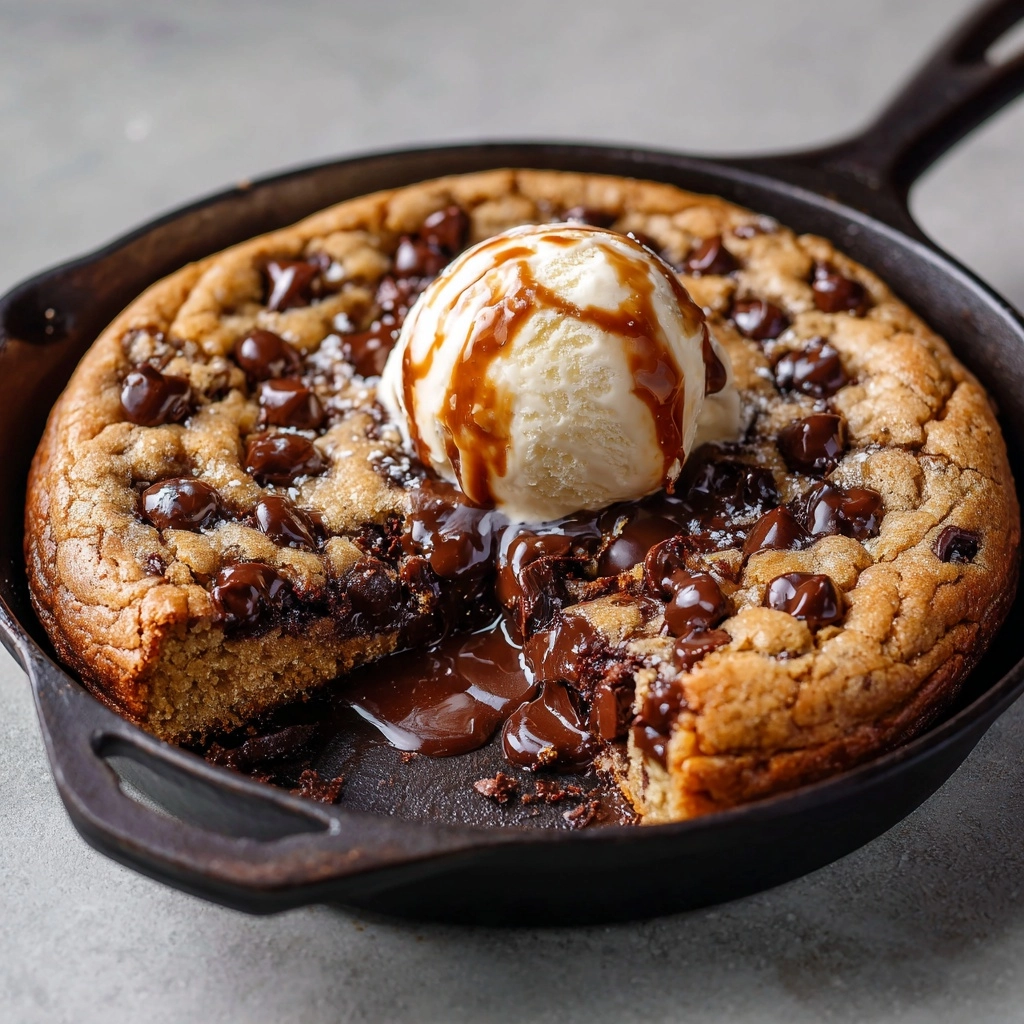
Introduction to Cast Iron Skillet Cookie
There’s something magical about a warm, gooey dessert that brings everyone together, and that’s exactly what a Cast Iron Skillet Cookie offers. Picture this: a busy day winding down, and you want to impress your loved ones with a treat that’s both simple and delicious. This ooey-gooey shareable dessert is not just a cookie; it’s a moment of joy, a slice of comfort, and a delightful way to create memories. Whether it’s a family gathering or a cozy night in, this recipe is your go-to solution for satisfying sweet cravings without the fuss.
Why You’ll Love This Cast Iron Skillet Cookie
This Cast Iron Skillet Cookie is a dream come true for busy moms and professionals alike. It’s incredibly easy to whip up, taking just 15 minutes of prep time. The best part? You can bake it all in one skillet, minimizing cleanup. With its crispy edges and ooey-gooey center, it’s a crowd-pleaser that satisfies even the pickiest eaters. Plus, it’s perfect for sharing, making it a delightful centerpiece for any gathering.
Ingredients for Cast Iron Skillet Cookie
Gathering the right ingredients is the first step to creating your Cast Iron Skillet Cookie masterpiece. Here’s what you’ll need:
- Unsalted Butter: This is the base of your cookie, providing richness and flavor. Make sure it’s softened for easy mixing.
- Brown Sugar: Adds moisture and a deep, caramel-like flavor. It’s what gives your cookie that delightful chewiness.
- Granulated Sugar: Balances the sweetness and helps create a lovely golden crust. A little goes a long way!
- Large Eggs: They bind everything together and add moisture. Room temperature eggs work best for even mixing.
- Vanilla Extract: A splash of this magical ingredient enhances the overall flavor, making your cookie irresistible.
- All-Purpose Flour: The backbone of your cookie dough. It provides structure and helps achieve that perfect texture.
- Baking Soda: This leavening agent helps your cookie rise and gives it a light, fluffy texture.
- Salt: Just a pinch enhances all the flavors, balancing the sweetness beautifully.
- Chocolate Chips: The star of the show! Use semi-sweet, dark, or even milk chocolate chips for a delightful burst of flavor.
Feel free to get creative! You can add nuts for crunch or swap in different types of chocolate. If you’re looking for a healthier twist, consider using whole wheat flour or coconut sugar. For exact measurements, check the bottom of the article where you can find everything available for printing.
How to Make Cast Iron Skillet Cookie
Now that you have your ingredients ready, let’s dive into the fun part: making your Cast Iron Skillet Cookie! Follow these simple steps, and you’ll have a delicious dessert that’s sure to impress.
Step 1: Preheat the Oven
First things first, preheat your oven to 350°F (175°C). Preheating is crucial because it ensures even baking. If you skip this step, your cookie might end up unevenly cooked, with a gooey center and burnt edges. Trust me, you want that perfect balance!
Step 2: Cream the Butter and Sugars
In a large bowl, cream together the softened butter, brown sugar, and granulated sugar until smooth. This step is vital for achieving the right texture. You want it to be light and fluffy, which helps create that melt-in-your-mouth experience. Use a hand mixer or a sturdy spatula to get the job done!
Step 3: Add Eggs and Vanilla
Next, add the eggs and vanilla extract to the mixture. The eggs bind everything together, while the vanilla adds a warm, inviting flavor. Mix until everything is well combined. You’ll notice the batter becoming richer and more aromatic—this is the magic happening!
Step 4: Combine Dry Ingredients
In a separate bowl, whisk together the all-purpose flour, baking soda, and salt. Mixing these dry ingredients separately helps ensure that the baking soda and salt are evenly distributed. This step is key to achieving that perfect rise and flavor balance in your Cast Iron Skillet Cookie.
Step 5: Mix Wet and Dry Ingredients
Now, gradually add the dry ingredients to the wet mixture. Stir gently until just combined. Be careful not to overmix! Overmixing can lead to a tough cookie, and we want it to be soft and chewy. A few flour streaks are okay; they’ll disappear as you fold in the chocolate chips.
Step 6: Fold in Chocolate Chips
Time to add the star of the show—chocolate chips! Fold them into the dough gently. You can use semi-sweet, dark, or even white chocolate chips for a fun twist. Make sure they’re evenly distributed throughout the dough for that delightful burst of chocolate in every bite.
Step 7: Spread Dough in Skillet
Next, spread the cookie dough evenly in a greased cast iron skillet. Use a spatula to smooth the top. This ensures that it bakes evenly. If you want a rustic look, don’t worry about making it perfect; a few swirls can add character!
Step 8: Bake to Perfection
Finally, pop your skillet in the oven and bake for 25-30 minutes. Keep an eye on it! You’ll know it’s done when the edges are golden brown, and the center is set but still soft. If you overbake, you’ll lose that ooey-gooey goodness. Let it cool slightly before serving, and enjoy it warm with a scoop of ice cream!
Tips for Success
- Always use softened butter for easy mixing and a creamy texture.
- Don’t skip the preheating step; it’s essential for even baking.
- For a chewier cookie, let the dough rest for 10 minutes before baking.
- Experiment with different chocolate chip varieties for unique flavors.
- Keep an eye on the baking time to avoid overbaking.
Equipment Needed
- Cast Iron Skillet: The star of the show! If you don’t have one, a regular oven-safe skillet works too.
- Mixing Bowls: A couple of medium-sized bowls will do the trick.
- Spatula: For mixing and spreading the dough. A wooden spoon works well too.
- Measuring Cups and Spoons: Essential for accurate ingredient measurements.
- Oven Mitts: Safety first! Protect your hands when handling the hot skillet.
Variations for Cast Iron Skillet Cookie
- Nutty Delight: Add 1 cup of chopped nuts like walnuts or pecans for a crunchy texture.
- Oreo Twist: Crush a few Oreo cookies and fold them into the dough for a fun flavor combination.
- Peanut Butter Swirl: Mix in 1/2 cup of creamy peanut butter for a rich, nutty flavor that pairs perfectly with chocolate.
- Gluten-Free Option: Substitute all-purpose flour with a gluten-free flour blend for a delicious gluten-free treat.
- Fruit Infusion: Add 1 cup of dried fruits like cranberries or cherries for a sweet and tart contrast.
- Spiced Up: Incorporate a teaspoon of cinnamon or nutmeg for a warm, cozy flavor that’s perfect for fall.
Serving Suggestions for Cast Iron Skillet Cookie
- Ice Cream: Serve warm with a scoop of vanilla or chocolate ice cream for a classic pairing.
- Whipped Cream: Top with freshly whipped cream for an extra indulgent touch.
- Fresh Berries: Add a side of fresh strawberries or raspberries for a refreshing contrast.
- Chocolate Sauce: Drizzle with chocolate sauce for an extra layer of sweetness.
- Presentation: Serve directly from the skillet for a rustic, cozy feel.
FAQs about Cast Iron Skillet Cookie
Can I make this Cast Iron Skillet Cookie ahead of time?
Absolutely! You can prepare the dough in advance and store it in the fridge for up to 24 hours. Just remember to let it sit at room temperature for about 15 minutes before spreading it in the skillet and baking.
What if I don’t have a cast iron skillet?
No worries! You can use any oven-safe skillet or even a baking dish. Just make sure to adjust the baking time, as different materials may cook differently.
How do I store leftovers?
Store any leftover Cast Iron Skillet Cookie in an airtight container at room temperature for up to three days. You can also reheat it in the oven for a few minutes to bring back that warm, gooey goodness.
Can I freeze the cookie?
Yes! You can freeze the baked cookie for up to three months. Just wrap it tightly in plastic wrap and then in aluminum foil. When you’re ready to enjoy it, thaw it in the fridge overnight and reheat in the oven.
What are some fun mix-ins I can add?
Get creative! You can add nuts, dried fruits, or even different types of chocolate chips. Try adding a swirl of peanut butter or caramel for an extra indulgent treat!
Final Thoughts
Making a Cast Iron Skillet Cookie is more than just baking; it’s about creating moments of joy and connection. The aroma wafting through your kitchen, the laughter shared over warm slices, and the smiles on your loved ones’ faces are priceless. This ooey-gooey shareable dessert is perfect for any occasion, whether it’s a family movie night or a gathering with friends. Plus, the simplicity of the recipe means you can whip it up even on your busiest days. So, grab your skillet, gather your ingredients, and let the magic unfold. Happy baking!

Cast Iron Skillet Cookie: The Ultimate Ooey-Gooey Delight!
- Total Time: 45 minutes
- Yield: 8 servings 1x
- Diet: Vegetarian
Description
A delicious and shareable dessert made in a cast iron skillet, featuring a gooey center and a crispy edge.
Ingredients
- 1 cup unsalted butter, softened
- 1 cup brown sugar
- 1/2 cup granulated sugar
- 2 large eggs
- 2 teaspoons vanilla extract
- 2 1/4 cups all-purpose flour
- 1 teaspoon baking soda
- 1/2 teaspoon salt
- 2 cups chocolate chips
Instructions
- Preheat your oven to 350°F (175°C).
- In a large bowl, cream together the softened butter, brown sugar, and granulated sugar until smooth.
- Add the eggs and vanilla extract, mixing until well combined.
- In a separate bowl, whisk together the flour, baking soda, and salt.
- Gradually add the dry ingredients to the wet ingredients, mixing until just combined.
- Fold in the chocolate chips.
- Spread the cookie dough evenly in a greased cast iron skillet.
- Bake for 25-30 minutes or until the edges are golden brown and the center is set but still soft.
- Let it cool slightly before serving. Enjoy warm with ice cream!
Notes
- For an extra touch, sprinkle sea salt on top before baking.
- This cookie is best served warm and can be reheated in the oven.
- Feel free to add nuts or other mix-ins as desired.
- Prep Time: 15 minutes
- Cook Time: 30 minutes
- Category: Dessert
- Method: Baking
- Cuisine: American
Nutrition
- Serving Size: 1 slice
- Calories: 350
- Sugar: 20g
- Sodium: 200mg
- Fat: 18g
- Saturated Fat: 10g
- Unsaturated Fat: 8g
- Trans Fat: 0g
- Carbohydrates: 45g
- Fiber: 2g
- Protein: 4g
- Cholesterol: 50mg
