Introduction to Apple Cider Cheesecake That Tastes Like Fall in Every Bite
As the leaves turn golden and the air gets crisp, there’s nothing quite like the comforting embrace of a dessert that captures the essence of fall. This Apple Cider Cheesecake That Tastes Like Fall in Every Bite is my go-to recipe for autumn gatherings. It’s not just a treat; it’s a warm hug on a plate! Perfect for busy moms and professionals, this cheesecake is easy to whip up and sure to impress your loved ones. So, let’s dive into this delightful recipe that brings the flavors of fall right to your table!
Why You’ll Love This Apple Cider Cheesecake That Tastes Like Fall in Every Bite
This Apple Cider Cheesecake is a breeze to make, even on your busiest days. With just a handful of ingredients, you can create a dessert that tastes like a cozy autumn afternoon. The creamy texture paired with the warm spices will have everyone asking for seconds. Plus, it’s a fantastic way to celebrate the season without spending hours in the kitchen. Trust me, your taste buds will thank you!
Ingredients for Apple Cider Cheesecake That Tastes Like Fall in Every Bite
Gathering the right ingredients is the first step to creating this delightful Apple Cider Cheesecake. Each component plays a vital role in bringing that cozy fall flavor to life. Here’s what you’ll need:
- Graham cracker crumbs: These form the base of your cheesecake crust, providing a sweet and crunchy texture.
- Unsalted butter: Melted butter binds the crumbs together, adding richness to the crust.
- Cream cheese: The star of the show! It gives the cheesecake its creamy, smooth texture.
- Granulated sugar: This sweetens the filling, balancing the tanginess of the cream cheese.
- Apple cider: The essence of fall! It infuses the cheesecake with a delightful apple flavor.
- Large eggs: Eggs help set the cheesecake, giving it structure and a velvety mouthfeel.
- Vanilla extract: A splash of vanilla enhances the overall flavor, making it even more delicious.
- Ground cinnamon: This warm spice is a must for that classic fall taste.
- Ground nutmeg: Just a pinch adds depth and a hint of warmth to the cheesecake.
- Salt: A little salt balances the sweetness and enhances all the flavors.
For those looking to customize, you can reduce the apple cider to intensify the apple flavor or top your cheesecake with whipped cream and fresh apple slices for a beautiful presentation. If you’re curious about exact measurements, they’re available at the bottom of the article for easy printing!
How to Make Apple Cider Cheesecake That Tastes Like Fall in Every Bite
Now that we have our ingredients ready, let’s dive into the steps to create this delicious Apple Cider Cheesecake. Each step is simple, and I promise it will be worth the effort when you take that first bite!
Step 1: Preheat the Oven
First things first, preheat your oven to 325°F (160°C). Preheating is crucial because it ensures that your cheesecake bakes evenly. A hot oven helps set the filling just right, giving you that perfect creamy texture. Trust me, you don’t want to skip this step!
Step 2: Prepare the Crust
In a mixing bowl, combine your graham cracker crumbs with the melted butter. Stir until the crumbs are fully coated. This mixture should resemble wet sand. Now, press it firmly into the bottom of your springform pan. This step is vital! A well-pressed crust provides a sturdy base for your cheesecake, preventing it from crumbling when you slice it.
Step 3: Mix the Filling
In a large mixing bowl, beat the softened cream cheese and granulated sugar together until smooth. This is where the magic begins! Achieving a creamy texture is essential for a luscious cheesecake. Make sure there are no lumps; a smooth filling means a delightful bite every time.
Step 4: Add Flavorful Ingredients
Now, it’s time to add the apple cider, eggs, vanilla extract, ground cinnamon, ground nutmeg, and salt to the cream cheese mixture. Mix until everything is well combined. The apple cider brings that fall flavor, while the spices add warmth and depth. You’ll feel like autumn has arrived in your kitchen!
Step 5: Combine and Pour
Carefully pour the cheesecake mixture over the prepared crust in the springform pan. Use a spatula to spread it evenly. This step is important for even baking. An even layer ensures that every slice has the same delicious flavor and texture. No one likes a lopsided cheesecake!
Step 6: Bake to Perfection
Place your cheesecake in the preheated oven and bake for 50-60 minutes. Keep an eye on it! The center should be set but still slightly jiggly. This means it’s perfectly baked. Overbaking can lead to cracks, so check for doneness carefully. A toothpick inserted should come out clean, but not too dry.
Step 7: Cool and Chill
Once baked, remove the cheesecake from the oven and let it cool at room temperature. After about an hour, refrigerate it for at least 4 hours, or overnight if you can wait! Chilling is key to achieving that creamy texture. The flavors will meld beautifully, making each bite a taste of fall.
Tips for Success
- Use room temperature cream cheese for a smoother filling.
- Don’t skip the chilling time; it enhances the flavor and texture.
- For a festive touch, sprinkle extra cinnamon on top before serving.
- Check for doneness by gently shaking the pan; the center should slightly jiggle.
- Consider using a water bath to prevent cracks in your cheesecake.
Equipment Needed
- Springform pan: Essential for easy removal; a regular cake pan works too, but slicing will be trickier.
- Mixing bowls: Use a large bowl for the filling and a smaller one for the crust.
- Electric mixer: A hand mixer or stand mixer makes beating the cream cheese a breeze.
- Spatula: Perfect for spreading the filling evenly over the crust.
- Measuring cups and spoons: Accurate measurements ensure the best results.
Variations
- Gluten-Free Option: Substitute graham cracker crumbs with gluten-free cookie crumbs for a delicious gluten-free crust.
- Vegan Twist: Use vegan cream cheese and replace eggs with flaxseed meal mixed with water for a plant-based version.
- Spiced Up: Add a dash of ginger or allspice to the filling for an extra layer of warmth and flavor.
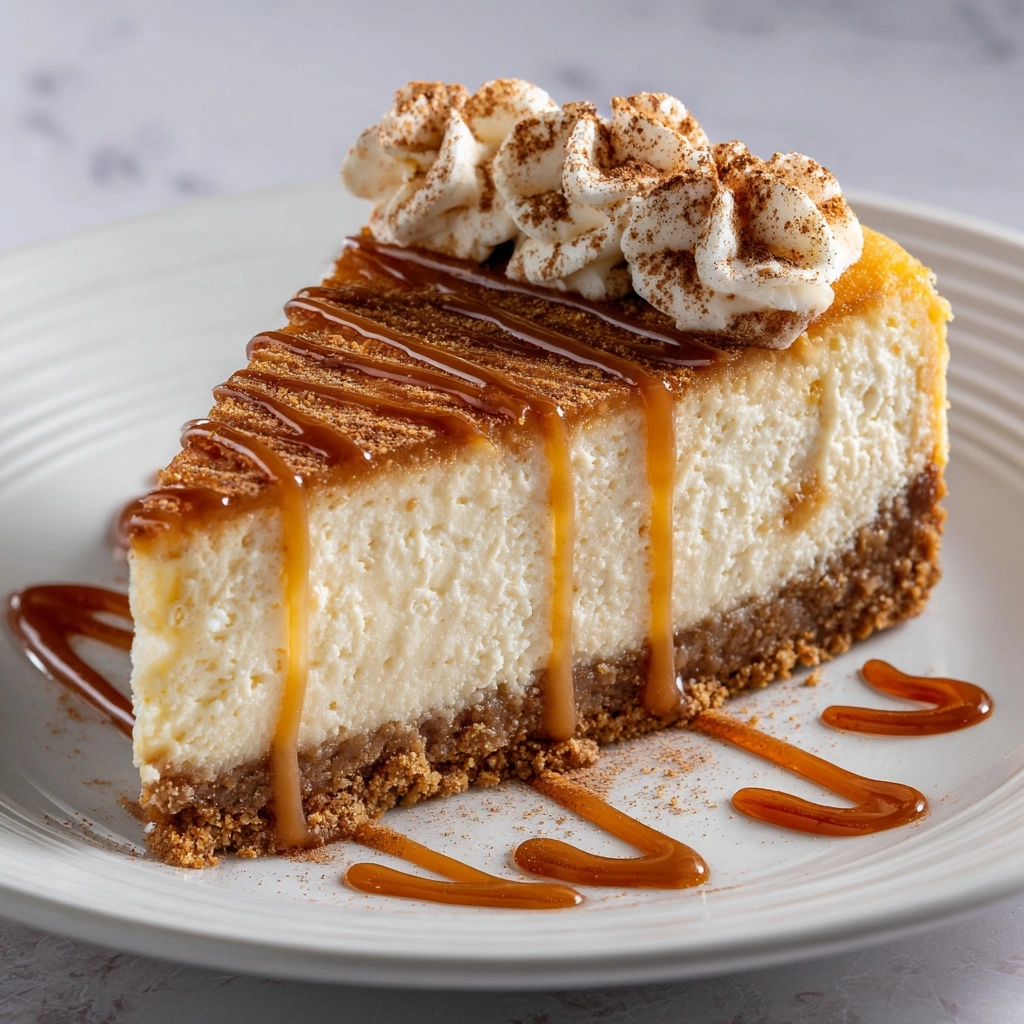
- Caramel Drizzle: Drizzle caramel sauce over the cheesecake before serving for a sweet, indulgent touch.
- Nutty Crust: Mix in finely chopped nuts, like pecans or walnuts, with the graham cracker crumbs for added crunch.
Serving Suggestions
- Pair with a dollop of whipped cream for a light, airy finish.
- Serve alongside spiced apple cider or a warm cup of chai tea for a cozy experience.
- Garnish with thin apple slices and a sprinkle of cinnamon for a beautiful presentation.
- Consider adding a scoop of vanilla ice cream for an indulgent treat.
FAQs about Apple Cider Cheesecake That Tastes Like Fall in Every Bite
Can I make this cheesecake ahead of time?
Absolutely! This Apple Cider Cheesecake is perfect for making ahead. Just prepare it a day or two in advance and let it chill in the fridge. The flavors will deepen, making it even more delicious!
How do I store leftovers?
Store any leftover cheesecake in an airtight container in the refrigerator. It will stay fresh for up to five days. Just be sure to cover it well to keep that creamy texture intact!
Can I freeze this cheesecake?
Yes, you can freeze this cheesecake! Wrap it tightly in plastic wrap and then in aluminum foil. It can be frozen for up to three months. Just thaw it in the fridge overnight before serving.
What can I use instead of apple cider?
If you don’t have apple cider, you can substitute it with apple juice. While it won’t have the same depth of flavor, it will still give you a lovely apple taste in your cheesecake.
Can I add more spices to enhance the flavor?
Definitely! Feel free to experiment with additional spices like ginger or cloves. Just a pinch can elevate the fall flavors and make your cheesecake even more delightful!
Final Thoughts
Creating this Apple Cider Cheesecake That Tastes Like Fall in Every Bite is more than just baking; it’s about crafting memories. Each slice is a celebration of autumn, filled with warmth and nostalgia. I love how this cheesecake brings family and friends together, sparking joy and laughter around the table. The delightful blend of spices and creamy texture makes every bite a cozy reminder of the season. So, whether you’re hosting a gathering or enjoying a quiet evening, this cheesecake is sure to bring a smile to your face and warmth to your heart!
Print
Apple Cider Cheesecake That Tastes Like Fall Awaits You!
- Total Time: 4 hours 20 minutes
- Yield: 8 servings 1x
- Diet: Vegetarian
Description
A delicious apple cider cheesecake that captures the essence of fall in every bite, perfect for autumn gatherings.
Ingredients
- 1 ½ cups graham cracker crumbs
- ½ cup unsalted butter, melted
- 2 cups cream cheese, softened
- 1 cup granulated sugar
- 1 cup apple cider
- 3 large eggs
- 1 teaspoon vanilla extract
- 1 teaspoon ground cinnamon
- ½ teaspoon ground nutmeg
- ¼ teaspoon salt
Instructions
- Preheat the oven to 325°F (160°C).
- In a bowl, mix graham cracker crumbs and melted butter until combined, then press into the bottom of a springform pan.
- In a large mixing bowl, beat the cream cheese and sugar until smooth.
- Add the apple cider, eggs, vanilla, cinnamon, nutmeg, and salt, and mix until well combined.
- Pour the cheesecake mixture over the crust in the springform pan.
- Bake for 50-60 minutes or until the center is set.
- Allow to cool, then refrigerate for at least 4 hours before serving.
Notes
- For a stronger apple flavor, reduce the apple cider to ¾ cup.
- Top with whipped cream and apple slices for garnish.
- Store leftovers in the refrigerator for up to 5 days.
- Prep Time: 20 minutes
- Cook Time: 60 minutes
- Category: Dessert
- Method: Baking
- Cuisine: American
Nutrition
- Serving Size: 1 slice
- Calories: 350
- Sugar: 25g
- Sodium: 200mg
- Fat: 22g
- Saturated Fat: 12g
- Unsaturated Fat: 8g
- Trans Fat: 0g
- Carbohydrates: 30g
- Fiber: 1g
- Protein: 5g
- Cholesterol: 80mg