Introduction to Peanut Butter Chocolate Layer Cake for Serious Dessert Lovers
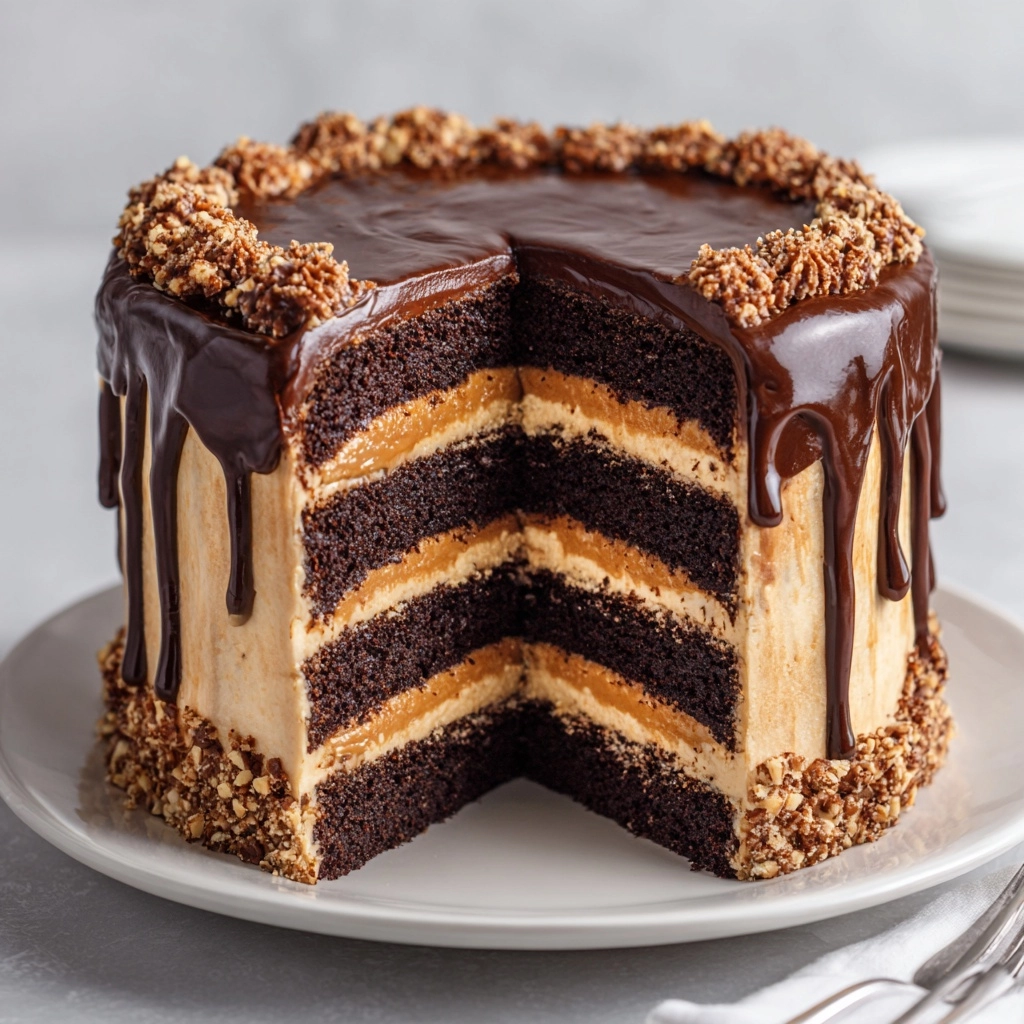
Welcome, fellow dessert enthusiasts! If you’re anything like me, you know that life can get hectic. Between juggling work, family, and everything in between, finding time to whip up something special can feel impossible. That’s where this Peanut Butter Chocolate Layer Cake for Serious Dessert Lovers comes in! It’s a delightful treat that’s not only easy to make but also guaranteed to impress your loved ones. Imagine layers of moist chocolate cake paired with creamy peanut butter frosting—pure bliss! Let’s dive into this sweet adventure together!
Why You’ll Love This Peanut Butter Chocolate Layer Cake for Serious Dessert Lovers
This Peanut Butter Chocolate Layer Cake for Serious Dessert Lovers is a dream come true for busy moms and professionals alike. It’s quick to prepare, taking just over an hour from start to finish. The rich flavors of chocolate and peanut butter create a heavenly combination that will satisfy any sweet tooth. Plus, it’s perfect for celebrations or a cozy family dessert night. Trust me, this cake will become a favorite in your home!
Ingredients for Peanut Butter Chocolate Layer Cake for Serious Dessert Lovers
Gathering the right ingredients is the first step to creating this decadent Peanut Butter Chocolate Layer Cake for Serious Dessert Lovers. Here’s what you’ll need:
- All-purpose flour: The backbone of your cake, providing structure and texture.
- Granulated sugar: Sweetens the cake and helps create that lovely moist crumb.
- Unsweetened cocoa powder: Adds rich chocolate flavor; feel free to use dark chocolate cocoa for a deeper taste.
- Baking powder and baking soda: These leavening agents help the cake rise, making it light and fluffy.
- Salt: Enhances the flavors and balances the sweetness.
- Large eggs: Bind the ingredients together and add moisture.
- Whole milk: Contributes to the cake’s richness and helps create a tender crumb.
- Vegetable oil: Keeps the cake moist; you can substitute with melted butter for a richer flavor.
- Vanilla extract: A must-have for that warm, comforting flavor.
- Boiling water: This secret ingredient helps to dissolve the cocoa and creates a smooth batter.
- Creamy peanut butter: The star of the frosting, adding that irresistible nutty flavor.
- Powdered sugar: Sweetens the frosting and gives it that perfect creamy texture.
- Unsalted butter: Adds richness to the frosting; make sure it’s softened for easy mixing.
- Heavy cream: Whips up beautifully to create a light and fluffy frosting.
For exact measurements, check the bottom of the article where you can find everything listed for easy printing. Happy baking!
How to Make Peanut Butter Chocolate Layer Cake for Serious Dessert Lovers
Step 1: Preheat and Prepare
First things first, let’s get that oven preheating to 350°F (175°C). While it warms up, grab two 9-inch round cake pans and grease them well. I like to use a bit of butter or cooking spray to ensure the cakes slide out easily later. Trust me, there’s nothing worse than a cake that sticks!
Step 2: Mix Dry Ingredients
In a large mixing bowl, combine the all-purpose flour, granulated sugar, unsweetened cocoa powder, baking powder, baking soda, and salt. Whisk them together until they’re well blended. This step is crucial because it ensures that the leavening agents are evenly distributed, giving your cake that perfect rise.
Step 3: Combine Wet Ingredients
Now, it’s time to add the wet ingredients. Crack in the large eggs, pour in the whole milk, vegetable oil, and vanilla extract. Mix everything together until it’s smooth and well combined. I love using a hand mixer for this, but a whisk works just fine too. Just make sure there are no lumps!
Step 4: Add Boiling Water
Here comes the magic! Carefully stir in the boiling water. This step might seem odd, but it’s essential for achieving that moist, tender cake. The hot water helps dissolve the cocoa powder, creating a silky batter. Don’t worry if it looks a bit thin; that’s exactly how it should be!
Step 5: Bake the Cakes
Pour the batter evenly into your prepared cake pans. Pop them in the oven and bake for 30-35 minutes. To check for doneness, insert a toothpick into the center of the cakes. If it comes out clean or with just a few crumbs, they’re ready! If not, give them a few more minutes.
Step 6: Cool the Cakes
Once baked, let the cakes cool in the pans for about 10 minutes. Then, carefully transfer them to wire racks to cool completely. This step is vital because frosting a warm cake can lead to a melty mess. Patience is key here, my friends!
Step 7: Make the Peanut Butter Frosting
While the cakes cool, let’s whip up that dreamy peanut butter frosting. In a separate bowl, beat together the creamy peanut butter, softened unsalted butter, and powdered sugar until it’s smooth. Then, add the heavy cream and mix until it’s light and fluffy. This frosting is so good, you might be tempted to eat it straight from the bowl!
Step 8: Assemble the Cake
Now for the fun part! Once the cakes are completely cool, place one layer on a serving plate. Spread a generous amount of peanut butter frosting on top. Then, gently place the second layer on top and frost the top and sides of the cake. Don’t worry about making it perfect; a little rustic charm adds character!
Tips for Success
- Always measure your ingredients accurately for the best results.
- Let your eggs and milk come to room temperature before mixing.
- Use a toothpick to check for doneness; it should come out clean.
- Cool cakes completely before frosting to avoid melting.
- For a fun twist, add chocolate chips to the batter for extra texture!
Equipment Needed
- Two 9-inch round cake pans (or use one 9×13-inch pan for a single layer).
- Mixing bowls (a large one for dry ingredients and a medium one for wet).
- Whisk or hand mixer (a whisk works just as well!).
- Measuring cups and spoons for accuracy.
- Cooling racks (or a plate to cool the cakes).
Variations
- For a gluten-free option, substitute all-purpose flour with a 1:1 gluten-free baking blend.
- Add a layer of raspberry or strawberry jam between the cake layers for a fruity twist.
- Try using crunchy peanut butter instead of creamy for added texture and flavor.
- For a vegan version, replace eggs with flax eggs and use plant-based milk and butter.
- Incorporate espresso powder into the batter for a mocha flavor that pairs beautifully with chocolate.
Serving Suggestions
- Pair slices of cake with a scoop of vanilla ice cream for a delightful contrast.
- Serve with fresh berries to add a pop of color and freshness.
- Drizzle chocolate sauce over the top for an extra indulgent touch.
- Enjoy with a cup of coffee or a glass of cold milk.
FAQs about Peanut Butter Chocolate Layer Cake for Serious Dessert Lovers
As a passionate home cook, I often get questions about this delightful Peanut Butter Chocolate Layer Cake for Serious Dessert Lovers. Here are some common queries that might help you on your baking journey!
Can I make this cake ahead of time?
Absolutely! You can bake the cakes a day in advance. Just wrap them tightly in plastic wrap and store them at room temperature. Frost them the day you plan to serve for the best flavor and texture.
What can I substitute for peanut butter?
If you have nut allergies or prefer a different flavor, try using sun butter or almond butter. Both will give you a unique twist while still being delicious!
How should I store leftovers?
Store any leftover cake in an airtight container at room temperature for up to three days. If you want to keep it longer, you can freeze it for up to two months. Just make sure to wrap it tightly!
Can I use a different frosting?
Of course! While the peanut butter frosting is a star, you can swap it for chocolate ganache or cream cheese frosting for a different flavor profile. The cake will still shine!
Is this cake suitable for special occasions?
Final Thoughts
Creating this Peanut Butter Chocolate Layer Cake for Serious Dessert Lovers is more than just baking; it’s about making memories. The joy of watching your loved ones savor each slice is truly priceless. This cake brings a sense of warmth and comfort, perfect for any occasion. Whether it’s a birthday celebration or a cozy family dinner, this dessert is sure to steal the show. So, roll up your sleeves, embrace the mess, and enjoy the sweet rewards of your hard work. Trust me, every bite will be worth it!
Peanut Butter Chocolate Layer Cake for Serious Dessert Lovers Awaits!
- Total Time: 1 hour 5 minutes
- Yield: 12 servings 1x
- Diet: Vegetarian
Description
A rich and decadent Peanut Butter Chocolate Layer Cake that is perfect for serious dessert lovers, featuring layers of moist chocolate cake and creamy peanut butter frosting.
Ingredients
- 2 cups all-purpose flour
- 2 cups granulated sugar
- 3/4 cup unsweetened cocoa powder
- 1 1/2 teaspoons baking powder
- 1 1/2 teaspoons baking soda
- 1 teaspoon salt
- 2 large eggs
- 1 cup whole milk
- 1/2 cup vegetable oil
- 2 teaspoons vanilla extract
- 1 cup boiling water
- 1 cup creamy peanut butter
- 4 cups powdered sugar
- 1/2 cup unsalted butter, softened
- 1/4 cup heavy cream
Instructions
- Preheat the oven to 350°F (175°C) and grease two 9-inch round cake pans.
- In a large bowl, combine flour, sugar, cocoa powder, baking powder, baking soda, and salt.
- Add eggs, milk, oil, and vanilla to the dry ingredients and mix until well combined.
- Stir in boiling water until the batter is smooth.
- Pour the batter evenly into the prepared cake pans.
- Bake for 30-35 minutes or until a toothpick inserted in the center comes out clean.
- Let the cakes cool in the pans for 10 minutes, then transfer to wire racks to cool completely.
- In a separate bowl, beat together peanut butter, softened butter, and powdered sugar until smooth.
- Add heavy cream and mix until the frosting is light and fluffy.
- Once the cakes are completely cool, spread peanut butter frosting between the layers and on top of the cake.
Notes
- For a richer flavor, use dark chocolate cocoa powder.
- Store leftovers in an airtight container at room temperature for up to 3 days.
- This cake can be frozen for up to 2 months; wrap it tightly in plastic wrap.
- Prep Time: 30 minutes
- Cook Time: 35 minutes
- Category: Dessert
- Method: Baking
- Cuisine: American
Nutrition
- Serving Size: 1 slice
- Calories: 450
- Sugar: 35g
- Sodium: 300mg
- Fat: 20g
- Saturated Fat: 8g
- Unsaturated Fat: 10g
- Trans Fat: 0g
- Carbohydrates: 60g
- Fiber: 3g
- Protein: 6g
- Cholesterol: 50mg