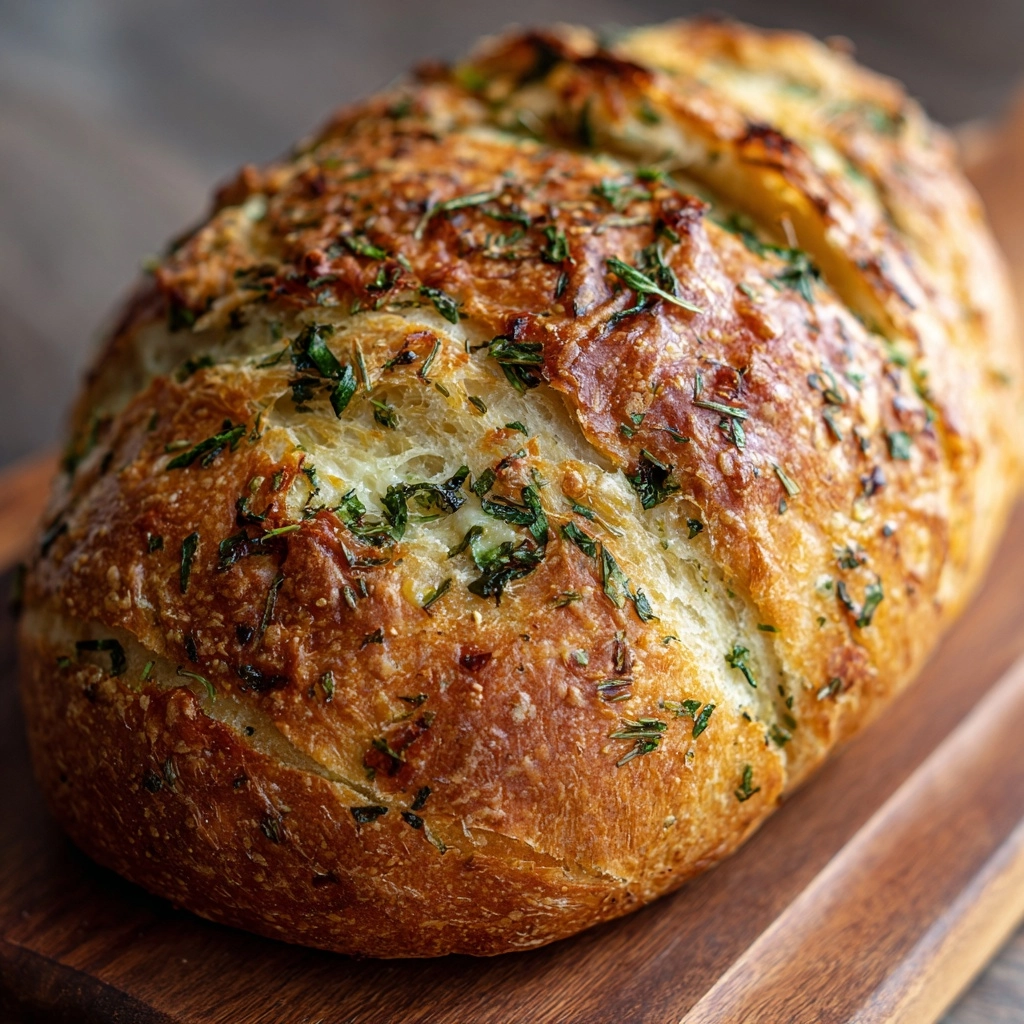
Introduction to Italian Herb & Cheese Bread That’s Bakery-Soft at Home
There’s something magical about the aroma of freshly baked bread wafting through the house. It instantly transforms any space into a warm, inviting haven. This Italian Herb & Cheese Bread That’s Bakery-Soft at Home is not just a recipe; it’s a delightful experience waiting to happen. Perfect for busy days, this bread is a quick solution that impresses family and friends alike. Imagine serving warm slices slathered with butter or dipping them into a rich marinara sauce. Trust me, this bread will become a cherished staple in your kitchen!
Why You’ll Love This Italian Herb & Cheese Bread That’s Bakery-Soft at Home
This Italian Herb & Cheese Bread is a game-changer for busy moms and professionals. It’s incredibly easy to make, requiring just a few simple ingredients. The best part? It bakes up soft and fluffy, just like the bread from your favorite bakery. Plus, the delightful blend of herbs and gooey cheese makes every bite a flavor explosion. You’ll find yourself reaching for this recipe time and time again!
Ingredients for Italian Herb & Cheese Bread That’s Bakery-Soft at Home
Gathering the right ingredients is the first step to creating this delightful Italian Herb & Cheese Bread. Here’s what you’ll need:
- All-purpose flour: The backbone of your bread, providing structure and softness.
- Sugar: Just a touch to help activate the yeast and enhance the flavor.
- Salt: Essential for seasoning and balancing the flavors in the bread.
- Dried Italian herbs: A fragrant mix that brings a taste of Italy to your kitchen.
- Active dry yeast: The magic ingredient that makes your bread rise and become fluffy.
- Warm water: Activates the yeast and helps bring the dough together.
- Shredded mozzarella cheese: Adds a gooey, cheesy goodness that melts beautifully.
- Olive oil: Provides moisture and a rich flavor, making the bread tender.
For an extra kick, consider adding garlic powder or grated Parmesan cheese to the dough. These optional ingredients can elevate the flavor profile even more!
Don’t worry about the exact measurements; you can find them at the bottom of the article, ready for printing. Happy baking!
How to Make Italian Herb & Cheese Bread That’s Bakery-Soft at Home
Step 1: Prepare the Yeast Mixture
Start by combining warm water, sugar, and active dry yeast in a large bowl. The water should feel warm to the touch, like a cozy hug. Stir gently to dissolve the sugar and yeast. Let this mixture sit for about 5 minutes. You’ll know it’s ready when it becomes frothy and bubbly, like a little yeast party! This step is crucial, as it activates the yeast, ensuring your bread rises beautifully.
Step 2: Combine Dry Ingredients
Once your yeast mixture is frothy, it’s time to add the dry ingredients. In the same bowl, add all-purpose flour, salt, dried Italian herbs, and olive oil. Mix everything together until a shaggy dough forms. It’s like bringing together a team of flavors! Don’t worry if it looks a bit messy; that’s perfectly normal. This mixture will soon transform into a soft, inviting dough.
Step 3: Knead the Dough
Now comes the fun part—kneading! Lightly flour your work surface and turn the dough out onto it. Knead the dough for about 10 minutes, pushing and folding it until it’s smooth and elastic. Think of it as giving your dough a little workout! If it sticks to your hands, sprinkle a bit more flour. This step develops the gluten, which gives your bread that delightful chewy texture.
Step 4: Incorporate Cheese
Once your dough is kneaded to perfection, it’s time to add the star ingredient—shredded mozzarella cheese! Gently fold the cheese into the dough, ensuring it’s evenly distributed. It’s like tucking in a cozy blanket! The cheese will melt beautifully during baking, creating pockets of gooey goodness. Don’t rush this step; take your time to mix it in well.
Step 5: First Rise
Place your dough in a greased bowl, turning it once to coat all sides. Cover the bowl with a clean kitchen towel or plastic wrap. Now, let it rise in a warm spot for about 1 hour, or until it doubles in size. This is the dough’s time to shine! You can use this time to tidy up your kitchen or sip a cup of tea. Just imagine the aroma that will soon fill your home!
Step 6: Shape the Loaf
After the dough has risen, it’s time to shape it. Gently punch down the dough to release the air. Turn it out onto a floured surface and shape it into a loaf. It should feel soft and pliable, like a fluffy cloud. Place the shaped loaf into a greased loaf pan, ensuring it fits snugly. This is where it will rise again, so give it a little love!
Step 7: Second Rise
Cover the loaf with a towel and let it rise for another 30 minutes. This second rise is essential for achieving that bakery-soft texture. While you wait, preheat your oven to 375°F (190°C). The anticipation builds as you imagine the delicious bread that’s about to come out of your oven. It’s like waiting for a surprise party!
Step 8: Bake the Bread
Once the loaf has risen, it’s time to bake! Place the loaf in the preheated oven and bake for 25-30 minutes. You’ll know it’s done when it’s golden brown and sounds hollow when tapped. The aroma will be irresistible! Let it cool in the pan for a few minutes before transferring it to a wire rack. Patience is key here; let it cool before slicing to avoid a cheesy mess!
Tips for Success
- Use warm water, not hot, to activate the yeast without killing it.
- Don’t skip the kneading; it’s essential for a soft texture.
- For a golden crust, brush the loaf with olive oil before baking.
- Experiment with different cheeses like cheddar or feta for unique flavors.
- Let the bread cool completely before slicing for cleaner cuts.
Equipment Needed
- Large mixing bowl: Any bowl will do, but a glass or stainless steel one is ideal.
- Floured surface: A clean countertop or cutting board works perfectly.
- Loaf pan: If you don’t have one, a round cake pan can be a great alternative.
- Kitchen towel: A clean dish towel or plastic wrap for covering the dough.
- Wire rack: If you don’t have one, a plate can work for cooling the bread.
Variations of Italian Herb & Cheese Bread That’s Bakery-Soft at Home
- Garlic Herb Bread: Add minced garlic or garlic powder to the dough for a robust flavor.
- Cheesy Spinach Bread: Fold in fresh spinach along with the mozzarella for a nutritious twist.
- Sun-Dried Tomato and Basil: Incorporate chopped sun-dried tomatoes and fresh basil for a Mediterranean flair.
- Gluten-Free Option: Substitute all-purpose flour with a gluten-free flour blend for a gluten-free version.
- Whole Wheat Variation: Use whole wheat flour instead of all-purpose for a heartier, healthier bread.
Serving Suggestions for Italian Herb & Cheese Bread That’s Bakery-Soft at Home
- Serve warm with a side of marinara sauce for dipping.
- Pair with a fresh garden salad drizzled with balsamic vinaigrette.
- Enjoy alongside a hearty soup, like minestrone or tomato basil.
- Slice and toast for a delicious breakfast with butter and jam.
- Present on a rustic wooden board for a charming touch.
FAQs about Italian Herb & Cheese Bread That’s Bakery-Soft at Home
Can I use fresh herbs instead of dried?
Absolutely! Fresh herbs can add a vibrant flavor to your Italian Herb & Cheese Bread. Just remember to use about three times the amount of fresh herbs compared to dried, as they are less concentrated.
What can I do if my dough doesn’t rise?
If your dough doesn’t rise, it could be due to inactive yeast. Make sure your water is warm, not hot, and check the expiration date on your yeast. If it’s still good, give it another try!
How should I store leftover bread?
Store any leftover Italian Herb & Cheese Bread in an airtight container at room temperature for up to three days. For longer storage, freeze it! Just thaw before serving for that fresh-baked taste.
Can I make this bread ahead of time?
Yes! You can prepare the dough and let it rise, then shape it and refrigerate it overnight. Just let it come to room temperature before the second rise and baking. It’s a great time-saver!
What can I serve with this bread?
This bread pairs wonderfully with marinara sauce, soups, or a fresh salad. You can also enjoy it toasted with butter or jam for breakfast. The possibilities are endless!
Final Thoughts
Making Italian Herb & Cheese Bread That’s Bakery-Soft at Home is more than just a cooking project; it’s a heartwarming experience. The joy of kneading the dough, watching it rise, and finally pulling that golden loaf from the oven fills your kitchen with love and warmth. Each slice is a reminder of the simple pleasures in life, perfect for sharing with family or savoring alone with a cup of tea. This recipe not only satisfies your cravings but also creates cherished memories. So roll up your sleeves, and let’s bake some happiness together!

Italian Herb & Cheese Bread That’s Bakery-Soft at Home!
- Total Time: 1 hour 45 minutes
- Yield: 1 loaf 1x
- Diet: Vegetarian
Description
A deliciously soft and flavorful Italian herb and cheese bread that you can easily make at home, reminiscent of bakery-fresh bread.
Ingredients
- 4 cups all-purpose flour
- 1 tablespoon sugar
- 2 teaspoons salt
- 1 tablespoon dried Italian herbs
- 1 packet (2 1/4 teaspoons) active dry yeast
- 1 1/2 cups warm water
- 1 cup shredded mozzarella cheese
- 2 tablespoons olive oil
Instructions
- In a large bowl, combine warm water, sugar, and yeast. Let it sit for about 5 minutes until frothy.
- Add flour, salt, Italian herbs, and olive oil to the yeast mixture. Mix until a dough forms.
- Knead the dough on a floured surface for about 10 minutes until smooth and elastic.
- Incorporate the shredded mozzarella cheese into the dough.
- Place the dough in a greased bowl, cover it, and let it rise in a warm place for about 1 hour or until doubled in size.
- Punch down the dough and shape it into a loaf. Place it in a greased loaf pan.
- Cover and let it rise again for about 30 minutes.
- Preheat the oven to 375°F (190°C).
- Bake the bread for 25-30 minutes or until golden brown and sounds hollow when tapped.
- Let it cool before slicing and serving.
Notes
- For extra flavor, you can add garlic powder or grated Parmesan cheese to the dough.
- Store leftover bread in an airtight container at room temperature for up to 3 days.
- This bread can be frozen for up to 3 months; just thaw before serving.
- Prep Time: 15 minutes
- Cook Time: 30 minutes
- Category: Bread
- Method: Baking
- Cuisine: Italian
Nutrition
- Serving Size: 1 slice
- Calories: 150
- Sugar: 1g
- Sodium: 200mg
- Fat: 3g
- Saturated Fat: 1g
- Unsaturated Fat: 2g
- Trans Fat: 0g
- Carbohydrates: 28g
- Fiber: 1g
- Protein: 5g
- Cholesterol: 5mg
