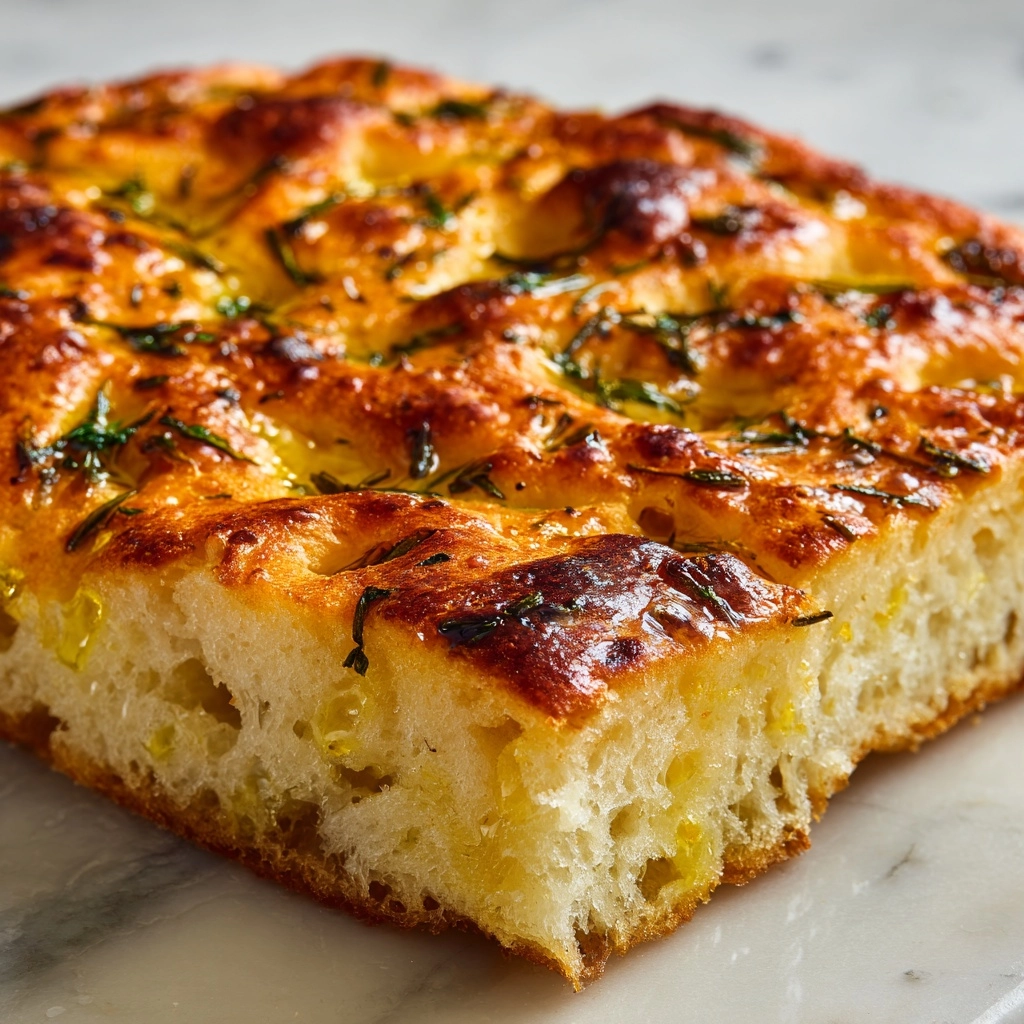
Introduction to Crispy-Edged Homemade Focaccia with Olive Oil & Herbs
Welcome to the world of homemade bread! If you’re like me, the thought of baking can feel daunting, especially on a busy day. But let me tell you, this Crispy-Edged Homemade Focaccia with Olive Oil & Herbs is a game changer. It’s not just easy; it’s a delightful way to impress your loved ones without spending hours in the kitchen. Imagine the aroma of fresh bread wafting through your home, making everyone feel cozy and loved. This recipe is perfect for those moments when you want to create something special, yet simple.
Why You’ll Love This Crispy-Edged Homemade Focaccia with Olive Oil & Herbs
This Crispy-Edged Homemade Focaccia with Olive Oil & Herbs is a true delight for busy moms and professionals alike. It’s incredibly easy to whip up, taking just a few simple steps. The taste? Oh, it’s heavenly! With its golden, crispy edges and fragrant herbs, it’s a crowd-pleaser. Plus, it’s versatile enough to pair with any meal or stand alone as a snack. You’ll find yourself making it again and again!
Ingredients for Crispy-Edged Homemade Focaccia with Olive Oil & Herbs
Gathering the right ingredients is the first step to creating your Crispy-Edged Homemade Focaccia with Olive Oil & Herbs. Here’s what you’ll need:
- All-purpose flour: This is the backbone of your focaccia, giving it that lovely structure.
- Salt: Essential for flavor, it enhances the taste of the bread.
- Sugar: Just a touch helps activate the yeast and adds a hint of sweetness.
- Active dry yeast: This little powerhouse makes your dough rise, creating that airy texture.
- Warm water: It’s crucial for activating the yeast. Make sure it’s not too hot or too cold!
- Olive oil: A generous drizzle not only adds flavor but also helps achieve those crispy edges.
- Fresh herbs: Rosemary, thyme, or oregano work beautifully, infusing the bread with aromatic goodness.
- Coarse sea salt: This is for topping, giving your focaccia that extra crunch and flavor burst.
For those looking to experiment, consider adding garlic or other spices to the olive oil for an extra kick. You can find all the exact measurements at the bottom of the article, ready for printing. Happy baking!
How to Make Crispy-Edged Homemade Focaccia with Olive Oil & Herbs
Step 1: Prepare the Yeast Mixture
Start by combining warm water, sugar, and active dry yeast in a large bowl. The water should feel like a warm hug, not too hot! Stir gently and let it sit for about 5 minutes. This waiting game is crucial; you want to see it become frothy and bubbly. That’s the yeast waking up, ready to work its magic. Trust me, this step is the foundation of your Crispy-Edged Homemade Focaccia with Olive Oil & Herbs.
Step 2: Mix the Dough
Once your yeast mixture is frothy, it’s time to add the all-purpose flour and salt. Pour them in and mix until a dough starts to form. I like to use a wooden spoon for this part, but your hands work just as well! The dough will be a bit sticky at first, but don’t worry. Just keep mixing until everything is combined, and you can see the dough starting to come together. This is where the fun begins!
Step 3: Knead the Dough
Now comes the workout! Transfer your dough to a floured surface and knead it for about 10 minutes. Use the heel of your hand to push the dough away, then fold it back over itself. Repeat this motion, adding a sprinkle of flour if it gets too sticky. You want the dough to become smooth and elastic. Think of it as giving your dough a little love; it will reward you with that perfect texture!
Step 4: Let the Dough Rise
After kneading, place your dough in a greased bowl and cover it with a clean kitchen towel. Find a warm spot in your kitchen and let it rise for 1-2 hours. You’ll know it’s ready when it has doubled in size. This is the dough’s time to shine! It’s like watching a balloon inflate, and the anticipation of that fluffy focaccia is so worth it.
Step 5: Preheat the Oven
While your dough is rising, preheat your oven to 425°F (220°C). This step is essential for achieving those crispy edges. A hot oven will help the focaccia bake evenly and give it that golden-brown color we all crave. So, don’t skip this part!
Step 6: Shape the Dough
Once your dough has risen, it’s time to transfer it to a greased baking sheet. Gently stretch it out to fit the pan, using your fingers to coax it into shape. Don’t worry if it doesn’t look perfect; rustic is the name of the game! The dough should be about 1 inch thick. This thickness will ensure those delightful crispy edges we’re after.
Step 7: Add Olive Oil and Herbs
Now for the fun part! Drizzle a generous amount of olive oil over the top of your dough. Use your fingers to create dimples all over the surface; this is where the oil will pool, creating flavor pockets. Next, sprinkle your choice of fresh herbs and coarse sea salt on top. The aroma will be heavenly, and you’ll be tempted to dive right in!
Step 8: Bake the Focaccia
Place your baking sheet in the preheated oven and bake for 20-25 minutes. Keep an eye on it; you want it to turn golden brown and crispy. When it’s done, the edges will be beautifully crisp, and the center will be soft and fluffy. You’ll know it’s ready when your kitchen smells like a little slice of Italy!
Step 9: Cool and Serve
Once baked, let your focaccia cool slightly on a wire rack. This will help maintain its crispy edges. After a few minutes, slice it up and serve warm. It’s perfect on its own or with a side of olive oil for dipping. Enjoy every bite!
Tips for Success
- Use room temperature ingredients for better mixing.
- Don’t rush the rising time; it’s key for fluffy focaccia.
- Experiment with different herbs for unique flavors.
- For extra crunch, add a sprinkle of coarse sea salt before baking.
- Store leftovers in an airtight container to keep them fresh.
Equipment Needed
- Large mixing bowl: Any bowl will do, but a glass or stainless steel one is ideal.
- Wooden spoon: A sturdy spoon for mixing; a spatula works too!
- Floured surface: A clean countertop or cutting board for kneading.
- Baking sheet: A rimmed baking sheet is perfect for catching any oil.
- Kitchen towel: To cover the dough while it rises; a plastic wrap works as well.
Variations
- Garlic Infusion: Add minced garlic to the olive oil for a robust flavor that pairs beautifully with the herbs.
- Cheesy Delight: Sprinkle grated Parmesan or mozzarella on top before baking for a cheesy crust.
- Olive Medley: Top with a mix of olives for a Mediterranean twist that adds a briny kick.
- Sun-Dried Tomatoes: Incorporate chopped sun-dried tomatoes into the dough for a burst of flavor.
- Gluten-Free Option: Substitute all-purpose flour with a gluten-free flour blend for a gluten-free focaccia.
Serving Suggestions
- Pair your focaccia with a fresh garden salad for a light meal.
- Serve it alongside a warm bowl of soup, like minestrone or tomato basil.
- Drizzle with balsamic glaze for an elegant touch.
- Enjoy with a glass of red wine for a cozy evening.
- Present it on a wooden board for a rustic look.
FAQs about Crispy-Edged Homemade Focaccia with Olive Oil & Herbs
Can I use whole wheat flour instead of all-purpose flour?
Absolutely! Whole wheat flour will give your Crispy-Edged Homemade Focaccia with Olive Oil & Herbs a nuttier flavor and denser texture. Just keep in mind that you may need to adjust the water slightly, as whole wheat flour absorbs more moisture.
How do I store leftover focaccia?
To keep your focaccia fresh, store it in an airtight container at room temperature for up to three days. If you want to keep it longer, consider freezing it. Just wrap it tightly in plastic wrap and then in aluminum foil before placing it in the freezer.
Can I make the dough ahead of time?
Yes! You can prepare the dough and let it rise, then punch it down and refrigerate it for up to 24 hours. When you’re ready to bake, just let it come to room temperature before shaping and baking. This is a great time-saver for busy days!
What can I serve with focaccia?
Your Crispy-Edged Homemade Focaccia with Olive Oil & Herbs pairs wonderfully with a variety of dishes. Consider serving it with soups, salads, or even as a base for sandwiches. It’s also delightful on its own, dipped in olive oil or balsamic vinegar.
Can I add toppings to my focaccia?
Definitely! Feel free to get creative with toppings. You can add sliced olives, cherry tomatoes, or even caramelized onions before baking. Just remember to adjust the baking time if you add extra moisture-rich toppings!
Final Thoughts
Baking this Crispy-Edged Homemade Focaccia with Olive Oil & Herbs is more than just a recipe; it’s an experience that fills your home with warmth and love. The joy of watching the dough rise, the aroma of herbs mingling with olive oil, and the satisfaction of pulling a golden loaf from the oven are truly rewarding. Whether you’re sharing it with family or enjoying a quiet moment with a slice, this focaccia brings a little slice of Italy to your kitchen. So roll up your sleeves, embrace the process, and let the magic of homemade bread brighten your day!

Crispy-Edged Homemade Focaccia with Olive Oil & Herbs Awaits You!
- Total Time: 2 hours 40 minutes
- Yield: 12 servings 1x
- Diet: Vegetarian
Description
A delicious and easy recipe for homemade focaccia bread with crispy edges, infused with olive oil and herbs.
Ingredients
- 4 cups all-purpose flour
- 2 teaspoons salt
- 1 teaspoon sugar
- 1 packet (2 1/4 teaspoons) active dry yeast
- 1 3/4 cups warm water
- 1/4 cup olive oil
- Fresh herbs (rosemary, thyme, or oregano)
- Coarse sea salt for topping
Instructions
- In a large bowl, combine warm water, sugar, and yeast. Let it sit for about 5 minutes until frothy.
- Add flour and salt to the yeast mixture and mix until a dough forms.
- Knead the dough on a floured surface for about 10 minutes until smooth.
- Place the dough in a greased bowl, cover, and let it rise in a warm place for 1-2 hours until doubled in size.
- Preheat the oven to 425°F (220°C).
- Transfer the dough to a greased baking sheet and stretch it out to fit the pan.
- Drizzle olive oil over the top and use your fingers to create dimples in the dough.
- Sprinkle fresh herbs and coarse sea salt on top.
- Bake for 20-25 minutes until golden brown and crispy.
- Let it cool slightly before slicing and serving.
Notes
- For extra flavor, you can add garlic or other spices to the olive oil.
- Focaccia can be stored in an airtight container for up to 3 days.
- This recipe can be easily doubled for a larger batch.
- Prep Time: 15 minutes
- Cook Time: 25 minutes
- Category: Bread
- Method: Baking
- Cuisine: Italian
Nutrition
- Serving Size: 1 slice
- Calories: 200
- Sugar: 1g
- Sodium: 300mg
- Fat: 8g
- Saturated Fat: 1g
- Unsaturated Fat: 6g
- Trans Fat: 0g
- Carbohydrates: 30g
- Fiber: 1g
- Protein: 5g
- Cholesterol: 0mg