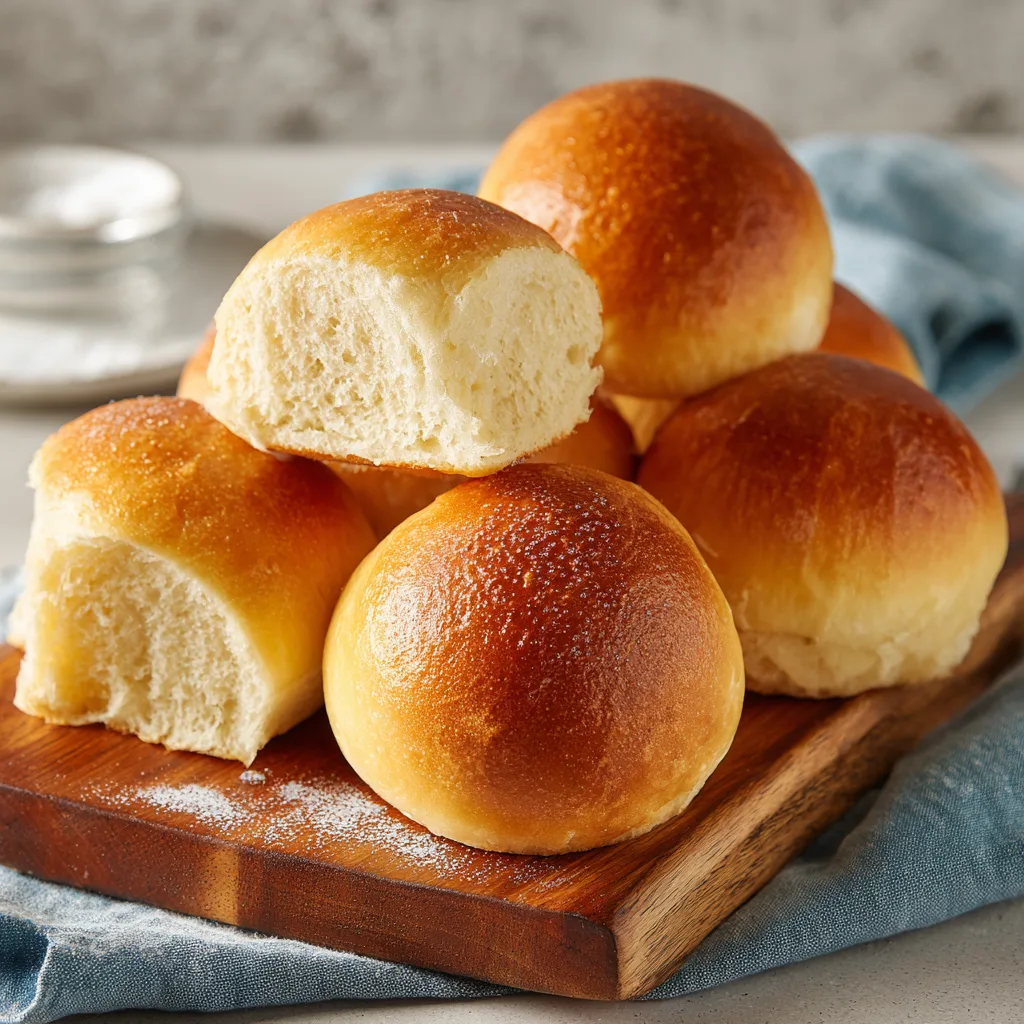
Introduction to Waterford Blaas: How to Make Authentic Pillowy Irish Rolls
Welcome to the delightful world of Waterford Blaas! These traditional Irish rolls are not just any bread; they’re soft, pillowy treasures that can elevate any meal. As a busy mom, I know how precious time is, and this recipe is a quick solution for those hectic days when you want to impress your loved ones without spending hours in the kitchen. Imagine the joy on their faces as they sink their teeth into these warm, fluffy rolls, slathered with butter. Trust me, once you try making Waterford Blaas, you’ll never look back!
Why You’ll Love This Waterford Blaas
Waterford Blaas are a dream come true for busy cooks like us! They’re incredibly easy to make, requiring just a handful of ingredients you probably already have at home. Plus, they bake up in no time, filling your kitchen with a warm, inviting aroma. The taste? Oh, it’s like a hug in bread form! Perfect for sandwiches, or simply enjoyed with butter, these rolls will quickly become a family favorite.
Ingredients for Waterford Blaas
To create these delightful Waterford Blaas, you’ll need a few simple ingredients that come together to form the magic of these rolls. Here’s what you’ll need:
- Strong white flour: This is the backbone of your rolls, giving them that lovely structure and chewiness.
- Salt: A pinch of salt enhances the flavor, balancing the sweetness and making each bite more delicious.
- Sugar: Just a touch of sugar helps to activate the yeast and adds a hint of sweetness to the rolls.
- Instant yeast: This is your secret weapon for fluffy rolls! It works quickly, so you can enjoy fresh bread in no time.
- Warm water: The warm water helps to activate the yeast, creating that perfect rise. Make sure it’s not too hot, or it might kill the yeast!
- Unsalted butter: Melted butter adds richness and flavor, making your rolls irresistibly soft.
- Extra flour: You’ll need this for dusting your work surface, ensuring the dough doesn’t stick.
For those looking to experiment, consider substituting some of the water with milk for a richer flavor. And remember, while these rolls are best enjoyed fresh, they can be frozen for later use. You’ll find the exact quantities for each ingredient at the bottom of the article, ready for printing!
How to Make Waterford Blaas
Step 1: Prepare the Dry Ingredients
Let’s kick things off by mixing the dry ingredients. In a large bowl, combine the strong white flour, salt, sugar, and instant yeast. I love using a whisk for this step; it helps to aerate the flour and evenly distribute the yeast. Make sure there are no lumps! This mixture is the foundation of your Waterford Blaas, so take a moment to enjoy the aroma of the flour. It’s like a warm hug waiting to happen!
Step 2: Combine Wet Ingredients
Now, it’s time to bring the wet ingredients into the mix. Gently warm your water until it’s just warm to the touch—think cozy bath, not boiling hot! Pour this warm water into the dry ingredients, followed by the melted unsalted butter. As you add these, you’ll notice the flour starting to clump together. This is where the magic begins! Stir everything together until it forms a shaggy dough. It’s okay if it looks a bit messy; that’s part of the fun!
Step 3: Knead the Dough
Once your dough is formed, it’s time to get your hands a little floury! Transfer the dough onto a floured surface and knead it for about 10 minutes. I like to fold and push the dough, turning it as I go. You’ll know it’s ready when it’s smooth and elastic. This step is crucial for developing that pillowy texture we all love in Waterford Blaas. Plus, it’s a great way to relieve some stress after a long day!
Step 4: First Rise
After kneading, place your dough in a lightly oiled bowl. Cover it with a clean cloth and let it rise for about an hour. This is the time to grab a cup of tea or coffee and relax! You want the dough to double in size, which means the yeast is doing its job. If you’re feeling adventurous, you can even place it in a warm spot, like near a sunny window. Just don’t forget about it!
Step 5: Shape the Rolls
Once your dough has risen, it’s time to shape those rolls! Gently punch down the dough to release the air. Then, divide it into 12 equal pieces. I like to use a bench scraper for this—it makes cutting so much easier! Shape each piece into a ball by tucking the edges underneath. Place them on a baking tray lined with parchment paper, giving them a little space to breathe. They’ll puff up beautifully in the next rise!
Step 6: Second Rise
Cover the shaped rolls with a clean cloth and let them rise for another 30 minutes. This second rise is essential for achieving that light, airy texture. While you wait, you can preheat your oven to 220°C (428°F). The anticipation builds as you imagine the delicious aroma filling your kitchen. Trust me, it’s worth the wait!
Step 7: Bake the Rolls
Now comes the exciting part—baking! Carefully place your tray in the preheated oven and bake the rolls for 15-20 minutes. Keep an eye on them; you want them to turn a lovely golden brown. The smell will be heavenly, and you might find it hard to resist peeking! Once they’re done, take them out and let them cool for a moment. Your Waterford Blaas are almost ready to shine!
Step 8: Cool and Serve
After baking, remove the rolls from the oven and let them cool on a wire rack. This step is crucial; it allows the steam to escape, keeping the rolls from getting soggy. Once they’re cool enough to handle, serve them warm with a generous pat of butter. You can also enjoy them with jam or as a side to your favorite soup. Trust me, these Waterford Blaas will steal the show!
Tips for Success
- Always use warm water, not hot, to activate the yeast properly.
- Don’t rush the rising times; they’re key for fluffy rolls.
- For extra flavor, try adding herbs or spices to the dough.
- Keep your work surface lightly floured to prevent sticking.
- Store leftover rolls in an airtight container to maintain freshness.
Equipment Needed
- Large mixing bowl: A sturdy bowl for combining ingredients; any large bowl will do.
- Whisk: Great for mixing dry ingredients; a fork works in a pinch!
- Bench scraper: Perfect for cutting dough; a sharp knife can also work.
- Baking tray: A flat tray for baking; a cookie sheet is a good alternative.
- Parchment paper: Helps prevent sticking; greasing the tray is another option.
Variations of Waterford Blaas
- Herb-Infused Blaas: Add fresh herbs like rosemary or thyme to the dough for a fragrant twist.
- Cheesy Rolls: Incorporate shredded cheese, such as cheddar or mozzarella, into the dough for a savory flavor.
- Whole Wheat Option: Substitute half of the strong white flour with whole wheat flour for a nuttier taste and added fiber.
- Sweet Blaas: Mix in dried fruits like raisins or cranberries for a sweet version, perfect for breakfast.
- Gluten-Free Blaas: Use a gluten-free flour blend to make these rolls suitable for those with gluten sensitivities.
Serving Suggestions for Waterford Blaas
- Serve warm with a generous spread of butter for a classic treat.
- Pair with hearty soups like Irish stew or vegetable chowder for a comforting meal.
- Enjoy alongside a fresh salad for a light lunch option.
- Present them in a rustic basket lined with a cloth for a charming touch.
- Drizzle with honey or jam for a delightful breakfast option.
FAQs about Waterford Blaas
What makes Waterford Blaas different from other rolls?
Waterford Blaas are unique due to their soft, pillowy texture and slightly sweet flavor. Unlike other rolls, they are traditionally steamed, giving them a distinct taste and lightness that’s hard to resist. They’re perfect for sandwiches or simply enjoyed with butter!
Can I make Waterford Blaas ahead of time?
Absolutely! You can prepare the dough in advance and let it rise in the fridge overnight. Just remember to bring it back to room temperature before shaping and baking. This way, you can enjoy fresh rolls with minimal effort on busy days!
How should I store leftover Waterford Blaas?
To keep your Waterford Blaas fresh, store them in an airtight container at room temperature for up to three days. If you want to keep them longer, freeze them! Just make sure to wrap them tightly in plastic wrap and place them in a freezer bag.
Can I use whole wheat flour for Waterford Blaas?
Yes, you can! Substituting half of the strong white flour with whole wheat flour adds a nutty flavor and extra fiber. Just keep in mind that the texture may be slightly denser, but still delicious!
What can I serve with Waterford Blaas?
These rolls are incredibly versatile! Serve them warm with butter, alongside soups, or as a base for sandwiches. You can also enjoy them with jam or honey for a sweet breakfast treat. The possibilities are endless!
Final Thoughts
Making Waterford Blaas is more than just baking; it’s about creating memories in the kitchen. The joy of watching the dough rise, the aroma wafting through your home, and the smiles on your loved ones’ faces as they enjoy these pillowy rolls are priceless. Whether you’re serving them warm with butter or using them for sandwiches, these rolls bring a touch of Ireland to your table. So, roll up your sleeves, embrace the process, and let the magic of Waterford Blaas fill your home with warmth and love. Happy baking!
Print
Waterford Blaas: Discover the Secret to Pillowy Irish Rolls!
- Total Time: 1 hour 50 minutes
- Yield: 12 rolls 1x
- Diet: Vegetarian
Description
Waterford Blaas are traditional Irish rolls known for their soft, pillowy texture and unique flavor, perfect for sandwiches or enjoying with butter.
Ingredients
- 500g strong white flour
- 10g salt
- 10g sugar
- 10g instant yeast
- 300ml warm water
- 30g unsalted butter, melted
- Extra flour for dusting
Instructions
- In a large bowl, mix the flour, salt, sugar, and yeast together.
- Add the warm water and melted butter to the dry ingredients.
- Mix until a dough forms, then knead on a floured surface for about 10 minutes until smooth.
- Place the dough in a lightly oiled bowl, cover, and let it rise for 1 hour or until doubled in size.
- Punch down the dough and divide it into 12 equal pieces.
- Shape each piece into a ball and place them on a baking tray lined with parchment paper.
- Cover the rolls with a clean cloth and let them rise for another 30 minutes.
- Preheat the oven to 220°C (428°F).
- Bake the rolls for 15-20 minutes until golden brown.
- Remove from the oven and let cool on a wire rack before serving.
Notes
- For a richer flavor, you can substitute some of the water with milk.
- These rolls are best served fresh but can be frozen for later use.
- Serve with butter, jam, or as a side to soups and stews.
- Prep Time: 1 hour 30 minutes
- Cook Time: 20 minutes
- Category: Baking
- Method: Baking
- Cuisine: Irish
Nutrition
- Serving Size: 1 roll
- Calories: 150
- Sugar: 1g
- Sodium: 200mg
- Fat: 4g
- Saturated Fat: 2g
- Unsaturated Fat: 1g
- Trans Fat: 0g
- Carbohydrates: 25g
- Fiber: 1g
- Protein: 5g
- Cholesterol: 10mg