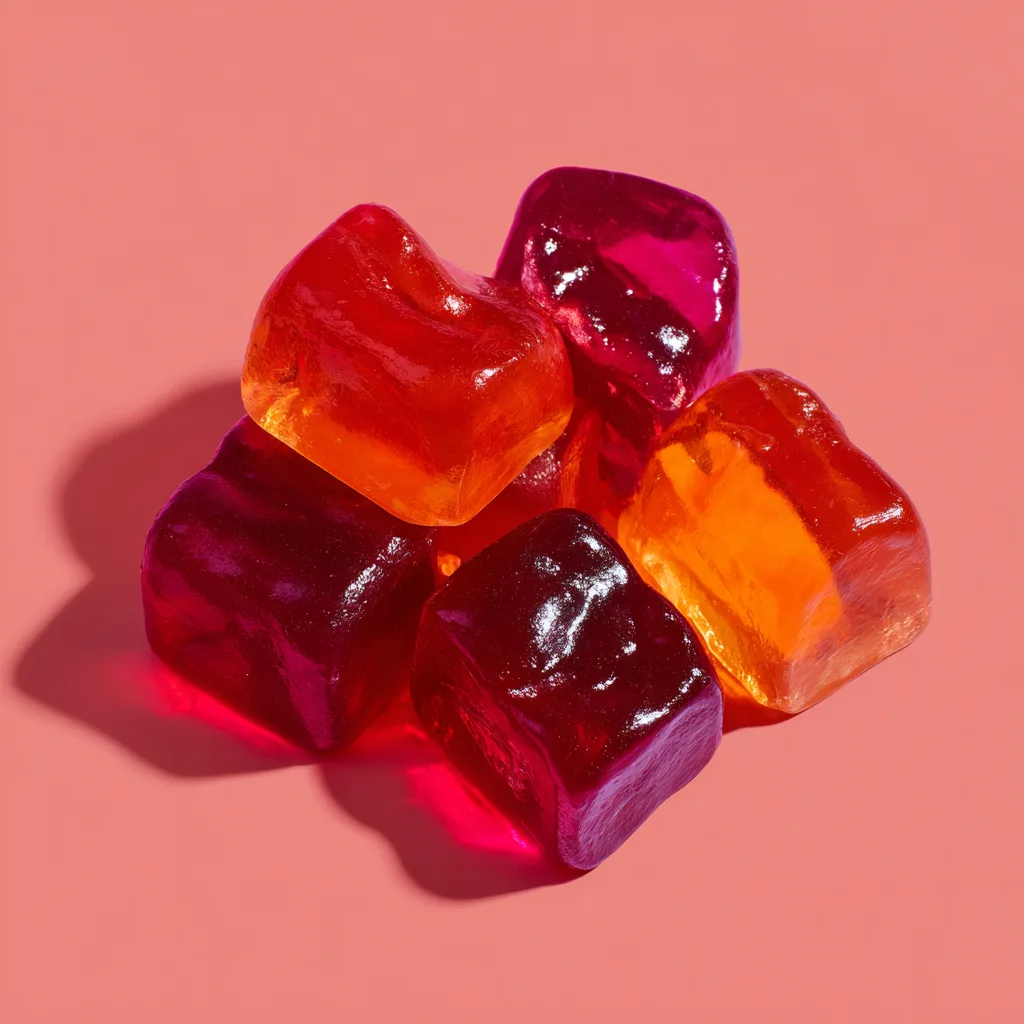
Introduction to Homemade Probiotic Gummies: The Secret to Better Digestion and Glowing Skin
As a busy mom, I know how challenging it can be to juggle family, work, and self-care. That’s why I’m excited to share my recipe for Homemade Probiotic Gummies: The Secret to Better Digestion and Glowing Skin. These little gems are not only delicious but also a fun way to support your gut health and enhance your natural glow. Imagine treating yourself and your loved ones to a healthy snack that’s quick to make and even quicker to disappear! Let’s dive into this delightful culinary adventure together.
Why You’ll Love This Homemade Probiotic Gummies: The Secret to Better Digestion and Glowing Skin
These Homemade Probiotic Gummies are a game-changer for busy lifestyles. They’re incredibly easy to whip up, taking just a few minutes of your time. Plus, they taste amazing! You can customize the flavors to suit your family’s preferences, making them a hit with everyone. With each gummy, you’re not just treating your taste buds; you’re also nurturing your gut and skin health. What’s not to love?
Ingredients for Homemade Probiotic Gummies: The Secret to Better Digestion and Glowing Skin
Gathering the right ingredients is the first step in our gummy-making adventure! Here’s what you’ll need:
- Fruit Juice: Choose your favorite juice, like apple, orange, or berry. Freshly squeezed juice adds a vibrant flavor.
- Honey or Maple Syrup: This natural sweetener enhances the taste while providing a touch of health. Maple syrup is a great vegan option!
- Gelatin Powder: This ingredient gives our gummies their chewy texture. If you prefer a plant-based alternative, look for agar-agar.
- Probiotic Powder or Capsules: The star of the show! This is what makes our gummies a powerhouse for digestion and skin health. Ensure it’s heat-stable for best results.
- Lemon Juice (Optional): A splash of lemon juice brightens the flavor and adds a zesty kick. It’s a delightful addition if you enjoy a tangy taste.
For exact measurements, check the bottom of the article where you can find everything listed for easy printing. Now, let’s get ready to create these delicious gummies!
How to Make Homemade Probiotic Gummies: The Secret to Better Digestion and Glowing Skin
Now that we have our ingredients ready, let’s jump into the fun part—making these delightful Homemade Probiotic Gummies! Follow these simple steps, and you’ll have a tasty treat that supports your digestion and skin health in no time.
Step 1: Heat the Fruit Juice
Start by pouring your chosen fruit juice into a small saucepan. Heat it over low heat, stirring gently. You want it warm, not boiling. This step helps to dissolve the sweetener and gelatin later on. The aroma of the juice will fill your kitchen, making it feel like a cozy haven!
Step 2: Add Sweetener
Once the juice is warm, add in your honey or maple syrup. Stir until it’s fully dissolved. This sweet touch not only enhances the flavor but also adds a hint of natural goodness. If you’re using maple syrup, you’ll love the rich, earthy taste it brings!
Step 3: Incorporate Gelatin
Next, sprinkle the gelatin powder over the warm juice mixture. Whisk it in quickly until it’s completely dissolved. This is where the magic happens! The gelatin will give your gummies that perfect chewy texture. If you’re using agar-agar, follow the package instructions for the best results.
Step 4: Cool and Add Probiotics
Remove the saucepan from heat and let the mixture cool slightly. This is important because you don’t want to kill the probiotics. Once it’s just warm, stir in the probiotic powder or capsules. This step is crucial for ensuring your gummies are packed with gut-friendly goodness!
Step 5: Pour into Molds
Now comes the fun part! Carefully pour the mixture into your gummy molds. If you don’t have molds, you can use a small baking dish and cut them into squares later. Just make sure to work quickly, as the mixture will start to set as it cools.
Step 6: Refrigerate and Set
Place the filled molds in the refrigerator and let them set for at least 2 hours. This waiting game is worth it! You’ll be rewarded with delicious, healthy gummies that are perfect for snacking. Just imagine popping one in your mouth and feeling that burst of flavor!
Step 7: Store Your Gummies
Once your gummies are set, gently pop them out of the molds. Store them in an airtight container in the fridge. They’ll last up to two weeks, but I doubt they’ll stick around that long! Enjoy these Homemade Probiotic Gummies as a delightful snack that supports your digestion and gives your skin that lovely glow.
Tips for Success
- Use high-quality fruit juice for the best flavor and nutrients.
- Experiment with different sweeteners to find your favorite taste.
- Make sure your probiotic powder is heat-stable to retain its benefits.
- Keep your molds lightly greased for easier removal.
- Try adding a pinch of salt to enhance the sweetness.
Equipment Needed for Homemade Probiotic Gummies: The Secret to Better Digestion and Glowing Skin
- Small Saucepan: A medium-sized pot works too if you don’t have a small one.
- Whisk: A fork can be a handy alternative for mixing.
- Gummy Molds: Ice cube trays or silicone baking molds can substitute.
- Airtight Container: Any container with a lid will keep your gummies fresh.
Variations of Homemade Probiotic Gummies: The Secret to Better Digestion and Glowing Skin
- Berry Blast: Use a mix of berry juices like raspberry, blueberry, and strawberry for a fruity explosion.
- Tropical Twist: Try pineapple or mango juice for a sunny, tropical flavor that transports you to the beach.
- Green Goodness: Add a splash of spinach or kale juice for a nutrient boost and a vibrant green color.
- Herbal Infusion: Incorporate herbal teas like chamomile or peppermint for a soothing twist.
- Vegan Delight: Substitute gelatin with agar-agar or pectin for a completely plant-based option.
- Spicy Citrus: Add a hint of ginger or cayenne pepper for a zesty kick that warms the soul.
Serving Suggestions for Homemade Probiotic Gummies: The Secret to Better Digestion and Glowing Skin
- Pair your gummies with a refreshing herbal tea for a soothing afternoon snack.
- Serve them alongside a fruit platter for a colorful and healthy dessert option.
- Present your gummies in a cute jar with a ribbon for a delightful gift.
- Enjoy them with a handful of nuts for a balanced snack on the go.
- Mix them into yogurt for a fun and nutritious breakfast treat.
FAQs about Homemade Probiotic Gummies: The Secret to Better Digestion and Glowing Skin
Can I use any type of fruit juice for these gummies?
Absolutely! You can use any fruit juice you love. Just remember that freshly squeezed juice will give you the best flavor and nutrients. Experiment with different juices to find your favorite combination!
How long do these gummies last in the fridge?
Your Homemade Probiotic Gummies can last up to two weeks in the refrigerator. Just make sure to store them in an airtight container to keep them fresh and tasty!
Are these gummies suitable for kids?
Yes! These gummies are a fun and healthy snack for kids. They’ll love the fruity flavors, and you’ll love knowing they’re getting a boost for their digestion and skin health.
Can I make these gummies vegan?
Definitely! Simply substitute the gelatin with agar-agar or pectin. This way, you can enjoy the same delicious gummies while keeping them plant-based!
What if I don’t have gummy molds?
No worries! You can use ice cube trays or a small baking dish instead. Just pour the mixture in, let it set, and cut them into squares once firm. It’s all about getting creative!
Final Thoughts on Homemade Probiotic Gummies: The Secret to Better Digestion and Glowing Skin
Making Homemade Probiotic Gummies has been a delightful journey for me, and I hope it will be for you too! These little treats are not just a snack; they’re a way to nurture your body and enjoy a moment of joy in your busy day. With each gummy, you’re supporting your digestion and enhancing your skin’s natural glow. Plus, the smiles on my family’s faces when they taste these fruity delights make all the effort worthwhile. So, roll up your sleeves and dive into this fun recipe—your gut and skin will thank you!
Print
Homemade Probiotic Gummies: Unlock Better Digestion Today!
- Total Time: 2 hours 15 minutes
- Yield: Approximately 20 gummies 1x
- Diet: Vegan
Description
Homemade Probiotic Gummies are a delicious and healthy way to support digestion and promote glowing skin.
Ingredients
- 1 cup fruit juice (your choice)
- 2 tablespoons honey or maple syrup
- 2 tablespoons gelatin powder
- 1/4 cup probiotic powder or capsules
- Optional: 1 tablespoon lemon juice for flavor
Instructions
- In a small saucepan, heat the fruit juice over low heat.
- Add honey or maple syrup and stir until dissolved.
- Sprinkle gelatin powder over the juice and whisk until fully dissolved.
- Remove from heat and let cool slightly.
- Stir in the probiotic powder or capsules.
- Pour the mixture into gummy molds.
- Refrigerate for at least 2 hours or until set.
- Pop the gummies out of the molds and store in an airtight container in the fridge.
Notes
- Experiment with different fruit juices for varied flavors.
- Ensure the probiotic powder is suitable for heat exposure.
- These gummies can last up to 2 weeks in the refrigerator.
- Prep Time: 10 minutes
- Cook Time: 5 minutes
- Category: Snack
- Method: No-bake
- Cuisine: American
Nutrition
- Serving Size: 2 gummies
- Calories: 50
- Sugar: 5g
- Sodium: 5mg
- Fat: 0g
- Saturated Fat: 0g
- Unsaturated Fat: 0g
- Trans Fat: 0g
- Carbohydrates: 12g
- Fiber: 0g
- Protein: 1g
- Cholesterol: 0mg