Introduction to Build-Your-Own Nacho Bar: The Stress-Free Way to Host in 2026
As a busy mom, I know how overwhelming it can be to host a gathering. That’s why I love the Build-Your-Own Nacho Bar: The Stress-Free Way to Host in 2026! This fun and interactive dish allows your guests to create their own nacho masterpieces, making it perfect for any occasion. With minimal prep and maximum flavor, it’s a quick solution for those hectic days. Plus, everyone gets to customize their plate, ensuring that even the pickiest eaters leave happy. Let’s dive into this delicious adventure together!
Why You’ll Love This Build-Your-Own Nacho Bar
This Build-Your-Own Nacho Bar is a game-changer for busy families. It’s incredibly easy to set up, taking just 20 minutes of your time. The best part? Everyone can customize their nachos to their liking, making it a hit with both kids and adults. Plus, it’s a delicious way to bring people together, creating a fun atmosphere without the stress of traditional hosting. You’ll love how simple and satisfying it is!
Ingredients for Build-Your-Own Nacho Bar
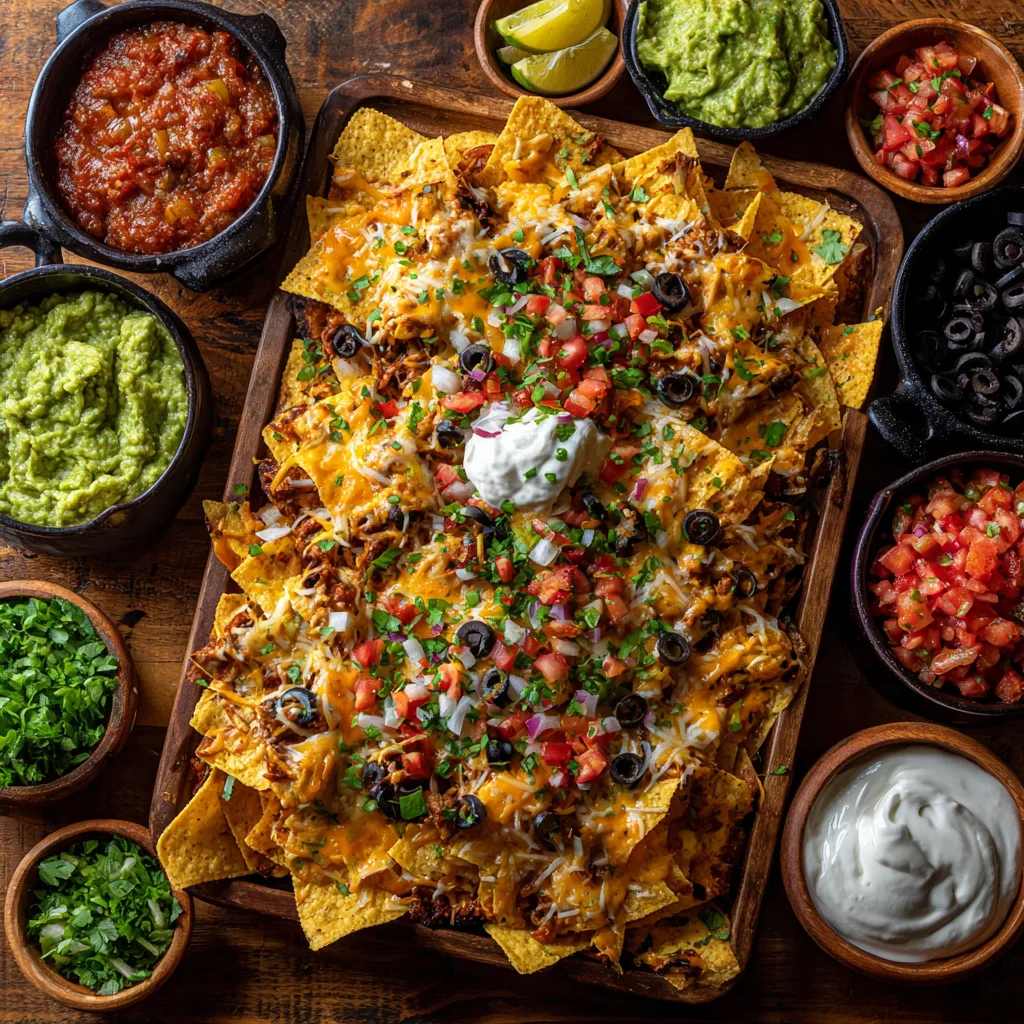
Gathering the right ingredients is key to a successful Build-Your-Own Nacho Bar. Here’s what you’ll need:
- Tortilla Chips: The foundation of your nachos. Choose a sturdy brand that can hold up under all those toppings.
- Shredded Cheddar Cheese: A classic choice that melts beautifully. Feel free to mix in some Monterey Jack for a flavor twist.
- Black Beans: These add protein and a hearty texture. Canned beans are convenient, but you can also cook dried beans if you have the time.
- Salsa: A must-have for that zesty kick. You can opt for mild, medium, or hot, depending on your crowd’s preference.
- Guacamole: Creamy and rich, it elevates your nachos. Store-bought is fine, but homemade is always a crowd-pleaser.
- Sliced Jalapeños: For those who like a bit of heat. You can use fresh or pickled, depending on your taste.
- Sour Cream: A cooling contrast to the spicy toppings. Greek yogurt is a great substitute for a healthier option.
- Green Onions: These add a fresh crunch and a pop of color. Chopped cilantro can be a lovely addition for those who enjoy it.
Feel free to get creative! You can add other toppings like olives, diced tomatoes, or even grilled chicken for extra flair. For exact quantities, check the bottom of the article where you can find everything available for printing.
How to Make Build-Your-Own Nacho Bar
Step 1: Set Up Your Nacho Bar
Creating a Build-Your-Own Nacho Bar is all about the setup. Start by finding a spacious table or countertop. Lay out all your ingredients in separate bowls. This makes it easy for guests to see their options. I like to arrange the bowls in a line, from chips to toppings. This way, everyone can build their nachos in a smooth flow. Don’t forget to provide plates and utensils nearby. A little organization goes a long way in making your nacho bar inviting and stress-free!
Step 2: Prepare the Base
Now, let’s talk about the foundation of your nachos: the tortilla chips. Place a generous handful of chips on each plate. This solid base is crucial because it holds all the delicious toppings. I recommend using sturdy chips that won’t crumble under pressure. You want your guests to pile on the goodies without fear of a chip disaster! A good base ensures that every bite is a perfect mix of flavors and textures. Trust me, it makes all the difference!
Step 3: Add the Cheese and Beans
Next up, it’s time to layer on the cheese and beans. Start with a sprinkle of shredded cheddar cheese over the chips. The cheese melts beautifully, creating a gooey goodness that everyone loves. Then, add a scoop of black beans for protein and a hearty texture. Layering these ingredients not only enhances the flavor but also adds depth to your nachos. Remember, the more cheese, the better! This combination is a crowd favorite and will keep everyone coming back for more.
Step 4: Top with Salsas and Guacamole
Now, let’s bring in the flavor with salsas and guacamole. Drizzle your chosen salsa over the cheese and beans. This adds a zesty kick that elevates the entire dish. I like to offer a variety of salsas, from mild to spicy, to cater to everyone’s taste buds. Next, add a generous dollop of guacamole. Its creamy texture balances the heat and adds richness. These toppings are essential for creating that perfect nacho experience. Trust me, your guests will rave about it!
Step 5: Finish with Fresh Toppings
Finally, it’s time to add the finishing touches! Top your nachos with sliced jalapeños for a spicy kick. Then, add a dollop of sour cream for a cooling effect. Sprinkle chopped green onions and cilantro for a fresh crunch and vibrant color. These fresh toppings not only enhance the flavor but also make your nachos look appealing. A well-dressed plate is always more inviting! With these final touches, your Build-Your-Own Nacho Bar is ready to impress!
Tips for Success
- Prep all ingredients ahead of time to keep stress at bay.
- Use a variety of chips, like blue corn or spicy tortilla chips, for added fun.
- Offer both mild and spicy toppings to cater to all taste buds.
- Keep extra bowls handy for guests who want to mix and match.
- Encourage creativity—let guests build their nacho dreams!
Equipment Needed
- Large Table or Counter: A spacious area for your nacho bar setup.
- Bowls: Use various sizes for toppings; mason jars work great too!
- Plates: Provide sturdy plates for guests to build their nachos.
- Spoons and Tongs: For easy serving of toppings.
Variations
- Spicy Nacho Bar: Add spicy chorizo or jalapeño-infused cheese for a fiery twist.
- Vegan Nacho Bar: Use vegan cheese and replace sour cream with cashew cream for a plant-based option.
- Tex-Mex Nacho Bar: Incorporate grilled chicken, pico de gallo, and avocado for a heartier meal.
- Breakfast Nacho Bar: Top with scrambled eggs, breakfast sausage, and salsa for a fun brunch idea.
- Gluten-Free Nacho Bar: Use gluten-free tortilla chips and ensure all toppings are gluten-free.
Serving Suggestions
- Side Dishes: Pair with a fresh salad or corn on the cob for a balanced meal.
- Drinks: Serve with refreshing beverages like iced tea, lemonade, or margaritas.
- Presentation: Use colorful platters and napkins to create a festive atmosphere.
FAQs about Build-Your-Own Nacho Bar
Can I make the Build-Your-Own Nacho Bar ahead of time?
Absolutely! You can prep all the ingredients in advance. Just keep the chips separate until serving to maintain their crunch. This way, you can enjoy the gathering without the last-minute rush!
What if I have guests with dietary restrictions?
No worries! The Build-Your-Own Nacho Bar is super flexible. Offer vegetarian and vegan options, like plant-based cheese and sour cream. You can also provide gluten-free chips to accommodate everyone.
How can I keep the nacho toppings warm?
To keep your toppings warm, consider using slow cookers for items like cheese and beans. This way, they stay melty and delicious throughout the event, ensuring everyone enjoys their nachos at the perfect temperature!
What are some creative toppings I can add?
Get adventurous! Try adding toppings like roasted corn, diced bell peppers, or even pulled pork. The Build-Your-Own Nacho Bar is all about creativity, so let your guests mix and match to their heart’s content!
How do I store leftovers?
Leftovers can be tricky, but you can store any unused toppings in airtight containers in the fridge. Chips, however, are best enjoyed fresh, so try to only prepare what you think will be eaten!
Final Thoughts
Hosting a Build-Your-Own Nacho Bar is not just about the food; it’s about creating memories with loved ones. This stress-free way to entertain allows everyone to express their creativity while enjoying delicious flavors. I cherish the laughter and conversations that flow as guests build their perfect nacho plates. It’s a simple yet delightful experience that brings people together, making any gathering feel special. So, whether it’s a casual family night or a festive celebration, this nacho bar is sure to be a hit. Dive in, have fun, and savor every bite!

Build-Your-Own Nacho Bar: Host Stress-Free in 2026!
- Total Time: 20 minutes
- Yield: 8 servings
- Diet: Vegetarian
Description
A fun and interactive way to host a gathering by allowing guests to create their own nacho plates with a variety of toppings.
Ingredients
- Chips: 2 bags of tortilla chips
- Cheese: 2 cups of shredded cheddar cheese
- Beans: 1 can of black beans, drained and rinsed
- Salsa: 1 cup of salsa
- Guacamole: 1 cup of guacamole
- Jalapeños: 1 jar of sliced jalapeños
- Sour Cream: 1 cup of sour cream
- Green Onions: 1 bunch, chopped
- Cilantro: 1 bunch, chopped
Instructions
- Set up a table with all the ingredients laid out in separate bowls.
- Start with a base of tortilla chips on each plate.
- Add cheese, beans, and any other desired toppings.
- Drizzle with salsa and guacamole.
- Top with jalapeños, sour cream, green onions, and cilantro.
- Enjoy your personalized nacho creation!
Notes
- Consider offering a variety of cheeses for different flavor profiles.
- Make sure to have vegetarian and vegan options available.
- Prepare all ingredients in advance to minimize stress during the event.
- Prep Time: 20 minutes
- Cook Time: 0 minutes
- Category: Appetizer
- Method: Assembly
- Cuisine: Mexican
Nutrition
- Serving Size: 1 plate
- Calories: 450
- Sugar: 3g
- Sodium: 800mg
- Fat: 25g
- Saturated Fat: 10g
- Unsaturated Fat: 15g
- Trans Fat: 0g
- Carbohydrates: 45g
- Fiber: 6g
- Protein: 12g
- Cholesterol: 30mg