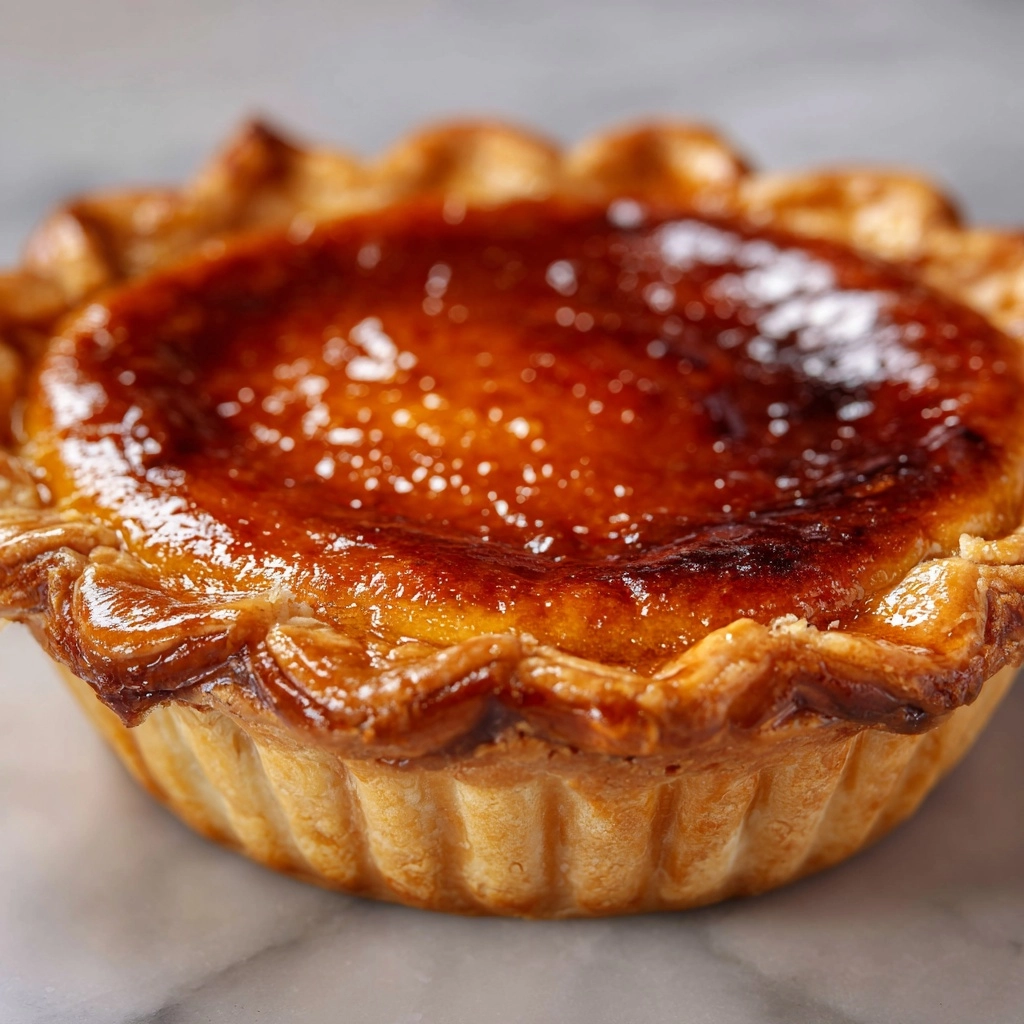
Introduction to Burnt Honey Pie – Bold Flavor in Every Bite
Welcome to the delightful world of Burnt Honey Pie – bold flavor in every bite! As a busy mom, I know how precious time can be, especially when it comes to whipping up something special for my family. This pie is not just a dessert; it’s a sweet escape that impresses without demanding hours in the kitchen. The rich, caramelized notes of burnt honey create a unique flavor that will have your loved ones asking for seconds. Trust me, this recipe is a game-changer for those hectic days when you still want to serve something extraordinary!
Why You’ll Love This Burnt Honey Pie – Bold Flavor in Every Bite
This Burnt Honey Pie is a true lifesaver for busy days. It’s quick to prepare, taking just 15 minutes of hands-on time. The bold flavor will surprise and delight your family, making it a memorable treat. Plus, it’s a versatile dessert that can be made ahead of time, allowing you to enjoy more moments with your loved ones. Who wouldn’t love a pie that’s both easy and impressive?
Ingredients for Burnt Honey Pie – Bold Flavor in Every Bite
Gathering the right ingredients is the first step to creating this delicious Burnt Honey Pie. Here’s what you’ll need:
- Honey: The star of the show! Choose a high-quality honey for the best flavor. Local varieties often have unique tastes.
- Pie crust: You can use a store-bought crust for convenience or make your own for a personal touch. Either way, it’s the perfect vessel for the creamy filling.
- Eggs: These provide structure and richness to the pie. Fresh eggs will yield the best results.
- Heavy cream: This adds a luscious creaminess that balances the boldness of the burnt honey. You can substitute with half-and-half for a lighter version.
- Vanilla extract: A splash of vanilla enhances the overall flavor, making it even more delightful.
- Salt: Just a pinch helps to elevate the sweetness and round out the flavors.
For those who love to experiment, consider adding a hint of citrus zest or a sprinkle of cinnamon for an extra layer of flavor. Remember, the exact quantities of these ingredients are listed at the bottom of the article, ready for you to print and take to the kitchen!
How to Make Burnt Honey Pie – Bold Flavor in Every Bite
Now that you have your ingredients ready, let’s dive into the steps to create this delicious Burnt Honey Pie. Each step is simple, and I promise you’ll feel like a pro in no time!
Step 1: Preheat the Oven
First things first, preheat your oven to 350°F (175°C). Preheating is crucial because it ensures even baking. A hot oven helps the pie set properly, giving you that perfect creamy texture. Trust me, you don’t want to skip this step!
Step 2: Prepare the Honey
Next, grab a saucepan and pour in your honey. Heat it over medium heat, stirring occasionally. Watch closely as it darkens and caramelizes. You’re aiming for a deep amber color, which brings out that bold flavor. Just be careful not to let it burn too much, or it might turn bitter!
Step 3: Mix the Filling
In a mixing bowl, whisk together the eggs, heavy cream, vanilla extract, and salt. This mixture is the heart of your pie. Whisk until everything is well combined and slightly frothy. The creaminess of the heavy cream will balance the boldness of the burnt honey beautifully.
Step 4: Combine Ingredients
Now, it’s time to add the burnt honey to your egg mixture. Slowly pour the warm honey into the bowl while whisking continuously. This helps to temper the eggs, preventing them from scrambling. You want a smooth, velvety filling that’s bursting with flavor!
Step 5: Pour into Crust
Carefully pour the mixture into your prepared pie crust. Make sure to fill it evenly, so every slice has that delicious filling. If you’re using a store-bought crust, it’s already ready to go. If you made your own, ensure it’s cooled before adding the filling.
Step 6: Bake the Pie
Place the pie in the preheated oven and bake for 30-35 minutes. You’ll know it’s done when the filling is set but still has a slight jiggle in the center. This is the sweet spot for that creamy texture. Keep an eye on it, as ovens can vary!
Step 7: Cool and Serve
Once baked, remove the pie from the oven and let it cool at room temperature. This cooling time allows the filling to firm up a bit more. Serve it plain or with a dollop of whipped cream for an extra touch of indulgence. Enjoy every bold bite!
Tips for Success
- Use a candy thermometer to monitor the honey’s temperature for perfect caramelization.
- Let the pie cool completely before slicing for cleaner pieces.
- Experiment with different honey varieties for unique flavors.
- For a fun twist, add a splash of bourbon to the filling.
- Store leftovers in the fridge, covered, for up to three days.
Equipment Needed for Burnt Honey Pie – Bold Flavor in Every Bite
- Mixing bowl: A large bowl for whisking ingredients. A sturdy pot can work in a pinch.
- Whisk: Essential for mixing. A fork can also do the job if needed.
- Pie dish: A standard pie pan is ideal. You can use a tart pan for a different look.
- Saucepan: For heating the honey. A small skillet can be a good alternative.
Variations of Burnt Honey Pie – Bold Flavor in Every Bite
- Nutty Delight: Add chopped nuts like pecans or walnuts to the filling for a delightful crunch.
- Chocolate Twist: Stir in some melted dark chocolate for a rich, decadent flavor that pairs beautifully with burnt honey.
- Fruit Infusion: Top the pie with fresh berries or sliced peaches for a refreshing contrast to the creamy filling.
- Gluten-Free Option: Use a gluten-free pie crust to make this dessert suitable for those with dietary restrictions.
- Spiced Version: Incorporate spices like nutmeg or cardamom into the filling for a warm, aromatic twist.
Serving Suggestions for Burnt Honey Pie – Bold Flavor in Every Bite
- Pair with a scoop of vanilla ice cream for a delightful contrast in temperature.
- Serve alongside fresh berries to add a pop of color and freshness.
- Drizzle with extra burnt honey for an elegant presentation.
- Enjoy with a cup of herbal tea for a cozy afternoon treat.
FAQs about Burnt Honey Pie – Bold Flavor in Every Bite
Can I use a different type of sweetener instead of honey?
While honey is the star of this Burnt Honey Pie, you can experiment with maple syrup or agave nectar. Just keep in mind that the flavor will change, and you may need to adjust the quantities.
How do I know when the pie is done baking?
The pie is ready when the filling is set but still has a slight jiggle in the center. This ensures a creamy texture that melts in your mouth. A toothpick inserted should come out clean.
Can I make this pie ahead of time?
Absolutely! This pie can be made a day in advance. Just store it in the refrigerator, covered, until you’re ready to serve. It tastes even better after the flavors have had time to meld!
What can I serve with Burnt Honey Pie?
For a delightful pairing, serve it with whipped cream, fresh berries, or a scoop of vanilla ice cream. These additions enhance the bold flavor and create a beautiful presentation.
Is Burnt Honey Pie suitable for special diets?
This pie is vegetarian-friendly, but if you need a gluten-free option, simply use a gluten-free pie crust. You can also adjust the recipe to fit other dietary needs by substituting ingredients as needed.
Final Thoughts on Burnt Honey Pie – Bold Flavor in Every Bite
Creating this Burnt Honey Pie is more than just baking; it’s about crafting a memorable experience for your loved ones. Each slice offers a delightful balance of bold flavors and creamy textures that will leave everyone wanting more. I love how this pie can transform an ordinary day into something special, making it perfect for family gatherings or a cozy night in. Plus, the joy of sharing a homemade dessert is truly priceless. So, roll up your sleeves, embrace the process, and enjoy the sweet rewards of your culinary adventure with this unforgettable pie!
Print
Burnt Honey Pie – Experience Bold Flavor in Every Bite!
- Total Time: 50 minutes
- Yield: 8 servings 1x
- Diet: Vegetarian
Description
Burnt Honey Pie is a unique dessert that combines the rich flavor of burnt honey with a creamy filling, creating a bold and unforgettable taste experience.
Ingredients
- 1 cup honey
- 1 pie crust
- 3 large eggs
- 1 cup heavy cream
- 1 teaspoon vanilla extract
- 1/4 teaspoon salt
Instructions
- Preheat the oven to 350°F (175°C).
- In a saucepan, heat the honey over medium heat until it turns dark and caramelized.
- Remove from heat and let it cool slightly.
- In a mixing bowl, whisk together the eggs, heavy cream, vanilla extract, and salt.
- Slowly add the burnt honey to the egg mixture, whisking continuously.
- Pour the mixture into the pie crust.
- Bake for 30-35 minutes or until the filling is set.
- Let it cool before serving.
Notes
- For a deeper flavor, let the honey burn a little longer, but be careful not to let it become bitter.
- Serve with whipped cream for added richness.
- This pie can be made a day in advance and stored in the refrigerator.
- Prep Time: 15 minutes
- Cook Time: 35 minutes
- Category: Dessert
- Method: Baking
- Cuisine: American
Nutrition
- Serving Size: 1 slice
- Calories: 300
- Sugar: 25g
- Sodium: 150mg
- Fat: 15g
- Saturated Fat: 9g
- Unsaturated Fat: 4g
- Trans Fat: 0g
- Carbohydrates: 35g
- Fiber: 1g
- Protein: 4g
- Cholesterol: 100mg