Introduction to DIY Hot Cocoa Bombs (Winter Treat)
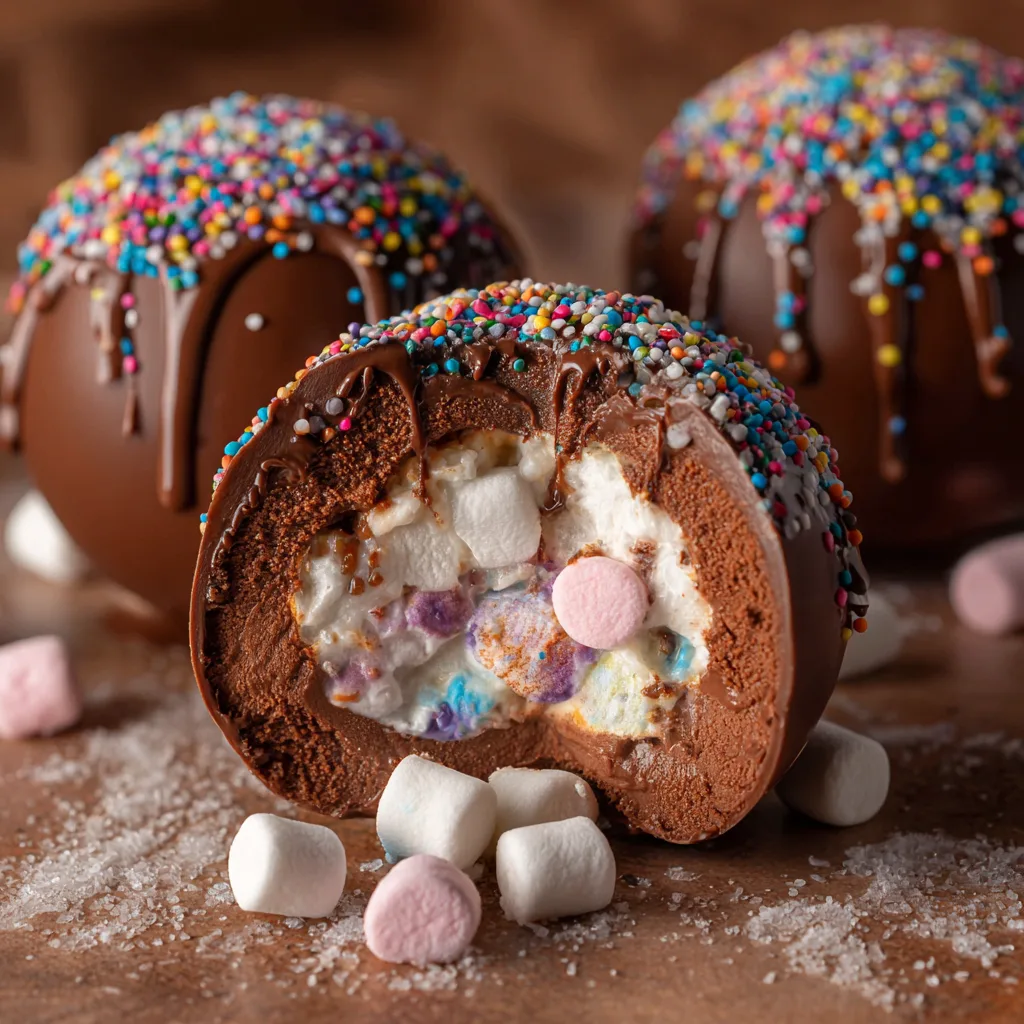
As the chilly winds of winter blow in, there’s nothing quite like a cozy cup of hot chocolate to warm your soul. That’s where these delightful DIY Hot Cocoa Bombs come into play! They’re not just a treat; they’re an experience. Imagine watching them melt into a rich, creamy drink right before your eyes. Perfect for busy moms like me, this recipe is a quick solution for those hectic evenings when you need a little indulgence. Plus, they make a fantastic gift for loved ones, spreading warmth and joy during the holiday season!
Why You’ll Love This DIY Hot Cocoa Bombs (Winter Treat)
These DIY Hot Cocoa Bombs are a game-changer for winter nights! They’re incredibly easy to make, even for those of us juggling busy schedules. In just 30 minutes, you can create a delightful treat that’s sure to impress your family and friends. The taste? Oh, it’s pure bliss! Rich chocolate mingling with marshmallows creates a cozy hug in a mug. Trust me, once you try them, you’ll be hooked!
Ingredients for DIY Hot Cocoa Bombs (Winter Treat)
Gathering the right ingredients is the first step to creating these magical DIY Hot Cocoa Bombs. Here’s what you’ll need:
- Chocolate Chips: The star of the show! Use semi-sweet or dark chocolate for a rich flavor. You can even experiment with white chocolate for a sweeter twist.
- Hot Cocoa Mix: This is what gives your cocoa bombs that classic chocolatey goodness. Choose your favorite brand or make your own for a personal touch.
- Mini Marshmallows: These little puffs add a delightful texture and sweetness. They’re like tiny clouds of joy in your mug!
- Sprinkles (Optional): Want to add a pop of color? Sprinkles are a fun way to decorate your cocoa bombs. They’re not just for looks; they add a festive touch!
For those who might have dietary restrictions, feel free to substitute with dairy-free chocolate or sugar-free hot cocoa mix. The possibilities are endless! You can find all the exact measurements at the bottom of the article, ready for printing. Happy cooking!
How to Make DIY Hot Cocoa Bombs (Winter Treat)
Step 1: Melt the Chocolate
First things first, let’s melt those chocolate chips! Grab a microwave-safe bowl and pour in your chocolate chips. Microwave them in 30-second intervals, stirring in between. This helps prevent burning. Keep going until the chocolate is smooth and glossy. It should look like liquid silk, ready to work its magic!
Step 2: Coat the Mold
Now, it’s time to coat the mold. Using a spoon, take some of that melted chocolate and carefully coat the inside of your silicone mold. Make sure to create an even layer; this is crucial for a sturdy cocoa bomb. Once you’ve coated all the cavities, pop the mold in the fridge for about 10 minutes. This will help the chocolate set nicely.
Step 3: Fill the Cocoa Bombs
Once your chocolate shells are set, it’s filling time! Take the mold out of the fridge and gently remove the chocolate shells. In half of the shells, add a spoonful of hot cocoa mix. Then, toss in a few mini marshmallows. They’ll float like little clouds when you pour the hot milk over them!
Step 4: Seal the Cocoa Bombs
To seal your cocoa bombs, take another half of the chocolate shell and melt the edges slightly. This will create a sticky surface. Press it onto the filled half, making sure to seal it well. You want to create a cozy little package for all that deliciousness!
Step 5: Decorate (Optional)
If you’re feeling festive, now’s the time to decorate! Grab some sprinkles and sprinkle them on the outside of your cocoa bombs. It’s like giving them a little party hat! This step is optional, but it adds a fun touch that kids (and adults) will love.
Step 6: Set and Store
Let your cocoa bombs set completely before removing them from the mold. This ensures they hold their shape. Once set, gently pop them out and store them in an airtight container. They’ll be ready for your next cozy night in!
Step 7: Serve and Enjoy
When you’re ready to indulge, place a cocoa bomb in a mug. Pour hot milk over it and watch the magic happen! Stir it all together, and you’ll have a rich, creamy hot chocolate that’s perfect for warming up on a chilly evening. Enjoy every sip!
Tips for Success
- Make sure your chocolate is fully melted for a smooth coating.
- Use a silicone mold for easy removal of the cocoa bombs.
- Don’t rush the setting time; it’s key for a sturdy bomb.
- Experiment with flavors by adding peppermint or caramel to the cocoa mix.
- Store your cocoa bombs in a cool, dry place to keep them fresh.
Equipment Needed
- Microwave-safe bowl: Any bowl that can handle heat will do.
- Spoon: A regular spoon works perfectly for mixing and coating.
- Silicone mold: If you don’t have one, use muffin tins lined with paper.
- Spatula: Handy for scraping out every last bit of chocolate.
Variations
- Minty Delight: Add a few drops of peppermint extract to the hot cocoa mix for a refreshing twist.
- Spicy Kick: Mix in a pinch of cayenne pepper or cinnamon for a warm, spicy flavor that’s perfect for winter.
- Nutty Flavor: Incorporate a tablespoon of hazelnut or almond spread into the cocoa mix for a nutty surprise.
- Dairy-Free Option: Use dairy-free chocolate and almond or oat milk for a vegan-friendly treat.
- Caramel Swirl: Drizzle some caramel sauce inside the chocolate shells before filling for a sweet surprise.
Serving Suggestions
- Pair your cocoa bombs with freshly baked cookies for a delightful treat.
- Serve alongside a warm slice of banana bread or pumpkin loaf for a cozy combo.
- For a festive touch, add whipped cream and a sprinkle of cocoa powder on top.
- Enjoy with a side of peppermint bark for a holiday-inspired snack.
FAQs about DIY Hot Cocoa Bombs (Winter Treat)
Can I make DIY Hot Cocoa Bombs in advance?
Absolutely! You can prepare these cocoa bombs ahead of time. Just store them in an airtight container in a cool, dry place. They’ll stay fresh for several weeks, making them perfect for holiday gifting or cozy nights in!
What type of chocolate works best for cocoa bombs?
I recommend using semi-sweet or dark chocolate for a rich flavor. However, feel free to experiment with white chocolate or even flavored chocolates for a unique twist. Each type brings its own charm to your DIY Hot Cocoa Bombs!
Can I customize the filling of my cocoa bombs?
Definitely! You can add different flavors to the hot cocoa mix, like peppermint or caramel. You can also include various toppings, such as crushed candy canes or flavored marshmallows, to make your DIY Hot Cocoa Bombs truly your own!
How do I serve the cocoa bombs?
To enjoy your cocoa bombs, simply place one in a mug and pour hot milk over it. Watch the magic unfold as it melts and transforms into a delicious hot chocolate. Stir it up, and you’re ready to sip on a cozy winter treat!
Are DIY Hot Cocoa Bombs suitable for kids?
Yes! These cocoa bombs are a hit with kids. They love watching them melt and enjoy the sweet flavors. Just be mindful of any allergies, and feel free to adjust the sweetness to suit their taste!
Final Thoughts
Making DIY Hot Cocoa Bombs is more than just a recipe; it’s a delightful experience that brings warmth and joy to chilly winter nights. Each cocoa bomb is like a little gift, bursting with flavor and nostalgia. I love watching my family’s faces light up as they pour hot milk over these magical treats. It’s a simple pleasure that transforms an ordinary evening into something special. Whether you’re enjoying them solo or sharing with loved ones, these cocoa bombs are sure to create sweet memories. So, gather your ingredients and let the cozy vibes flow!

DIY Hot Cocoa Bombs (Winter Treat) for Cozy Nights!
- Total Time: 30 minutes
- Yield: 6 cocoa bombs 1x
- Diet: Vegetarian
Description
Delicious and fun DIY hot cocoa bombs that melt in your cup for a cozy winter treat.
Ingredients
- 1 cup of chocolate chips
- 1/2 cup of hot cocoa mix
- 1/4 cup of mini marshmallows
- 1/4 cup of sprinkles (optional)
Instructions
- Melt the chocolate chips in a microwave-safe bowl, stirring every 30 seconds until smooth.
- Using a silicone mold, coat the inside with melted chocolate, ensuring an even layer. Let it set in the fridge for about 10 minutes.
- Once set, add a spoonful of hot cocoa mix and a few mini marshmallows into half of the chocolate shells.
- Seal the cocoa bombs by melting the edges of another chocolate shell and pressing it onto the filled half.
- Decorate the outside with sprinkles if desired.
- Let the bombs set completely before removing them from the mold.
- To serve, place a cocoa bomb in a mug and pour hot milk over it. Stir and enjoy!
Notes
- Store the cocoa bombs in an airtight container.
- Experiment with different types of chocolate for varied flavors.
- These make great gifts during the holiday season!
- Prep Time: 20 minutes
- Cook Time: 10 minutes
- Category: Dessert
- Method: No-Bake
- Cuisine: American
Nutrition
- Serving Size: 1 cocoa bomb
- Calories: 150
- Sugar: 20g
- Sodium: 50mg
- Fat: 7g
- Saturated Fat: 4g
- Unsaturated Fat: 2g
- Trans Fat: 0g
- Carbohydrates: 20g
- Fiber: 1g
- Protein: 2g
- Cholesterol: 5mg