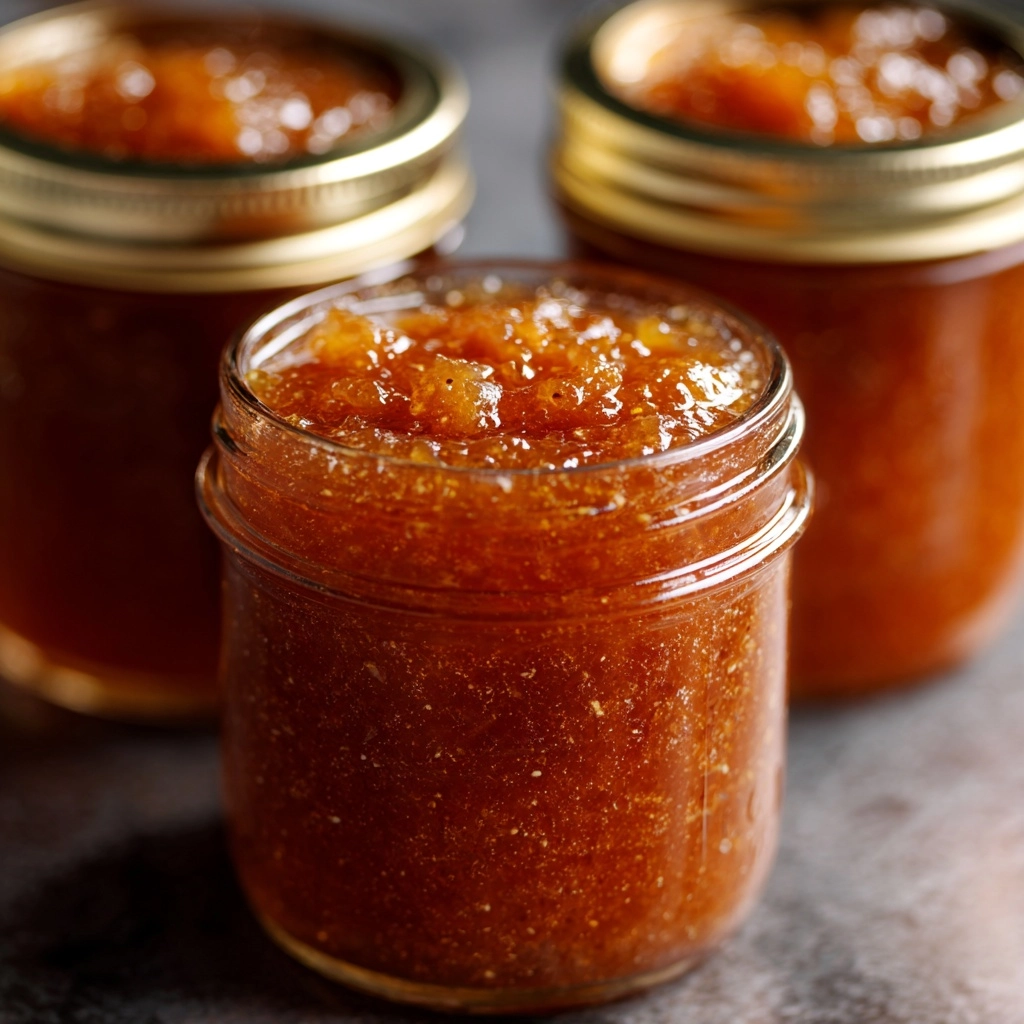
Introduction to Homemade Apple Pie Jam: A Fall Canning Favorite
As the leaves turn golden and the air gets crisp, there’s nothing quite like the aroma of Homemade Apple Pie Jam wafting through the kitchen. This delightful spread captures the essence of fall, making it a perfect treat for busy moms and professionals alike. Whether you’re looking for a quick solution for breakfast or a thoughtful gift for loved ones, this jam is your answer. It’s easy to make, and the warm spices will wrap you in a cozy embrace, reminding you of family gatherings and sweet moments shared around the table.
Why You’ll Love This Homemade Apple Pie Jam: A Fall Canning Favorite
This Homemade Apple Pie Jam is not just a treat; it’s a time-saver for your busy days. With just a handful of ingredients, you can whip up a batch in under an hour. The taste? Oh, it’s like autumn in a jar! Each spoonful bursts with sweet apples and warm spices, making it perfect for toast, desserts, or even as a gift. Trust me, your family will be begging for more!
Ingredients for Homemade Apple Pie Jam: A Fall Canning Favorite
Gathering the right ingredients is the first step to creating your Homemade Apple Pie Jam. Here’s what you’ll need:
- Peeled and chopped apples: Choose firm, fresh apples for the best flavor. Varieties like Granny Smith or Honeycrisp work wonderfully.
- Sugar: This sweetener balances the tartness of the apples. Feel free to adjust the amount based on your taste preference.
- Lemon juice: A splash of acidity brightens the flavors and helps preserve the jam. Freshly squeezed is always best!
- Ground cinnamon: This warm spice is the heart of the apple pie flavor, adding that cozy, nostalgic touch.
- Ground nutmeg: Just a pinch enhances the warmth and depth of the jam, making it feel like a hug in a jar.
- Ground allspice: This spice adds a unique flavor profile, reminiscent of holiday baking.
- Fruit pectin: Essential for achieving that perfect jam consistency, it helps the mixture thicken beautifully.
For those looking to experiment, consider adding a splash of vanilla extract or a sprinkle of ginger for an extra kick. You can find the exact measurements for these ingredients at the bottom of the article, ready for printing!
How to Make Homemade Apple Pie Jam: A Fall Canning Favorite
Making your own Homemade Apple Pie Jam is a delightful journey that fills your kitchen with the essence of fall. Follow these simple steps, and you’ll have jars of sweet goodness ready to enjoy or share!
Step 1: Prepare Your Jars
Before you dive into making your jam, it’s crucial to prepare your jars and lids. Sterilizing them in boiling water ensures that your jam stays safe and fresh. Just a quick dip for about 10 minutes will do the trick. This step is essential for preventing any unwanted bacteria from spoiling your delicious creation.
Step 2: Combine Ingredients
In a large pot, mix together your peeled and chopped apples, sugar, lemon juice, and spices. Stir gently to combine everything. The sugar will start to draw out the juices from the apples, creating a lovely syrup. This is where the magic begins! The aroma of cinnamon and nutmeg will already start to fill the air, making your kitchen feel like a cozy fall haven.
Step 3: Cook the Mixture
Now, it’s time to cook the mixture over medium heat. Keep an eye on it and stir occasionally. You want the apples to soften, which usually takes about 10 to 15 minutes. The goal is to have them tender but not mushy. This step is where the flavors meld together, creating that signature apple pie taste.
Step 4: Add Pectin and Boil
Once your apples are soft, it’s time to add the fruit pectin. Stir it in well, and bring the mixture to a rolling boil. This means it should bubble vigorously and not stop when stirred. Boil for 1 to 2 minutes, stirring constantly. This is the moment when your jam thickens beautifully, transforming into that luscious spread you’re dreaming of!
Step 5: Jar the Jam
Carefully ladle the hot jam into your prepared jars, leaving about a 1/4 inch of headspace at the top. This space is important for sealing. Wipe the rims of the jars with a clean cloth to remove any residue. Then, seal them with the lids. Make sure they’re on tight, but not overly so. You want a good seal without any pressure.
Step 6: Process the Jars
To preserve your jam, you’ll need to process the jars in a boiling water bath. Place them in a large pot of boiling water, ensuring they’re covered by at least an inch of water. Process for 10 minutes. This step is vital for ensuring your jam lasts for months on the shelf, ready to brighten your mornings or sweeten your desserts.
Step 7: Cool and Store
After processing, carefully remove the jars and let them cool completely on a clean towel or cooling rack. You’ll hear the satisfying “pop” of the lids sealing as they cool. Once they’re cool, store your Homemade Apple Pie Jam in a cool, dark place. It’s best enjoyed within a year, but I doubt it will last that long!
Tips for Success
- Use a mix of sweet and tart apples for a balanced flavor.
- Don’t skip the sterilization step; it’s key for safe canning.
- Keep your jars warm before filling to prevent cracking.
- Label your jars with the date to track freshness.
- Experiment with spices to create your unique twist on this jam!
Equipment Needed for Homemade Apple Pie Jam: A Fall Canning Favorite
- Large pot: A heavy-bottomed pot works best for even cooking.
- Canning jars and lids: Use glass jars; plastic containers can warp.
- Jar lifter: This handy tool makes transferring hot jars safe.
- Funnel: A wide-mouth funnel helps avoid spills when filling jars.
- Boiling water bath canner: If you don’t have one, a large stockpot will do!
Variations of Homemade Apple Pie Jam: A Fall Canning Favorite
- Spiced Apple Pie Jam: Add a pinch of ground ginger or cloves for an extra layer of warmth and spice.
- Maple Apple Pie Jam: Substitute half of the sugar with pure maple syrup for a rich, earthy flavor.
- Berry-Infused Apple Pie Jam: Mix in a cup of fresh or frozen berries, like blueberries or raspberries, for a fruity twist.
- Low-Sugar Option: Use a low-sugar pectin and reduce the sugar to suit your dietary needs.
- Nutty Apple Pie Jam: Stir in some finely chopped walnuts or pecans for a delightful crunch.
Serving Suggestions for Homemade Apple Pie Jam: A Fall Canning Favorite
- Spread on warm, toasted bread or bagels for a cozy breakfast treat.
- Use as a filling for pastries or thumbprint cookies for a delightful dessert.
- Pair with cream cheese on a charcuterie board for a sweet and savory combo.
- Drizzle over pancakes or waffles for a fall-inspired brunch.
- Serve alongside a cup of spiced tea or coffee for a comforting afternoon snack.
FAQs about Homemade Apple Pie Jam: A Fall Canning Favorite
Can I use frozen apples for this jam?
Absolutely! Just make sure to thaw and drain any excess liquid before using them. Frozen apples can still create a delicious jam.
How long does Homemade Apple Pie Jam last?
When properly canned and stored in a cool, dark place, your jam can last up to a year. Just be sure to check for any signs of spoilage before using.
Can I reduce the sugar in this recipe?
Yes! You can adjust the sugar to your taste. Using a low-sugar pectin can also help maintain the jam’s consistency while cutting down on sweetness.
What types of apples work best for this jam?
For the best flavor, I recommend using a mix of sweet and tart apples, like Granny Smith and Honeycrisp. This combination gives your jam a balanced taste.
Can I add other fruits to my Apple Pie Jam?
Definitely! Feel free to mix in berries or pears for a unique twist. Just remember to adjust the sugar and spices accordingly to complement the new flavors.
Final Thoughts on Homemade Apple Pie Jam: A Fall Canning Favorite
Creating Homemade Apple Pie Jam is more than just a recipe; it’s a heartwarming experience that brings the flavors of fall right into your kitchen. Each jar captures the essence of cozy family gatherings and sweet memories. As you spread this delightful jam on your morning toast or share it with loved ones, you’ll feel the warmth of autumn enveloping you. Plus, the joy of canning is in knowing you’ve crafted something special from scratch. So, roll up your sleeves, embrace the season, and let this jam be a delicious reminder of the simple pleasures in life!
Print
Homemade Apple Pie Jam: Discover the Fall Must-Have!
- Total Time: 50 minutes
- Yield: 6-8 half-pint jars 1x
- Diet: Vegetarian
Description
Homemade Apple Pie Jam is a delightful spread that captures the essence of fall with its warm spices and sweet apple flavor, perfect for canning and enjoying throughout the season.
Ingredients
- 4 cups of peeled and chopped apples
- 1 cup of sugar
- 1/4 cup of lemon juice
- 1 teaspoon of ground cinnamon
- 1/2 teaspoon of ground nutmeg
- 1/4 teaspoon of ground allspice
- 1 package (1.75 oz) fruit pectin
Instructions
- Prepare your canning jars and lids by sterilizing them in boiling water.
- In a large pot, combine the chopped apples, sugar, lemon juice, and spices.
- Cook the mixture over medium heat until the apples are soft, about 10-15 minutes.
- Add the fruit pectin and bring the mixture to a rolling boil, stirring constantly.
- Boil for 1-2 minutes until the jam thickens.
- Remove from heat and ladle the hot jam into the prepared jars, leaving a 1/4 inch headspace.
- Wipe the rims of the jars with a clean cloth and seal with the lids.
- Process the jars in a boiling water bath for 10 minutes.
- Remove the jars and let them cool completely on a clean towel or cooling rack.
Notes
- Ensure apples are firm and fresh for the best flavor.
- Adjust sugar according to your taste preference.
- Store the jam in a cool, dark place for optimal shelf life.
- Prep Time: 20 minutes
- Cook Time: 30 minutes
- Category: Canning
- Method: Stovetop
- Cuisine: American
Nutrition
- Serving Size: 1 tablespoon
- Calories: 50
- Sugar: 12g
- Sodium: 1mg
- Fat: 0g
- Saturated Fat: 0g
- Unsaturated Fat: 0g
- Trans Fat: 0g
- Carbohydrates: 13g
- Fiber: 0g
- Protein: 0g
- Cholesterol: 0mg
