Introduction to Hot Italian Sub Sliders
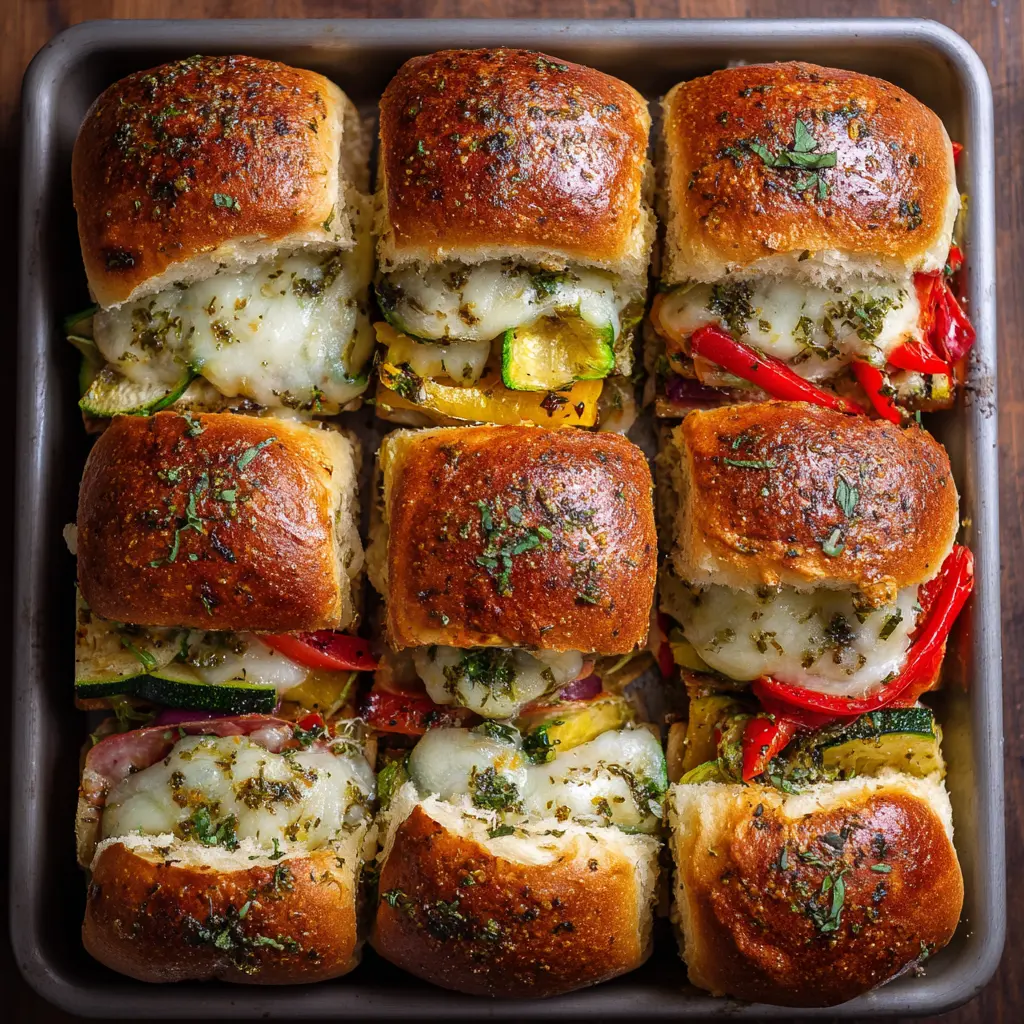
As a busy mom, I know how challenging it can be to whip up a meal that pleases everyone. That’s where my Hot Italian Sub Sliders come in! These little gems are not just a quick solution for a hectic day; they’re also a crowd-pleaser that will impress your loved ones. Picture this: warm, cheesy sliders filled with savory Italian sausage and colorful veggies, all nestled in soft rolls. It’s comfort food at its finest, and trust me, your family will be asking for seconds!
Why You’ll Love This Hot Italian Sub Sliders
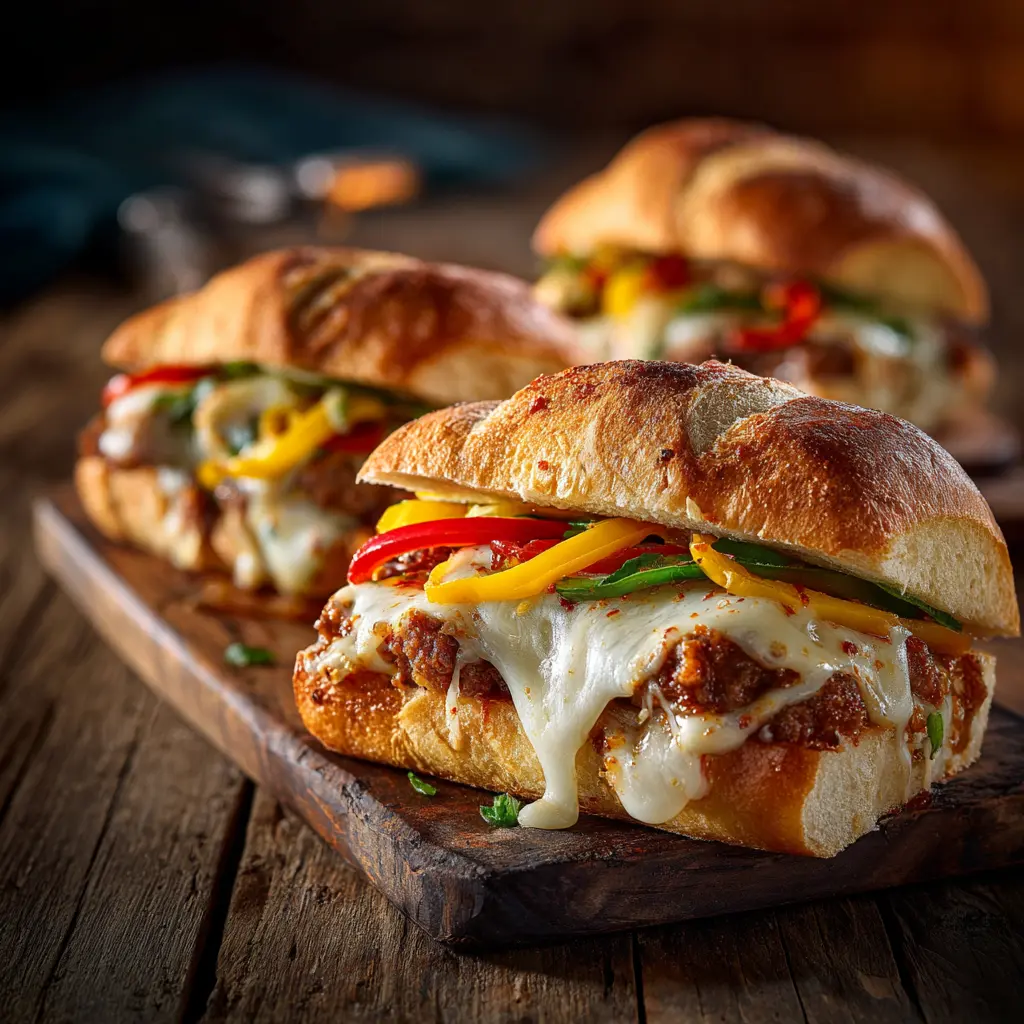
These Hot Italian Sub Sliders are a lifesaver for busy weeknights! They come together in just 35 minutes, making them perfect for a quick dinner or a last-minute gathering. The combination of savory sausage, melty cheese, and vibrant veggies creates a flavor explosion that will have everyone raving. Plus, they’re easy to customize, so you can cater to picky eaters or adventurous palates alike. What’s not to love?
Fore more recipes follow my pinterest
Print
Hot Italian Sub Sliders: Elevate Your Next Meal Today!
- Total Time: 35 minutes
- Yield: 12 sliders 1x
- Diet: Gluten Free
Description
Hot Italian Sub Sliders are a delicious and easy-to-make meal perfect for gatherings or a quick dinner.
Ingredients
- 1 package of slider rolls
- 1 pound of Italian sausage
- 1 cup of marinara sauce
- 1 cup of sliced bell peppers
- 1 cup of sliced onions
- 1 cup of shredded mozzarella cheese
- 1 tablespoon of Italian seasoning
- 2 tablespoons of olive oil
Instructions
- Preheat the oven to 350°F (175°C).
- In a skillet, heat olive oil over medium heat and sauté the onions and bell peppers until soft.
- Add the Italian sausage to the skillet and cook until browned.
- Stir in the marinara sauce and Italian seasoning, and let it simmer for a few minutes.
- Slice the slider rolls in half and place the bottom halves in a baking dish.
- Layer the sausage mixture on the bottom halves of the rolls.
- Sprinkle shredded mozzarella cheese on top of the sausage mixture.
- Place the top halves of the rolls on the sliders and brush with olive oil.
- Bake in the preheated oven for 15-20 minutes or until the cheese is melted and bubbly.
- Remove from the oven, slice, and serve warm.
Notes
- Feel free to add other toppings like jalapeños or olives for extra flavor.
- These sliders can be made ahead of time and baked just before serving.
- Serve with a side of chips or a salad for a complete meal.
- Prep Time: 15 minutes
- Cook Time: 20 minutes
- Category: Main Course
- Method: Baking
- Cuisine: Italian
Nutrition
- Serving Size: 1 slider
- Calories: 250
- Sugar: 2g
- Sodium: 600mg
- Fat: 12g
- Saturated Fat: 5g
- Unsaturated Fat: 4g
- Trans Fat: 0g
- Carbohydrates: 28g
- Fiber: 1g
- Protein: 12g
- Cholesterol: 40mg
Ingredients for Hot Italian Sub Sliders
Gathering the right ingredients is the first step to creating these delightful Hot Italian Sub Sliders. Here’s what you’ll need:
- Slider rolls: These soft, pillowy rolls are the perfect vessel for your filling. You can use any type you like, but I recommend a classic white or whole wheat for a nice balance.
- Italian sausage: This is the star of the show! Choose sweet or spicy Italian sausage based on your family’s preference. If you’re looking for a lighter option, turkey sausage works well too.
- Marinara sauce: A rich, flavorful marinara sauce adds moisture and depth. You can use store-bought for convenience or whip up a quick homemade version if you have the time.
- Sliced bell peppers: These add a pop of color and sweetness. Feel free to mix and match colors—red, yellow, and green all work beautifully.
- Sliced onions: Onions bring a savory depth to the sliders. I prefer yellow onions for their sweetness, but red onions can add a nice bite.
- Shredded mozzarella cheese: This gooey cheese is essential for that melty finish. You can substitute with provolone or even a dairy-free cheese if needed.
- Italian seasoning: A blend of herbs like oregano, basil, and thyme enhances the Italian flavors. If you don’t have this on hand, a mix of dried herbs will do just fine.
- Olive oil: This is used for sautéing the veggies and brushing on the rolls for a golden crust. Extra virgin olive oil adds a lovely flavor, but any cooking oil will work.
For exact measurements, check the bottom of the article where you can find everything listed for easy printing. Happy cooking!
How to Make Hot Italian Sub Sliders
Now that you have all your ingredients ready, let’s dive into making these delicious Hot Italian Sub Sliders! Follow these simple steps, and you’ll have a mouthwatering meal in no time.
Step 1: Preheat the Oven
First things first, preheat your oven to 350°F (175°C). Preheating is crucial because it ensures that your sliders bake evenly. A hot oven helps the cheese melt beautifully and gives the rolls a lovely golden crust.
Step 2: Sauté the Vegetables
Next, grab a skillet and heat a couple of tablespoons of olive oil over medium heat. Once the oil is shimmering, toss in the sliced onions and bell peppers. Sauté them until they’re soft and fragrant, about 5 minutes. The aroma will fill your kitchen, making it hard to resist sneaking a taste!
Step 3: Cook the Italian Sausage
Now, it’s time to add the Italian sausage to the skillet. Break it up with a spatula as it cooks, ensuring it browns evenly. This step is essential for flavor and texture. Cook until the sausage is no longer pink, about 7-10 minutes. Your kitchen will smell like an Italian bistro!
Step 4: Add Marinara Sauce and Seasoning
Once the sausage is cooked, stir in the marinara sauce and Italian seasoning. Let this mixture simmer for a few minutes. This allows the flavors to meld together, creating a rich and savory filling for your sliders.
Step 5: Prepare the Slider Rolls
While the filling simmers, slice your slider rolls in half. Place the bottom halves in a baking dish, making sure they’re snug. This will hold all that delicious filling without any spills!
Step 6: Layer the Sausage Mixture
Now, it’s time to layer the sausage mixture on the bottom halves of the rolls. Use a spoon to spread it evenly, ensuring every slider gets a generous helping of that tasty filling. Trust me, your family will thank you!
Step 7: Add Cheese
Sprinkle a generous amount of shredded mozzarella cheese on top of the sausage mixture. This is where the magic happens! The cheese will melt into gooey perfection, making each bite irresistible.
Step 8: Assemble and Brush with Olive Oil
Place the top halves of the rolls on the sliders. To give them a beautiful finish, brush the tops with a little olive oil. This will help them turn golden brown and add a touch of flavor.
Step 9: Bake the Sliders
Pop the baking dish into your preheated oven and bake for 15-20 minutes. Keep an eye on them! You’ll know they’re done when the cheese is melted and bubbly, and the tops are golden brown. It’s hard to resist that delicious aroma!
Step 10: Serve Warm
Once they’re out of the oven, let them cool for a minute. Then, slice the sliders and serve them warm. The combination of flavors and textures will have everyone coming back for more!
Tips for Success
- Prep your ingredients ahead of time to save on cooking stress.
- Don’t skip the preheating step; it’s key for even baking.
- Feel free to customize with your favorite veggies or cheeses.
- For extra flavor, add a sprinkle of red pepper flakes to the sausage mixture.
- Let the sliders cool slightly before serving to avoid burns!
Equipment Needed
- Skillet: A non-stick skillet works best, but any frying pan will do.
- Baking dish: A 9×13 inch dish is perfect, or use any oven-safe dish you have on hand.
- Spatula: A sturdy spatula is essential for breaking up the sausage.
- Knife: A sharp knife for slicing the rolls and veggies.
- Cutting board: A clean surface for chopping your ingredients.
Variations
- Vegetarian Option: Swap the Italian sausage for a plant-based sausage or sautéed mushrooms for a hearty, meat-free version.
- Spicy Kick: Add sliced jalapeños or a dash of hot sauce to the sausage mixture for an extra layer of heat.
- Cheesy Delight: Experiment with different cheeses like provolone or pepper jack for a unique flavor twist.
- Herb Infusion: Mix in fresh herbs like basil or parsley for a burst of freshness in every bite.
- Gluten-Free: Use gluten-free slider rolls to make this dish suitable for those with gluten sensitivities.
Serving Suggestions
- Chips: Serve with a side of crispy potato chips or tortilla chips for a satisfying crunch.
- Salad: A fresh garden salad pairs perfectly, adding a light and refreshing contrast.
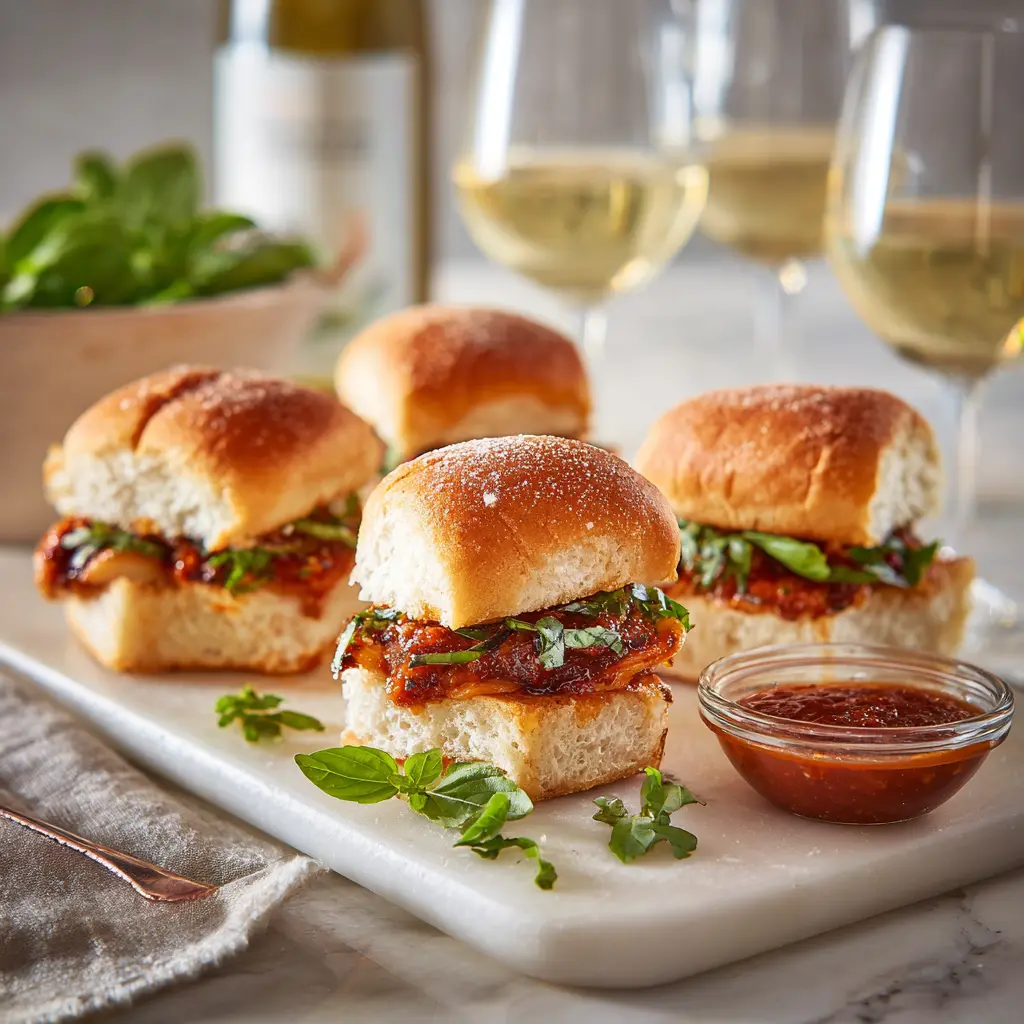
- Drinks: Consider pairing with a chilled Italian soda or a glass of red wine for a delightful meal.
- Presentation: Arrange sliders on a platter and garnish with fresh herbs for an inviting look.
FAQs about Hot Italian Sub Sliders
Can I make Hot Italian Sub Sliders ahead of time?
Absolutely! You can prepare the filling and assemble the sliders a few hours in advance. Just cover them and refrigerate. Bake them just before serving for a warm, fresh meal.
What can I substitute for Italian sausage?
If you’re looking for alternatives, turkey sausage or chicken sausage works well. For a vegetarian option, try using plant-based sausage or sautéed mushrooms for a hearty filling.
How do I store leftovers?
Store any leftover Hot Italian Sub Sliders in an airtight container in the fridge. They’ll stay fresh for up to three days. Reheat in the oven for the best texture!
Can I freeze these sliders?
Yes! You can freeze the assembled sliders before baking. Just wrap them tightly in plastic wrap and foil. When you’re ready to enjoy, bake them straight from the freezer, adding a few extra minutes to the cooking time.
What sides pair well with Hot Italian Sub Sliders?
These sliders are delicious with a side of crispy chips, a fresh garden salad, or even some roasted vegetables. They make for a well-rounded meal that everyone will love!
Final Thoughts
Making Hot Italian Sub Sliders is more than just cooking; it’s about creating moments. The joy of pulling a tray of warm, cheesy sliders from the oven fills the kitchen with an irresistible aroma that beckons everyone to gather around. Each bite is a delightful explosion of flavors, bringing smiles and satisfaction to the table. Whether it’s a busy weeknight or a fun gathering, these sliders are sure to be a hit. So, roll up your sleeves, embrace the mess, and enjoy the laughter and love that comes with sharing this delicious meal with your family!