
Introduction to Irresistible Salted Caramel Apple Bars for Fall
As the leaves turn golden and the air gets crisp, I find myself craving cozy treats that warm the heart. That’s where my Irresistible Salted Caramel Apple Bars for Fall come in! These bars are not just a dessert; they’re a hug in a pan. Perfect for busy days, they’re quick to whip up and even quicker to disappear. Whether you’re looking to impress guests or simply treat your family, these bars are a delightful solution. Trust me, once you take a bite, you’ll be hooked on their chewy goodness and rich caramel flavor!
Why You’ll Love This Irresistible Salted Caramel Apple Bars for Fall
These Irresistible Salted Caramel Apple Bars for Fall are a dream come true for busy moms and professionals alike. They come together in just 45 minutes, making them a quick and satisfying treat. The combination of sweet apples and rich caramel creates a flavor explosion that’s hard to resist. Plus, they’re perfect for sharing at gatherings or enjoying with a cup of coffee on a chilly afternoon. You’ll love how easy they are to make!
Ingredients for Irresistible Salted Caramel Apple Bars for Fall
Gathering the right ingredients is the first step to creating these delightful bars. Here’s what you’ll need:
- All-purpose flour: This forms the base of your bars, giving them structure and chewiness.
- Rolled oats: They add a lovely texture and a hint of nuttiness, making the bars heartier.
- Brown sugar: This brings a deep, caramel-like sweetness that complements the apples beautifully.
- Granulated sugar: A touch of this balances the flavors and helps with browning.
- Unsalted butter: Melted butter binds everything together and adds richness. You can substitute with coconut oil for a dairy-free option.
- Baking soda: This leavening agent helps the bars rise slightly, creating a soft texture.
- Salt: A pinch enhances all the flavors, especially the sweetness of the caramel.
- Diced apples: Fresh apples provide moisture and a burst of fruity flavor. Granny Smith or Honeycrisp work wonderfully!
- Salted caramel sauce: The star of the show! It adds a luscious, gooey layer that makes these bars irresistible. For a homemade touch, try making your own caramel sauce.
- Cinnamon: A sprinkle of this warm spice brings a cozy fall aroma and flavor to the bars.
For exact measurements, check the bottom of the article where you can find a printable version of the recipe!
How to Make Irresistible Salted Caramel Apple Bars for Fall
Step 1: Preheat and Prepare
First things first, preheat your oven to 350°F (175°C). While that’s warming up, grab a 9×13 inch baking dish and grease it well. This will ensure your bars come out easily and don’t stick. Trust me, you want to avoid any sticky situations!
Step 2: Mix Dry Ingredients
In a large bowl, combine the all-purpose flour, rolled oats, brown sugar, granulated sugar, baking soda, and salt. Stir them together until they’re well mixed. This dry mixture is the foundation of your bars, so make sure it’s evenly blended for the best results!
Step 3: Add Butter
Now, it’s time to add the melted butter to your dry ingredients. Mix it in until the mixture becomes crumbly. You want it to resemble wet sand. This buttery goodness will help bind everything together, creating that chewy texture we all love!
Step 4: Create the Base
Take half of your crumbly mixture and press it firmly into the bottom of the greased baking dish. This will form the base of your bars. Make sure it’s even and compact, as this will hold all the delicious layers together. A solid base is key!
Step 5: Layer the Apples
Next, spread the diced apples evenly over the crust. Make sure to cover the entire surface. The apples will add moisture and flavor, making each bite a delightful experience. Choose your favorite variety for the best taste!
Step 6: Drizzle Caramel
Now comes the fun part! Pour the salted caramel sauce generously over the apples. Let it drizzle down, covering them completely. This luscious layer is what makes these bars truly irresistible. Don’t be shy with the caramel; it’s the star of the show!
Step 7: Top with Crumble
Sprinkle the remaining crumb mixture on top of the caramel and apples. This will create a lovely crunchy topping. Make sure to cover it evenly, so every bite has that delightful texture. It’s like a cozy blanket for your delicious filling!
Step 8: Bake
Pop the baking dish into your preheated oven and bake for 25-30 minutes. Keep an eye on it until the top turns golden brown. The aroma will fill your kitchen, making it hard to wait. You’ll know they’re ready when they look perfectly baked!
Step 9: Cool and Cut
Once baked, remove the dish from the oven and let it cool completely. This is crucial for cutting them into neat bars. Patience is key here! Once cooled, slice them into squares and get ready to enjoy your Irresistible Salted Caramel Apple Bars for Fall!
Tips for Success
- Use fresh, crisp apples for the best flavor and texture.
- For a richer taste, opt for high-quality salted caramel sauce.
- Let the bars cool completely before cutting to avoid crumbling.
- Store leftovers in an airtight container to keep them fresh.
- Feel free to add nuts or chocolate chips for extra flavor!
Equipment Needed
- 9×13 inch baking dish: Essential for baking your bars. A glass or metal dish works well.
- Mixing bowls: Use a large bowl for dry ingredients and a smaller one for mixing.
- Measuring cups and spoons: Accurate measurements ensure perfect results.
- Spatula: Great for mixing and spreading the ingredients evenly.
- Cooling rack: Helps cool the bars evenly, but a plate works too!
Variations
- Nutty Delight: Add chopped walnuts or pecans for a crunchy texture and nutty flavor.
- Gluten-Free Option: Substitute all-purpose flour with a gluten-free blend to make these bars suitable for gluten-sensitive friends.
- Spiced Up: Mix in a pinch of nutmeg or ginger for an extra layer of warmth and spice.
- Chocolate Lovers: Fold in chocolate chips or drizzle melted chocolate on top for a decadent twist.
- Vegan Version: Use coconut oil instead of butter and a plant-based caramel sauce to make these bars vegan-friendly.
Serving Suggestions
- Serve warm with a scoop of vanilla ice cream for a delightful contrast.
- Pair with a hot cup of spiced chai or apple cider for a cozy fall treat.
- Dust with powdered sugar for an elegant presentation.
- Top with whipped cream and a drizzle of extra caramel for indulgence.
- Enjoy with a side of fresh fruit for a balanced snack!
FAQs about Irresistible Salted Caramel Apple Bars for Fall
Can I use different types of apples for this recipe?
Absolutely! While Granny Smith and Honeycrisp are my favorites, feel free to experiment with any apple variety you love. Just make sure they’re firm and crisp for the best texture in your Irresistible Salted Caramel Apple Bars for Fall.
How should I store the leftover bars?
Store your bars in an airtight container at room temperature for up to a week. If you want to keep them fresh longer, you can refrigerate them. Just remember to let them come to room temperature before serving for the best flavor!
Can I freeze these salted caramel apple bars?
Yes, you can! Wrap the cooled bars tightly in plastic wrap and then in aluminum foil. They’ll keep well in the freezer for up to three months. Just thaw them in the fridge overnight before enjoying!
What can I serve with these bars?
These bars are delicious on their own, but you can elevate them by serving with a scoop of vanilla ice cream or a drizzle of extra salted caramel sauce. Pairing them with a warm drink like apple cider makes for a perfect fall treat!
Can I make these bars ahead of time?
Definitely! These Irresistible Salted Caramel Apple Bars for Fall can be made a day in advance. Just store them properly, and they’ll be ready to impress your family or guests when you need them!
Final Thoughts
Making these Irresistible Salted Caramel Apple Bars for Fall is more than just baking; it’s about creating memories. The warm aroma wafting through your kitchen will draw everyone in, sparking conversations and smiles. Each bite is a delightful blend of chewy apples and rich caramel, reminding us of cozy autumn days. Whether you’re sharing them with loved ones or savoring them solo with a cup of tea, these bars bring joy to any occasion. So, roll up your sleeves and embrace the magic of fall with this delicious treat. You won’t regret it!
Irresistible Salted Caramel Apple Bars for Fall You’ll Love!
- Total Time: 45 minutes
- Yield: 12 bars 1x
- Diet: Vegetarian
Description
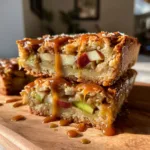
Delicious and chewy salted caramel apple bars perfect for fall.
Ingredients
- 2 cups all-purpose flour
- 1 cup rolled oats
- 1/2 cup brown sugar
- 1/2 cup granulated sugar
- 1/2 cup unsalted butter, melted
- 1/2 teaspoon baking soda
- 1/2 teaspoon salt
- 2 cups diced apples
- 1 cup salted caramel sauce
- 1 teaspoon cinnamon
Instructions
- Preheat the oven to 350°F (175°C) and grease a 9×13 inch baking dish.
- In a large bowl, mix together flour, oats, brown sugar, granulated sugar, baking soda, and salt.
- Add melted butter and mix until crumbly.
- Press half of the mixture into the bottom of the prepared baking dish.
- Spread the diced apples evenly over the crust.
- Drizzle the salted caramel sauce over the apples.
- Sprinkle the remaining crumb mixture on top.
- Bake for 25-30 minutes or until golden brown.
- Let cool before cutting into bars.
Notes
- For a richer flavor, use a high-quality salted caramel sauce.
- These bars can be stored in an airtight container for up to a week.
- Serve warm with a scoop of vanilla ice cream for an extra treat.
- Prep Time: 15 minutes
- Cook Time: 30 minutes
- Category: Dessert
- Method: Baking
- Cuisine: American
Nutrition
- Serving Size: 1 bar
- Calories: 250
- Sugar: 18g
- Sodium: 150mg
- Fat: 10g
- Saturated Fat: 5g
- Unsaturated Fat: 3g
- Trans Fat: 0g
- Carbohydrates: 38g
- Fiber: 2g
- Protein: 2g
- Cholesterol: 20mg