Introduction to My First Rosca de Reyes
As a passionate home cook, I find joy in sharing traditions that bring families together. My First Rosca de Reyes is one such delightful recipe that celebrates the arrival of the Three Wise Men. This beautiful pastry is not just a treat; it’s a symbol of love and togetherness. Perfect for busy moms and professionals, it’s a simple yet impressive dish that can brighten any gathering. Imagine the smiles on your loved ones’ faces as they enjoy a slice of this sweet, festive bread. Let’s dive into this culinary adventure together!
Why You’ll Love This My First Rosca de Reyes
This recipe for My First Rosca de Reyes is a delightful blend of ease and flavor. It’s perfect for those busy days when you want to impress without spending hours in the kitchen. The warm, sweet aroma fills your home, creating a cozy atmosphere. Plus, it’s a fun way to involve the kids in baking! Trust me, this festive treat will become a cherished family tradition.
Ingredients for My First Rosca de Reyes
Gathering the right ingredients is the first step in creating your My First Rosca de Reyes. Each component plays a vital role in crafting this delightful pastry. Here’s what you’ll need:
- All-purpose flour: The backbone of your Rosca, providing structure and texture.
- Milk: Adds moisture and richness, making the dough soft and tender.
- Sugar: Sweetens the bread, enhancing its flavor and giving it a lovely golden color.
- Unsalted butter: Brings a rich, buttery taste and helps create a tender crumb.
- Large eggs: Essential for binding the ingredients and adding richness.
- Active dry yeast: The magic ingredient that makes the dough rise, creating that fluffy texture.
- Salt: Balances the sweetness and enhances the overall flavor.
- Ground cinnamon: Adds a warm, aromatic spice that’s perfect for festive baking.
- Vanilla extract: A splash of this brings a lovely depth of flavor to the dough.
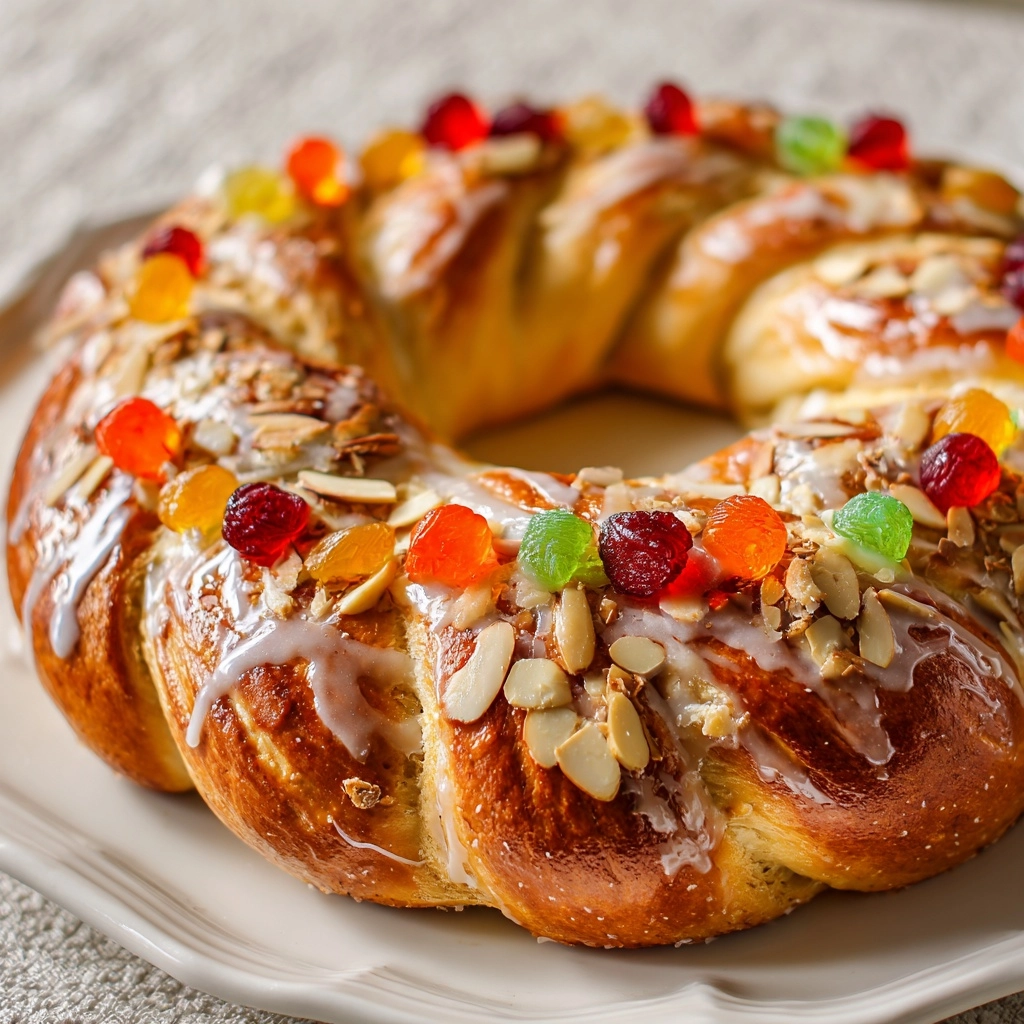
- Candied fruits: These colorful bits are for decoration, adding a festive touch and a burst of sweetness.
- Plastic figurine (optional): A fun tradition! If you include one, it adds an element of surprise for the lucky slice.
For exact measurements, check the bottom of the article where you can find everything listed for easy printing. Happy baking!
How to Make My First Rosca de Reyes
Now that you have your ingredients ready, let’s dive into the fun part: making My First Rosca de Reyes! Follow these simple steps, and you’ll have a beautiful pastry that’s sure to impress.
Step 1: Prepare the Yeast Mixture
Start by dissolving the active dry yeast in warm milk. Make sure the milk is warm, not hot, to keep the yeast happy. Let it sit for about 5 minutes. You’ll know it’s ready when it becomes frothy. This is the magic that will make your dough rise!
Step 2: Combine Dry Ingredients
In a large mixing bowl, combine the all-purpose flour, sugar, salt, and ground cinnamon. Whisk them together until they’re well mixed. This step is crucial because it ensures that the flavors are evenly distributed throughout your Rosca.
Step 3: Mix Wet Ingredients
Now, it’s time to add the fun stuff! Pour the yeast mixture into the bowl with the dry ingredients. Then, add the eggs, melted unsalted butter, and vanilla extract. Mix everything together until it forms a shaggy dough. Don’t worry if it looks a bit messy; that’s part of the process!
Step 4: Knead the Dough
Transfer the dough to a lightly floured surface. Knead it for about 10 minutes until it’s smooth and elastic. This is a great workout for your arms! If the dough sticks to your hands, sprinkle a little more flour as needed. You want it to be soft but not sticky.
Step 5: Let the Dough Rise
Place the kneaded dough in a greased bowl, turning it to coat all sides. Cover it with a clean kitchen towel and let it rise in a warm place for about 1 hour. You’ll know it’s ready when it has doubled in size. This is the perfect time to sip on some coffee or tea!
Step 6: Shape the Dough
Once the dough has risen, punch it down gently to release the air. Shape it into a ring, making sure to connect the ends. Place the ring on a baking sheet lined with parchment paper. This is where the magic happens, so make it look pretty!
Step 7: Second Rise
Cover the shaped dough again with the kitchen towel and let it rise for another 30 minutes. This second rise is essential for achieving that fluffy texture we all love. Use this time to prepare your decorations!
Step 8: Decorate the Rosca
Now comes the fun part! Decorate the top of your Rosca with candied fruits. Feel free to get creative! If you’re using a plastic figurine, tuck it inside the dough now. This adds an element of surprise for whoever finds it!
Step 9: Bake the Rosca
Preheat your oven to 350°F (175°C). Bake the Rosca for 25-30 minutes or until it’s golden brown. The aroma will fill your kitchen, making it hard to resist sneaking a taste!
Step 10: Cool and Serve
Once baked, allow the Rosca to cool on a wire rack. This step is important because it helps maintain the texture. Once it’s cool, slice it up and serve it to your family and friends. Enjoy the smiles and compliments that come your way!
Tips for Success
- Make sure your yeast is fresh for the best rise.
- Use warm milk, not hot, to activate the yeast properly.
- Don’t skip the second rise; it’s key for fluffiness.
- Feel free to mix up the candied fruits for a colorful topping.
- Let the Rosca cool completely before slicing for the best texture.
Equipment Needed
- Mixing bowls: A large bowl for mixing and a smaller one for the yeast.
- Measuring cups and spoons: Essential for accuracy; you can use a kitchen scale if preferred.
- Whisk: Great for combining dry ingredients; a fork works too!
- Baking sheet: A standard one lined with parchment paper is perfect.
- Kitchen towel: To cover the dough while it rises.
Variations of My First Rosca de Reyes
- Chocolate Rosca: Add cocoa powder to the dough for a rich chocolate flavor. You can also drizzle melted chocolate on top for extra indulgence.
- Nutty Twist: Incorporate chopped nuts like almonds or pecans into the dough for a delightful crunch and added flavor.
- Fruit-Infused: Substitute some of the milk with orange juice or add zest for a citrusy kick that brightens the flavor.
- Gluten-Free Option: Use a gluten-free flour blend to make this recipe suitable for those with gluten sensitivities.
- Vegan Version: Replace eggs with flaxseed meal and use plant-based milk and butter for a delicious vegan Rosca.
Serving Suggestions for My First Rosca de Reyes
- Pair your Rosca with a steaming cup of hot chocolate for a cozy treat.
- Serve it alongside freshly brewed coffee or tea for a delightful afternoon snack.
- For a festive touch, dust the top with powdered sugar before serving.
- Consider adding a side of whipped cream for an extra indulgent experience.
FAQs about My First Rosca de Reyes
As you embark on your journey to create My First Rosca de Reyes, you might have a few questions. Here are some common queries that can help guide you along the way:
Can I make My First Rosca de Reyes ahead of time?
Absolutely! You can prepare the dough a day in advance. Just let it rise, then shape it into a ring and refrigerate it. When you’re ready to bake, let it come to room temperature before the second rise.
What can I use instead of candied fruits?
If candied fruits aren’t your thing, feel free to use dried fruits like raisins or cranberries. You can also sprinkle some nuts on top for added texture and flavor.
How do I store leftovers?
Store any leftover Rosca in an airtight container at room temperature. It should stay fresh for a few days. You can also freeze it for longer storage; just wrap it tightly in plastic wrap.
What if my dough doesn’t rise?
If your dough doesn’t rise, it could be due to inactive yeast. Always check the expiration date on your yeast and ensure the milk is warm, not hot, when activating it. A warm environment is key for rising!
Can I add a filling to my Rosca?
Yes! Feel free to add a sweet filling like cream cheese or chocolate spread before shaping the dough into a ring. Just be careful not to overfill, or it might ooze out while baking!
Final Thoughts
Creating My First Rosca de Reyes is more than just baking; it’s about weaving a tapestry of memories and traditions. The joy of watching it rise, the sweet aroma filling your home, and the smiles it brings to your loved ones are truly priceless. This delightful pastry not only celebrates the Epiphany but also creates a moment of togetherness in our busy lives. So, gather your family, roll up your sleeves, and embark on this delicious adventure. I promise, each slice will be a reminder of love, laughter, and the magic of shared moments. Happy baking!
Print
My First Rosca de Reyes: A Delicious Tradition Awaits!
- Total Time: 2 hours
- Yield: 1 large Rosca 1x
- Diet: Vegetarian
Description
My First Rosca de Reyes is a delightful and traditional pastry enjoyed during the celebration of Epiphany, symbolizing the arrival of the Three Wise Men.
Ingredients
- 4 cups all-purpose flour
- 1 cup milk
- 1/2 cup sugar
- 1/2 cup unsalted butter
- 3 large eggs
- 2 teaspoons active dry yeast
- 1 teaspoon salt
- 1 teaspoon ground cinnamon
- 1/2 teaspoon vanilla extract
- 1/2 cup candied fruits (for decoration)
- 1 small plastic figurine (optional)
Instructions
- In a small bowl, dissolve the yeast in warm milk and let it sit for 5 minutes.
- In a large mixing bowl, combine flour, sugar, salt, and cinnamon.
- Add the yeast mixture, eggs, melted butter, and vanilla extract to the dry ingredients.
- Knead the dough until smooth and elastic, about 10 minutes.
- Place the dough in a greased bowl, cover, and let it rise in a warm place for about 1 hour or until doubled in size.
- Preheat the oven to 350°F (175°C).
- Shape the dough into a ring and place it on a baking sheet lined with parchment paper.
- Let the dough rise again for 30 minutes.
- Decorate the top with candied fruits and place the figurine inside if using.
- Bake for 25-30 minutes or until golden brown.
- Allow to cool before serving.
Notes
- Traditionally served on January 6th, the Day of the Kings.
- Can be enjoyed with hot chocolate or coffee.
- Store leftovers in an airtight container.
- Prep Time: 30 minutes
- Cook Time: 30 minutes
- Category: Dessert
- Method: Baking
- Cuisine: Mexican
Nutrition
- Serving Size: 1 slice
- Calories: 250
- Sugar: 10g
- Sodium: 150mg
- Fat: 10g
- Saturated Fat: 5g
- Unsaturated Fat: 3g
- Trans Fat: 0g
- Carbohydrates: 35g
- Fiber: 1g
- Protein: 5g
- Cholesterol: 50mg