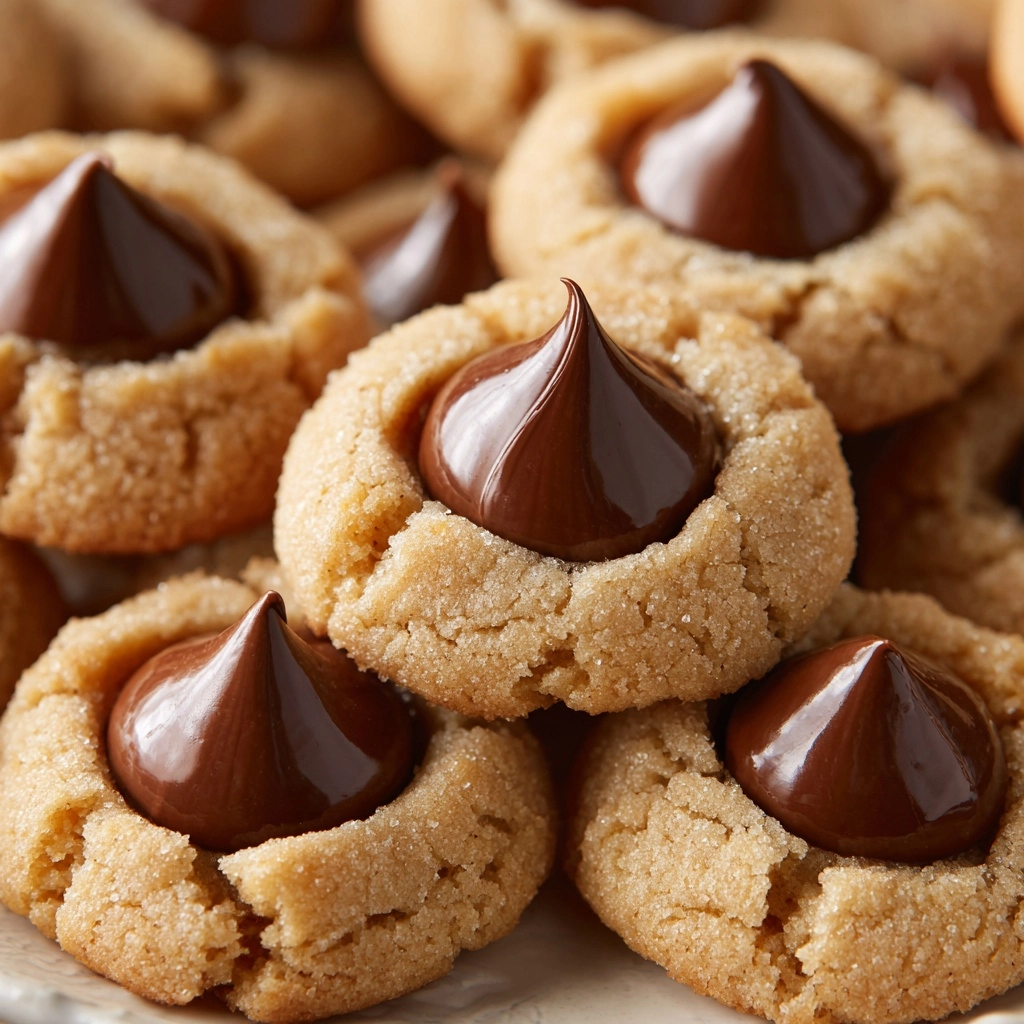
Introduction to Peanut Butter Blossoms (Grandma’s Holiday Cookie Classic)
Ah, the sweet aroma of freshly baked cookies wafting through the house! Nothing quite compares to the joy of making Peanut Butter Blossoms, Grandma’s holiday cookie classic. These delightful treats are not just cookies; they’re little bites of nostalgia that bring back warm memories of family gatherings. Perfect for busy moms like us, this recipe is quick and easy, making it a go-to for those hectic days. Plus, who can resist the combination of soft peanut butter and a gooey chocolate kiss? Let’s dive into this delicious adventure together!
Why You’ll Love This Peanut Butter Blossoms (Grandma’s Holiday Cookie Classic)
These Peanut Butter Blossoms are a delightful blend of simplicity and flavor. They come together in just 30 minutes, making them perfect for busy schedules. The soft, chewy texture paired with the rich chocolate kiss creates a taste sensation that’s hard to resist. Plus, they’re a hit with kids and adults alike, ensuring smiles all around. Trust me, these cookies will become a cherished tradition in your home!
Ingredients for Peanut Butter Blossoms (Grandma’s Holiday Cookie Classic)
Gathering the right ingredients is the first step to cookie magic! Here’s what you’ll need for these delightful Peanut Butter Blossoms:
- Peanut Butter: The star of the show! Choose creamy or crunchy, depending on your preference.
- Granulated Sugar: This adds sweetness and helps create that lovely chewy texture.
- Brown Sugar: For a hint of caramel flavor and moisture, brown sugar is essential.
- Eggs: They bind everything together, giving the cookies their soft structure.
- Vanilla Extract: A splash of vanilla elevates the flavor, making it even more irresistible.
- All-Purpose Flour: The backbone of the cookie, providing structure and stability.
- Baking Soda: This little leavening agent helps the cookies rise and become fluffy.
- Salt: Just a pinch enhances all the flavors, balancing the sweetness perfectly.
- Chocolate Kisses: The crowning glory! These melt-in-your-mouth chocolates are what make these cookies special.
For a festive twist, consider using colored chocolate kisses or even peanut butter cups for a fun variation. If you’re looking for a healthier option, try substituting half of the all-purpose flour with whole wheat flour. You can find the exact measurements for each ingredient at the bottom of the article, ready for printing!
How to Make Peanut Butter Blossoms (Grandma’s Holiday Cookie Classic)
Step 1: Preheat the Oven
Preheating your oven is crucial for baking success. Set it to 350°F (175°C) to ensure even cooking. A properly preheated oven helps the cookies rise beautifully and develop that perfect golden edge. Trust me, this step is key to achieving cookie perfection!
Step 2: Mix the Wet Ingredients
In a large bowl, combine the peanut butter, granulated sugar, brown sugar, eggs, and vanilla extract. Use a sturdy spoon or mixer to blend everything until it’s smooth and creamy. This mixture is the heart of your Peanut Butter Blossoms, so take your time to ensure it’s well combined. The creamy peanut butter and sweet sugars create a delightful base that will make your cookies irresistible. Don’t be afraid to taste a little—it’s a delicious perk of baking!
Step 3: Combine Dry Ingredients
In a separate bowl, whisk together the all-purpose flour, baking soda, and salt. This step is essential for evenly distributing the leavening agent and ensuring your cookies rise properly. A good whisking will also help break up any lumps in the flour, leading to a smoother dough.
Step 4: Combine Wet and Dry Mixtures
Gradually add the dry ingredients to the wet mixture, stirring gently until everything is just combined. Be careful not to overmix; you want a soft dough that holds together without being tough. The dough should be thick and slightly sticky, perfect for rolling into balls. This is where the magic happens, as the flavors meld together, creating a delightful cookie base that’s ready for baking!
Step 5: Shape the Cookies
Now it’s time to shape your cookies! Roll the dough into 1-inch balls and place them on a baking sheet lined with parchment paper. Make sure to leave some space between each ball, as they will spread while baking. This step is fun, and it’s a great way to get the kids involved in the kitchen!
Step 6: Bake the Cookies
Pop the baking sheet into your preheated oven and bake for 10-12 minutes. Keep an eye on them; you want the edges to be lightly golden while the centers remain soft. If you’re unsure, a toothpick can help check for doneness. Just remember, they’ll continue to cook a bit after you take them out!
Step 7: Add the Chocolate Kisses
As soon as you pull the cookies from the oven, press a chocolate kiss into the center of each cookie. The heat from the cookie will melt the chocolate slightly, creating a deliciously gooey center. This step is what makes these Peanut Butter Blossoms truly special, so don’t skip it!
Step 8: Cool the Cookies
Let the cookies cool on the baking sheet for a few minutes before transferring them to a wire rack. This cooling time allows the cookies to set properly, ensuring they hold their shape. Plus, the aroma wafting through your kitchen will be absolutely heavenly!
Tips for Success
- Use room temperature ingredients for better mixing.
- Don’t overbake; cookies will firm up as they cool.
- For uniform cookies, use a cookie scoop.
- Chill the dough for 30 minutes if it’s too sticky.
- Experiment with different chocolate varieties for a fun twist!
Equipment Needed for Peanut Butter Blossoms (Grandma’s Holiday Cookie Classic)
- Mixing Bowls: A large bowl for wet ingredients and a medium bowl for dry. Any size will do!
- Whisk: For combining dry ingredients. A fork works in a pinch!
- Baking Sheet: A standard sheet lined with parchment paper. You can use a silicone mat too!
- Cookie Scoop: For uniform cookie sizes. A tablespoon works just as well!
- Wire Rack: For cooling cookies. A plate can substitute if needed!
Variations of Peanut Butter Blossoms (Grandma’s Holiday Cookie Classic)
- Chocolate Peanut Butter Blossoms: Swap out the chocolate kisses for mini peanut butter cups for an extra peanut butter punch!
- Gluten-Free Option: Use a gluten-free all-purpose flour blend to make these cookies suitable for gluten-sensitive friends.
- Nut-Free Version: Replace peanut butter with sunflower seed butter for a nut-free alternative that’s just as delicious.
- Oatmeal Peanut Butter Blossoms: Add 1 cup of rolled oats to the dough for a chewy texture and added fiber.
- Spiced Peanut Butter Blossoms: Incorporate a teaspoon of cinnamon or nutmeg into the dry ingredients for a warm, spiced flavor.
Serving Suggestions for Peanut Butter Blossoms (Grandma’s Holiday Cookie Classic)
- Pair these cookies with a glass of cold milk for a classic treat.
- Serve alongside a warm cup of coffee or hot cocoa for a cozy afternoon snack.
- For a festive touch, arrange them on a decorative platter with holiday-themed napkins.
- Consider adding a scoop of vanilla ice cream on the side for an indulgent dessert.
FAQs about Peanut Butter Blossoms (Grandma’s Holiday Cookie Classic)
Can I use natural peanut butter for this recipe?
Absolutely! Natural peanut butter works well, but make sure to stir it well before measuring. It may make the dough a bit softer, so you might need to chill it for easier handling.
How do I store Peanut Butter Blossoms?
Store your cookies in an airtight container at room temperature for up to a week. If you want to keep them longer, freeze them with parchment paper between layers to prevent sticking.
Can I make the dough ahead of time?
Yes! You can prepare the dough and refrigerate it for up to 3 days. Just roll it into balls before baking, and you’ll have fresh cookies ready in no time!
What can I substitute for chocolate kisses?
If you’re looking for a change, try using caramel-filled chocolates or even white chocolate for a different flavor twist. The possibilities are endless!
Why are my cookies flat?
Flat cookies can happen if the dough is too warm or if you didn’t use enough flour. Make sure to measure accurately and chill the dough if it feels sticky!
Final Thoughts on Peanut Butter Blossoms (Grandma’s Holiday Cookie Classic)
Making Peanut Butter Blossoms is more than just baking; it’s about creating memories. The joy of rolling the dough, pressing in the chocolate kisses, and sharing these treats with loved ones brings warmth to any gathering. Each bite is a reminder of Grandma’s love and the sweet moments we cherish. Whether you’re baking for a holiday party or a cozy family night, these cookies are sure to bring smiles. So, gather your ingredients, embrace the process, and let the delightful aroma fill your home. Trust me, these cookies will become a beloved tradition in your family!
Print
Peanut Butter Blossoms: Discover Grandma’s Secret Recipe!
- Total Time: 30 minutes
- Yield: 36 cookies 1x
- Diet: Vegetarian
Description
Peanut Butter Blossoms are a classic holiday cookie featuring a soft peanut butter base topped with a chocolate kiss.
Ingredients
- 1 cup peanut butter
- 1 cup granulated sugar
- 1 cup brown sugar
- 2 large eggs
- 1 teaspoon vanilla extract
- 2 cups all-purpose flour
- 1 teaspoon baking soda
- 1/2 teaspoon salt
- 36 chocolate kisses
Instructions
- Preheat the oven to 350°F (175°C).
- In a large bowl, mix together peanut butter, granulated sugar, brown sugar, eggs, and vanilla extract until smooth.
- In another bowl, whisk together flour, baking soda, and salt.
- Gradually add the dry ingredients to the peanut butter mixture, stirring until combined.
- Roll the dough into 1-inch balls and place them on a baking sheet lined with parchment paper.
- Bake for 10-12 minutes or until the edges are lightly golden.
- Remove from the oven and immediately press a chocolate kiss into the center of each cookie.
- Allow to cool on the baking sheet for a few minutes before transferring to a wire rack to cool completely.
Notes
- For a festive touch, you can use colored chocolate kisses.
- Store cookies in an airtight container for up to a week.
- These cookies freeze well; just make sure to separate layers with parchment paper.
- Prep Time: 15 minutes
- Cook Time: 10-12 minutes
- Category: Dessert
- Method: Baking
- Cuisine: American
Nutrition
- Serving Size: 1 cookie
- Calories: 100
- Sugar: 8g
- Sodium: 50mg
- Fat: 4g
- Saturated Fat: 1g
- Unsaturated Fat: 3g
- Trans Fat: 0g
- Carbohydrates: 14g
- Fiber: 1g
- Protein: 2g
- Cholesterol: 10mg
