
Introduction to Red Velvet Cheesecake Brownies
As a busy mom, I know how precious time can be, especially when it comes to whipping up something special in the kitchen. That’s why I absolutely adore these Red Velvet Cheesecake Brownies! They’re not just a treat; they’re a delightful fusion of rich red velvet cake and creamy cheesecake that will impress your loved ones without taking hours to prepare. Whether it’s a last-minute gathering or a cozy family night, these brownies are the perfect solution. Trust me, once you try them, they’ll become a go-to dessert in your home!
Why You’ll Love This Red Velvet Cheesecake Brownies
These Red Velvet Cheesecake Brownies are a dream come true for busy cooks like us! They’re quick to make, taking just about 55 minutes from start to finish. The combination of flavors is simply divine, with the rich chocolatey notes of red velvet perfectly balanced by the creamy cheesecake layer. Plus, they’re a hit with everyone, from picky eaters to dessert lovers. You’ll find yourself making these again and again!
Ingredients for Red Velvet Cheesecake Brownies
Gathering the right ingredients is half the fun of baking these Red Velvet Cheesecake Brownies! Here’s what you’ll need:
- Unsalted butter: This adds richness and moisture to the brownies. You can substitute with margarine if needed.
- Granulated sugar: Sweetens the brownies and helps create that lovely texture. Brown sugar can be used for a deeper flavor.
- Large eggs: They bind the ingredients together and provide structure. Make sure they’re at room temperature for best results.
- Vanilla extract: A must for flavor! You can use almond extract for a unique twist.
- All-purpose flour: This is the base of your brownies. For a gluten-free option, try a 1:1 gluten-free flour blend.
- Cocoa powder: Adds that rich chocolate flavor. Dutch-processed cocoa can give a smoother taste.
- Baking powder: Helps the brownies rise slightly, giving them a nice texture.
- Salt: Enhances all the flavors. Just a pinch goes a long way!
- Red food coloring: This gives the brownies their signature color. Feel free to adjust the amount for a deeper hue.
- Cream cheese: The star of the cheesecake layer! Make sure it’s softened for easy mixing.
- Powdered sugar: Sweetens the cheesecake layer and gives it a smooth texture.
- Additional egg: This helps the cheesecake layer set perfectly.
For exact measurements, check the bottom of the article where you can find everything listed for easy printing. Happy baking!
How to Make Red Velvet Cheesecake Brownies
Now that you have all your ingredients ready, let’s dive into the fun part—making these scrumptious Red Velvet Cheesecake Brownies! Follow these simple steps, and you’ll have a dessert that’s sure to impress.
Step 1: Preheat and Prepare
First things first, preheat your oven to 350°F (175°C). This ensures even baking. While that’s heating up, grab a 9×13 inch baking pan and grease it well. You can use butter or cooking spray. This will help your brownies come out easily later!
Step 2: Make the Red Velvet Batter
In a large bowl, melt the unsalted butter. I usually do this in the microwave for about 30 seconds. Once melted, mix in the granulated sugar until it’s well combined. Then, add in the eggs and vanilla extract. Stir until the mixture is smooth and creamy. This is where the magic begins!
Step 3: Combine Dry Ingredients
In another bowl, whisk together the all-purpose flour, cocoa powder, baking powder, and salt. This step is crucial! It helps to evenly distribute the baking powder and salt, ensuring your brownies rise perfectly. Set this bowl aside for now.
Step 4: Mix the Batter
Now, gradually add the dry ingredients to your wet mixture. Stir gently until just combined. Be careful not to overmix! Once that’s done, it’s time to add the red food coloring. Stir it in until the batter is a vibrant red. It’s like painting, but way tastier!
Step 5: Prepare the Cheesecake Layer
In a separate bowl, beat the softened cream cheese until it’s nice and smooth. Then, add the powdered sugar, an egg, and a splash of vanilla extract. Mix until creamy and well combined. This layer is what makes these brownies truly special!
Step 6: Layer the Mixtures
Pour half of the red velvet batter into your prepared pan, spreading it evenly. Next, spoon the cheesecake mixture over the red velvet layer. Gently spread it out, but don’t worry about making it perfect. Finally, top it with the remaining red velvet batter. Use a knife to swirl it slightly for that beautiful marbled effect.
Step 7: Bake to Perfection
Now, it’s time to bake! Place your pan in the preheated oven and bake for 30-35 minutes. To check for doneness, insert a toothpick in the center. If it comes out clean or with a few moist crumbs, you’re good to go! Let the brownies cool in the pan before cutting them into squares. Enjoy the delicious aroma filling your kitchen!
Tips for Success
- Always use room temperature ingredients for a smoother batter.
- Don’t overmix the batter; it can make your brownies tough.
- For a richer flavor, consider using high-quality cocoa powder.
- Let the brownies cool completely before cutting for cleaner edges.
- Experiment with toppings like chocolate chips or nuts for added texture.
Equipment Needed
- 9×13 inch baking pan: A standard size for brownies. You can use a glass or metal pan.
- Mixing bowls: Have a few on hand for wet and dry ingredients. Any size will do!
- Whisk and spatula: Essential for mixing. A hand mixer can speed things up.
- Measuring cups and spoons: Accurate measurements are key for baking success.
Variations
- Red Velvet Cheesecake Swirl: Add a swirl of raspberry or strawberry puree to the cheesecake layer for a fruity twist.
- Nutty Delight: Fold in chopped walnuts or pecans into the red velvet batter for added crunch and flavor.
- Gluten-Free Option: Substitute all-purpose flour with a gluten-free flour blend to make these brownies suitable for gluten-sensitive friends.
- Vegan Version: Use a plant-based butter, flax eggs, and dairy-free cream cheese for a vegan-friendly treat.
- Chocolate Chip Surprise: Sprinkle chocolate chips on top of the cheesecake layer before adding the final red velvet batter for extra chocolatey goodness.
Serving Suggestions
- Serve warm with a dollop of whipped cream for an extra indulgent treat.
- Pair with a scoop of vanilla ice cream for a delightful contrast.
- Dust with powdered sugar for a beautiful presentation.
- Enjoy with a cup of coffee or a glass of milk.
FAQs about Red Velvet Cheesecake Brownies
Can I make these Red Velvet Cheesecake Brownies ahead of time?
Absolutely! You can prepare them a day in advance. Just store them in an airtight container in the fridge. They taste even better the next day as the flavors meld together!
What can I use instead of cream cheese?
If you’re looking for a substitute, try using mascarpone cheese or a dairy-free cream cheese alternative. Both will give you a creamy texture without compromising flavor.
How do I store leftover brownies?
Store your Red Velvet Cheesecake Brownies in an airtight container at room temperature for up to 5 days. If you want to keep them longer, refrigerate them for up to a week.
Can I freeze these brownies?
Yes! These brownies freeze beautifully. Just wrap them tightly in plastic wrap and then in aluminum foil. They’ll stay fresh for up to three months. Thaw them in the fridge before serving.
What’s the best way to cut brownies for clean edges?
To achieve those perfect squares, use a sharp knife and wipe it clean between cuts. This prevents the cheesecake layer from sticking to the knife, giving you those beautiful, clean edges!
Final Thoughts
Making Red Velvet Cheesecake Brownies is more than just baking; it’s about creating sweet memories in the kitchen. The joy of watching my family’s faces light up as they take that first bite is priceless. These brownies are a delightful blend of flavors and textures, perfect for any occasion. Whether it’s a birthday celebration or a cozy night in, they bring a touch of indulgence to our lives. I hope you find as much joy in making and sharing these treats as I do. Happy baking, and may your kitchen always be filled with love and laughter!
Print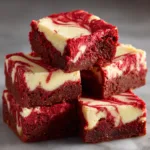
Red Velvet Cheesecake Brownies: A Decadent Delight!
- Total Time: 55 minutes
- Yield: 24 brownies 1x
- Diet: Vegetarian
Description
Red Velvet Cheesecake Brownies are a rich and indulgent dessert that combines the classic flavors of red velvet cake with a creamy cheesecake layer, creating a delightful treat for any occasion.
Ingredients
- 1 cup unsalted butter
- 2 cups granulated sugar
- 4 large eggs
- 2 teaspoons vanilla extract
- 2 cups all-purpose flour
- 1/2 cup cocoa powder
- 1 teaspoon baking powder
- 1 teaspoon salt
- 1 tablespoon red food coloring
- 8 oz cream cheese, softened
- 1/2 cup powdered sugar
- 1 egg
- 1 teaspoon vanilla extract
Instructions
- Preheat the oven to 350°F (175°C) and grease a 9×13 inch baking pan.
- In a large bowl, melt the butter and mix in the granulated sugar until well combined.
- Add the eggs and vanilla extract, mixing until smooth.
- In another bowl, whisk together the flour, cocoa powder, baking powder, and salt.
- Gradually add the dry ingredients to the wet mixture, stirring until just combined.
- Stir in the red food coloring until the batter is evenly colored.
- In a separate bowl, beat the cream cheese until smooth, then add the powdered sugar, egg, and vanilla extract, mixing until creamy.
- Pour half of the red velvet batter into the prepared pan, spreading it evenly.
- Spoon the cheesecake mixture over the red velvet layer, spreading it gently.
- Top with the remaining red velvet batter, swirling it slightly with a knife to create a marbled effect.
- Bake for 30-35 minutes or until a toothpick inserted in the center comes out clean.
- Allow to cool before cutting into squares and serving.
Notes
- For a more intense red color, add more food coloring as desired.
- These brownies can be stored in an airtight container for up to 5 days.
- Serve with whipped cream or a dusting of powdered sugar for extra flair.
- Prep Time: 20 minutes
- Cook Time: 35 minutes
- Category: Dessert
- Method: Baking
- Cuisine: American
Nutrition
- Serving Size: 1 brownie
- Calories: 250
- Sugar: 20g
- Sodium: 150mg
- Fat: 12g
- Saturated Fat: 7g
- Unsaturated Fat: 3g
- Trans Fat: 0g
- Carbohydrates: 30g
- Fiber: 1g
- Protein: 3g
- Cholesterol: 50mg