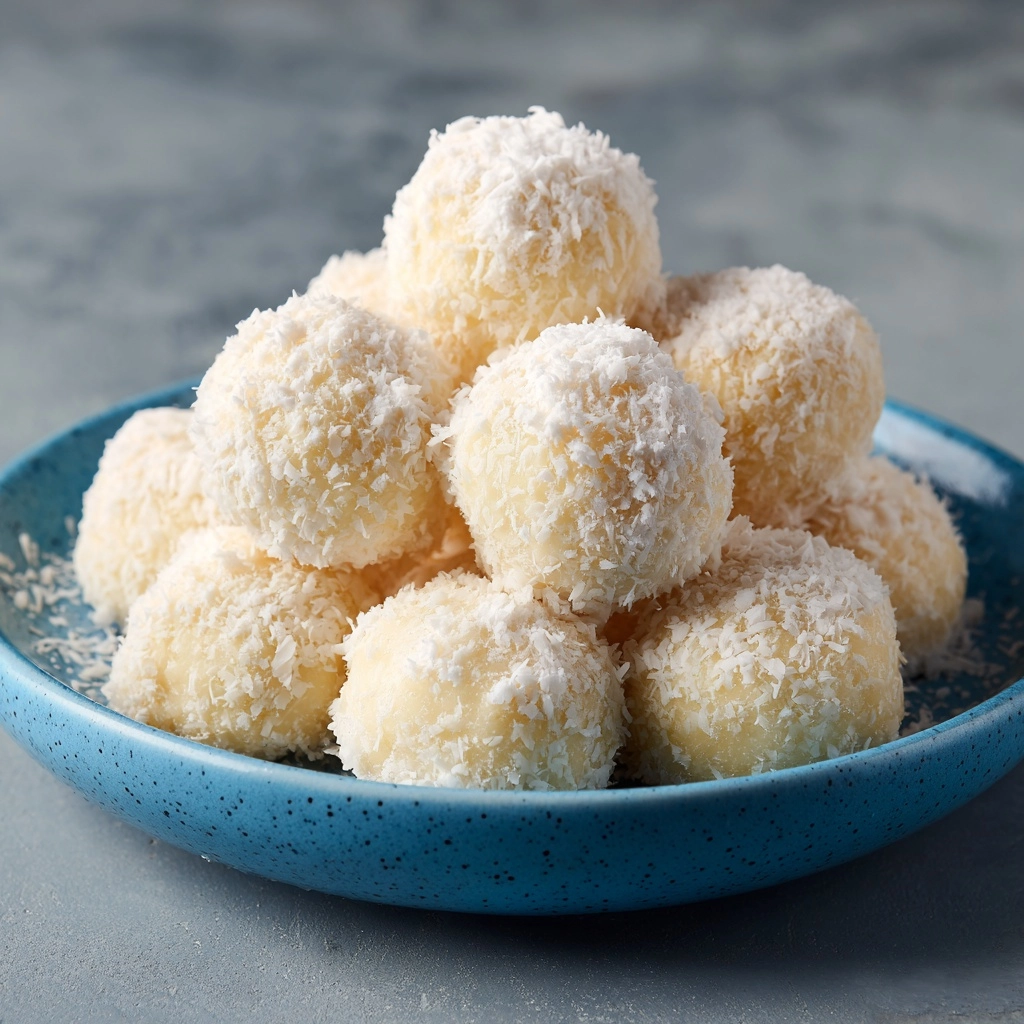
Introduction to Sweetened Condensed Milk Snowballs
As a busy mom, I know how precious time can be, especially when it comes to whipping up something sweet. That’s why I adore these Sweetened Condensed Milk Snowballs! They’re not just a treat; they’re a delightful escape from the chaos of everyday life. With just a handful of ingredients, you can create these melt-in-your-mouth delights that will impress your family and friends. Whether it’s a last-minute gathering or a cozy night in, these snowballs are the perfect solution. Trust me, once you try them, you’ll be hooked!
Why You’ll Love This Sweetened Condensed Milk Snowballs
These Sweetened Condensed Milk Snowballs are a dream come true for busy lives. They come together in just 15 minutes, making them a quick and easy dessert option. The taste? Oh, it’s like a sweet hug for your taste buds! Plus, they require no baking, so you can skip the oven and enjoy a delightful treat without the fuss. Perfect for any occasion, they’re sure to bring smiles all around!
Ingredients for Sweetened Condensed Milk Snowballs
Gathering the right ingredients is the first step to creating these delightful Sweetened Condensed Milk Snowballs. Here’s what you’ll need:
- Sweetened Condensed Milk: This creamy base adds rich sweetness and moisture, making the snowballs melt in your mouth.
- Shredded Coconut: It brings a tropical flair and chewy texture. You can use sweetened or unsweetened, depending on your preference.
- Powdered Sugar: This fine sugar helps to sweeten and bind the mixture, giving it that delightful sweetness without any graininess.
- Vanilla Extract: A splash of this aromatic extract enhances the flavor, adding warmth and depth to the snowballs.
- Chopped Nuts (optional): If you want a little crunch, fold in some chopped nuts like almonds or walnuts. They add a lovely texture and nutty flavor.
Feel free to customize your snowballs with different nuts or even a hint of almond extract for a unique twist. You can find all the exact measurements at the bottom of the article, ready for printing!
How to Make Sweetened Condensed Milk Snowballs
Making Sweetened Condensed Milk Snowballs is a breeze! Follow these simple steps, and you’ll have a batch of delightful treats ready to enjoy. Let’s dive in!
Step 1: Combine the Base Ingredients
Start by grabbing a mixing bowl. In it, combine the sweetened condensed milk, shredded coconut, powdered sugar, and vanilla extract. Use a spatula to mix everything together until it’s well blended. The mixture should be thick and sticky, almost like a sweet dough. This is where the magic begins!
Step 2: Add Optional Nuts
If you’re feeling adventurous, now’s the time to fold in those chopped nuts! Gently add them to the mixture and stir until they’re evenly distributed. Nuts like almonds or walnuts add a delightful crunch that contrasts beautifully with the soft texture of the snowballs. But if you prefer a nut-free version, feel free to skip this step!
Step 3: Chill the Mixture
Next, it’s time to chill! Cover the bowl with plastic wrap and pop it in the refrigerator for about 30 minutes. This step is crucial as it helps the mixture firm up, making it easier to scoop and roll into balls. Plus, it gives the flavors a chance to meld together, enhancing the overall taste.
Step 4: Form the Snowballs
Once the mixture is chilled, take it out of the fridge. Using a small cookie scoop or your hands, scoop out portions of the mixture. Roll each portion into a ball, about the size of a tablespoon. Don’t worry if they’re not perfect; the charm of these snowballs lies in their homemade look!
Step 5: Coat the Snowballs
Now comes the fun part—coating! Roll each ball in additional shredded coconut or powdered sugar. This adds a lovely finish and makes them look like little snowballs. The coating not only enhances the visual appeal but also adds a touch of sweetness with every bite.
Step 6: Refrigerate Until Set
Place the coated snowballs on a baking sheet lined with parchment paper. Pop them back in the refrigerator for about 15 minutes to set. This helps them hold their shape and makes them even more enjoyable to eat. Trust me, the wait will be worth it!
Step 7: Serve and Enjoy
Finally, it’s time to serve! Take the snowballs out of the fridge and arrange them on a pretty plate. These treats are best enjoyed chilled, so gather your loved ones and dig in. Each bite is a delightful explosion of sweetness that’s sure to bring smiles all around!
Tips for Success
- Make sure to chill the mixture thoroughly; it makes rolling easier.
- Use a cookie scoop for uniform snowballs; it saves time and ensures consistency.
- Experiment with different coatings like crushed nuts or sprinkles for a fun twist.
- Store leftovers in an airtight container to keep them fresh and delicious.
- Get the kids involved! They’ll love rolling the snowballs and choosing their coatings.
Equipment Needed
- Mixing Bowl: A medium-sized bowl works best. You can use any bowl you have on hand.
- Spatula: A rubber spatula is great for mixing. A wooden spoon will do just fine too.
- Cookie Scoop: This helps with portioning. If you don’t have one, your hands work perfectly!
- Baking Sheet: A standard baking sheet lined with parchment paper is ideal for chilling the snowballs.
Variations
- Chocolate Lovers: Add cocoa powder to the mixture for a chocolatey twist. You can also dip the finished snowballs in melted chocolate for an indulgent treat.
- Fruit Flavors: Mix in some finely chopped dried fruits like cranberries or apricots for a burst of flavor and color.
- Nut-Free Option: Simply omit the nuts or replace them with seeds like sunflower or pumpkin seeds for a crunchy texture without the allergens.
- Flavor Infusions: Experiment with different extracts like almond or coconut for a unique flavor profile.
- Gluten-Free: This recipe is naturally gluten-free, but always check your ingredient labels to ensure they meet your dietary needs.
Serving Suggestions
- Pair these Sweetened Condensed Milk Snowballs with a cup of hot cocoa for a cozy treat.
- Serve them alongside fresh fruit for a refreshing contrast to the sweetness.
- For a festive touch, arrange them on a decorative platter with holiday-themed garnishes.
- Consider adding a scoop of vanilla ice cream for an indulgent dessert experience.
FAQs about Sweetened Condensed Milk Snowballs
Can I make Sweetened Condensed Milk Snowballs ahead of time?
Absolutely! These snowballs can be made a day or two in advance. Just store them in an airtight container in the refrigerator. They’ll stay fresh and delicious, ready for your next gathering!
What can I use instead of sweetened condensed milk?
If you’re looking for a substitute, you can try using evaporated milk mixed with sugar. However, the texture and sweetness will differ slightly. For a vegan option, consider using coconut cream with a bit of maple syrup.
How long do Sweetened Condensed Milk Snowballs last?
These treats can last up to a week in the refrigerator when stored properly in an airtight container. Just be sure to keep them chilled for the best taste and texture!
Can I freeze Sweetened Condensed Milk Snowballs?
What’s the best way to serve these snowballs?
These Sweetened Condensed Milk Snowballs are best served chilled. You can arrange them on a festive platter or pair them with a warm drink like coffee or hot chocolate for a delightful contrast!
Final Thoughts
Creating these Sweetened Condensed Milk Snowballs is more than just making a dessert; it’s about bringing joy to your kitchen and your loved ones. Each bite is a reminder of the simple pleasures in life, like sharing sweet moments with family. The ease of preparation means you can whip them up even on the busiest days, making them a go-to treat for any occasion. So, gather your ingredients, roll up your sleeves, and let the delightful chaos of baking fill your home with warmth and happiness. Trust me, these snowballs will become a cherished favorite!
Print
Sweetened Condensed Milk Snowballs – Delight in Every Bite!
- Total Time: 45 minutes
- Yield: 24 snowballs 1x
- Diet: Vegetarian
Description
Sweetened Condensed Milk Snowballs are delightful treats that melt in your mouth, combining the rich sweetness of condensed milk with a soft, fluffy texture.
Ingredients
- 1 cup sweetened condensed milk
- 2 cups shredded coconut
- 1 cup powdered sugar
- 1 teaspoon vanilla extract
- 1/2 cup chopped nuts (optional)
Instructions
- In a mixing bowl, combine sweetened condensed milk, shredded coconut, powdered sugar, and vanilla extract.
- If using, fold in the chopped nuts until evenly distributed.
- Chill the mixture in the refrigerator for about 30 minutes to firm up.
- Once chilled, scoop out small portions and roll them into balls.
- Roll the balls in additional shredded coconut or powdered sugar for coating.
- Place the snowballs on a baking sheet lined with parchment paper and refrigerate until set.
- Serve chilled and enjoy!
Notes
- Store in an airtight container in the refrigerator for up to a week.
- Feel free to customize with different nuts or flavorings.
- These treats are perfect for holiday gatherings or as a sweet snack.
- Prep Time: 15 minutes
- Cook Time: 0 minutes
- Category: Dessert
- Method: No-bake
- Cuisine: American
Nutrition
- Serving Size: 1 snowball
- Calories: 120
- Sugar: 10g
- Sodium: 15mg
- Fat: 5g
- Saturated Fat: 4g
- Unsaturated Fat: 1g
- Trans Fat: 0g
- Carbohydrates: 18g
- Fiber: 1g
- Protein: 1g
- Cholesterol: 5mg
