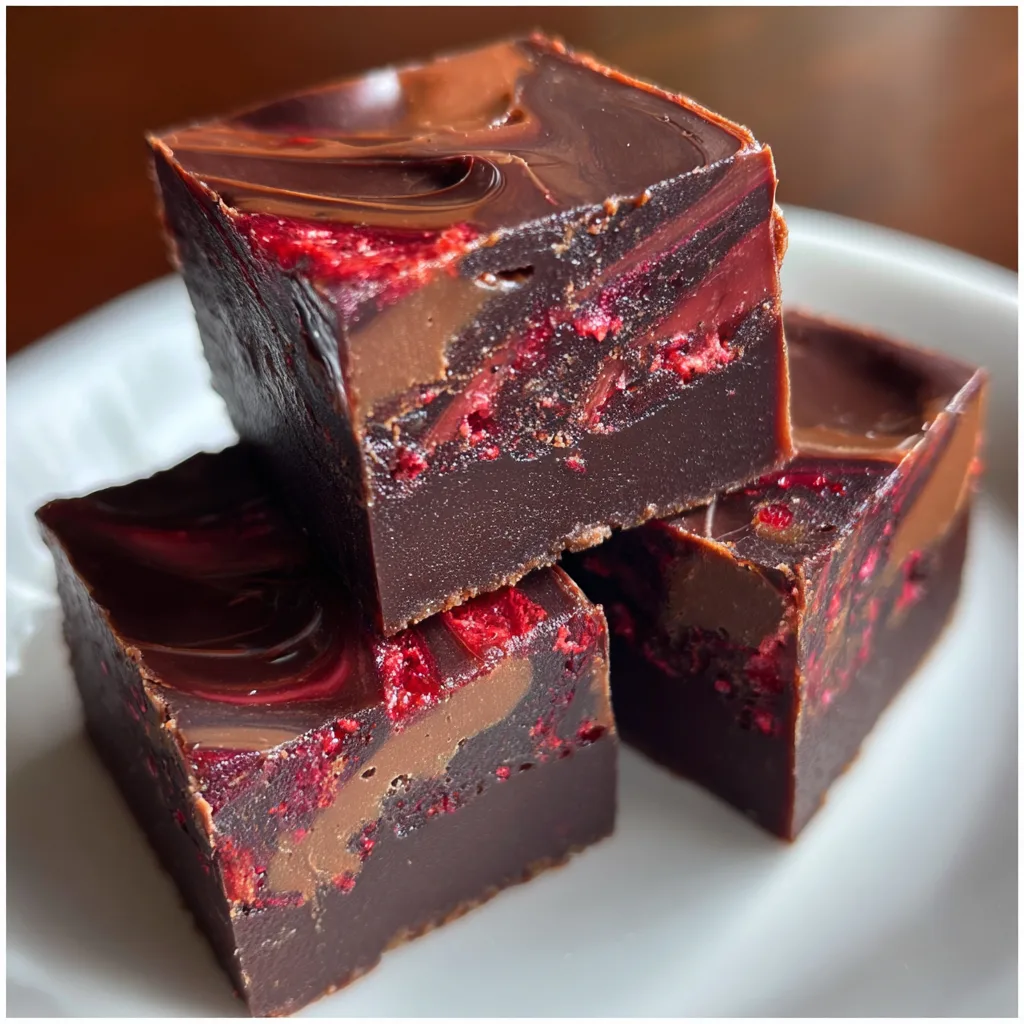
Introduction to Vampire Fudge Recipe
As the leaves turn and the air gets crisp, I can’t help but get excited about Halloween treats. One of my absolute favorites is this Vampire Fudge Recipe. It’s not just a dessert; it’s a delightful way to bring a little spooky fun into your kitchen! Perfect for busy moms like us, this fudge is quick to whip up and sure to impress your loved ones. With its rich, creamy texture and striking colors, it’s a treat that will have everyone asking for seconds. Let’s dive into this deliciously spooky adventure together!
Why You’ll Love This Vampire Fudge Recipe
This Vampire Fudge Recipe is a game-changer for busy days. It’s incredibly easy to make, taking just 15 minutes of prep time. The rich, creamy flavor will have your family raving, while the eye-catching red and black colors make it perfect for Halloween festivities. Plus, it’s a no-bake treat, so you can spend less time in the kitchen and more time enjoying the spooky season with your loved ones!
Ingredients for Vampire Fudge Recipe
Gathering the right ingredients is the first step to creating this spooktacular Vampire Fudge. Here’s what you’ll need:
- White chocolate chips: These are the base of our fudge, providing a creamy sweetness that balances the cocoa.
- Sweetened condensed milk: This magical ingredient adds richness and helps bind everything together, making the fudge extra smooth.
- Unsweetened cocoa powder: For that deep, chocolatey flavor, cocoa powder is essential. It gives the fudge its dark, mysterious hue.
- Butter: A little butter goes a long way in adding creaminess and a luscious texture to the fudge.
- Vanilla extract: This adds a warm, comforting flavor that enhances the sweetness of the fudge.
- Red food coloring: To achieve that spooky vampire look, red food coloring is a must. It gives the fudge its signature blood-red hue.
- Black food coloring: This helps create the striking contrast with the red, making your fudge visually stunning.
- Sprinkles (optional): For a festive touch, feel free to add sprinkles on top. They can be Halloween-themed for extra fun!
For exact measurements, check the bottom of the article where you can find everything listed for easy printing. Happy cooking!
How to Make Vampire Fudge Recipe
Now that we have our ingredients ready, let’s dive into the fun part—making this delicious Vampire Fudge! Follow these simple steps, and you’ll have a spooky treat that’s sure to impress.
Step 1: Melt the Base
Start by placing your butter and white chocolate chips in a saucepan over low heat. Stir constantly to ensure they melt evenly. This is where the magic begins! The aroma of melting chocolate will fill your kitchen, making it hard to resist sneaking a taste.
Step 2: Mix in Sweetened Condensed Milk
Once the butter and chocolate are melted, it’s time to add the sweetened condensed milk and vanilla extract. Stir well until everything is combined into a smooth, creamy mixture. This step is crucial for achieving that rich texture we all love in fudge!
Step 3: Separate the Mixture
Now, carefully remove half of the mixture from the saucepan and set it aside in a separate bowl. This will be the base for our chocolate layer. Don’t worry if it’s a little messy; that’s part of the fun!
Step 4: Add Cocoa Powder
To the remaining mixture in the saucepan, add the unsweetened cocoa powder. Mix it in until the mixture is smooth and chocolatey. This is where the fudge gets its deep, dark color and rich flavor. You’ll want to taste it, but remember, it’s hot!
Step 5: Color the Reserved Mixture
Next, take the reserved mixture and add a few drops of red food coloring. Stir until you achieve your desired spooky shade. The vibrant red will create a striking contrast with the dark chocolate layer. Feel free to add more coloring if you want a bolder look!
Step 6: Layer the Mixtures
Now, grab a greased pan and pour the chocolate mixture into it first. Spread it evenly across the bottom. Then, gently pour the red mixture on top. Don’t worry about making it perfect; the swirling will come next!
Step 7: Swirl for Effect
Using a knife, gently swirl the two mixtures together. This creates a beautiful marbled effect that’s not only visually appealing but also adds a fun texture to each bite. Just a few swirls will do; you want to see both colors!
Step 8: Refrigerate
Now comes the hardest part—waiting! Place the pan in the refrigerator for at least 2 hours until the fudge is set. This step is essential for achieving that perfect fudge consistency. You can use this time to clean up or plan your Halloween party!
Step 9: Cut and Serve
Once the fudge is set, take it out of the fridge and cut it into squares. If you want to add a festive touch, sprinkle some Halloween-themed sprinkles on top. Serve these delightful treats to your family and watch their faces light up with joy!
Tips for Success
- Make sure to stir constantly while melting to avoid burning the chocolate.
- Use a sharp knife to cut the fudge for clean edges.
- Let the fudge cool completely before refrigerating for the best texture.
- Experiment with different colors for a unique twist on the classic look.
- Store any leftovers in an airtight container to keep them fresh.
Equipment Needed
- Medium saucepan: A non-stick pan works best for easy melting.
- Mixing spoon: A wooden or silicone spoon is perfect for stirring.
- Measuring cups: Essential for accurate ingredient portions.
- Greased pan: A square or rectangular baking dish will do.
- Knife: A sharp knife is key for cutting the fudge into neat squares.
Variations
- Nutty Delight: Add chopped nuts like walnuts or pecans for a crunchy texture that complements the creamy fudge.
- Minty Twist: Incorporate a few drops of peppermint extract for a refreshing mint flavor that pairs beautifully with chocolate.
- Vegan Option: Substitute white chocolate chips with dairy-free chocolate chips and use coconut cream instead of sweetened condensed milk.
- Spicy Kick: Add a pinch of cayenne pepper or chili powder to the chocolate layer for a surprising heat that contrasts with the sweetness.
- Fruit Infusion: Mix in dried cranberries or cherries for a fruity burst that adds a delightful chewiness to each bite.
Serving Suggestions
- Pair your Vampire Fudge with a glass of cold milk for a classic treat.
- Serve alongside spooky-themed cupcakes or cookies for a festive dessert table.
- Present the fudge on a Halloween-themed platter, garnished with candy eyeballs for extra fun.
- Offer a side of whipped cream for dipping, adding a creamy contrast to the fudge.
FAQs about Vampire Fudge Recipe
Can I use different types of chocolate for this Vampire Fudge Recipe?
Absolutely! While white chocolate is the base, you can experiment with milk or dark chocolate for a different flavor profile. Just keep in mind that it will change the overall look and taste of your fudge.
How long does the Vampire Fudge last?
This spooky treat can be stored in an airtight container in the refrigerator for up to a week. Just make sure it’s completely set before storing to maintain its texture!
Can I make this fudge ahead of time?
Yes! This Vampire Fudge Recipe is perfect for making ahead of time. Just prepare it a day or two before your Halloween gathering, and it will be ready to impress your guests!
What if I don’t have food coloring?
If you’re out of food coloring, you can use natural alternatives like beet juice for red and activated charcoal for black. Just remember, the colors may not be as vibrant, but they’ll still be delicious!
Can I freeze Vampire Fudge?
Yes, you can freeze it! Just cut the fudge into squares, wrap them tightly in plastic wrap, and place them in a freezer-safe container. They’ll keep for up to three months. Just thaw in the fridge before serving!
Final Thoughts
Making this Vampire Fudge Recipe is more than just whipping up a dessert; it’s about creating memories with your loved ones. The joy of seeing their faces light up as they take a bite is priceless. This treat brings a touch of Halloween magic to your kitchen, making it a perfect addition to any gathering. Plus, it’s so easy to make that you’ll find yourself wanting to whip it up again and again. So, gather your ingredients, embrace the spooky spirit, and enjoy every delicious moment of this delightful fudge adventure!
Print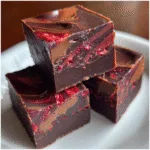
Vampire Fudge Recipe: Discover a Spooktacular Treat!
- Total Time: 2 hours 25 minutes
- Yield: 24 pieces 1x
- Diet: Vegetarian
Description
A deliciously spooky treat perfect for Halloween, this Vampire Fudge is rich, creamy, and features a striking red and black color scheme.
Ingredients
- 2 cups white chocolate chips
- 1 cup sweetened condensed milk
- 1/2 cup unsweetened cocoa powder
- 1/2 cup butter
- 1 teaspoon vanilla extract
- Red food coloring
- Black food coloring
- Sprinkles (optional)
Instructions
- In a saucepan, melt the butter and white chocolate chips over low heat, stirring constantly.
- Once melted, add the sweetened condensed milk and vanilla extract, mixing well.
- Remove half of the mixture and set aside.
- To the remaining mixture, add cocoa powder and mix until smooth.
- Add red food coloring to the reserved mixture until desired color is achieved.
- In a greased pan, pour the chocolate mixture first, followed by the red mixture on top.
- Swirl the two mixtures together using a knife for a marbled effect.
- Refrigerate for at least 2 hours until set.
- Cut into squares and serve, optionally topping with sprinkles.
Notes
- Ensure the fudge is completely set before cutting for clean edges.
- Store in an airtight container in the refrigerator for up to a week.
- Feel free to adjust the food coloring to achieve your desired spooky effect.
- Prep Time: 15 minutes
- Cook Time: 10 minutes
- Category: Dessert
- Method: Stovetop
- Cuisine: American
Nutrition
- Serving Size: 1 piece
- Calories: 150
- Sugar: 12g
- Sodium: 50mg
- Fat: 8g
- Saturated Fat: 5g
- Unsaturated Fat: 2g
- Trans Fat: 0g
- Carbohydrates: 18g
- Fiber: 1g
- Protein: 2g
- Cholesterol: 15mg