Introduction to No-Bake Oreo Cheesecake (Crowd-Pleaser!)
Hey there, fellow dessert lovers! If you’re anything like me, you know that life can get pretty hectic. Between juggling work, family, and everything in between, finding time to whip up a show-stopping dessert can feel impossible. That’s where my No-Bake Oreo Cheesecake comes in—a true crowd-pleaser! This delightful treat is not only easy to make, but it also requires no baking, making it the perfect solution for busy days. Imagine impressing your loved ones with a creamy, dreamy cheesecake that’s as simple as it is delicious. Trust me, this recipe will become your go-to for any occasion!
Why You’ll Love This No-Bake Oreo Cheesecake (Crowd-Pleaser!)
This No-Bake Oreo Cheesecake is a lifesaver for busy moms and professionals like us. It’s incredibly easy to whip up, taking just 20 minutes of your time. Plus, the rich, creamy flavor combined with the crunch of Oreo cookies makes it a dessert that everyone will adore. Whether it’s a family gathering or a last-minute get-together, this cheesecake is sure to impress without the stress!
Ingredients for No-Bake Oreo Cheesecake (Crowd-Pleaser!)
Let’s dive into the deliciousness! Here’s what you’ll need to create this No-Bake Oreo Cheesecake that will have everyone asking for seconds. Remember, the exact measurements are at the bottom of the article for your convenience.
- Oreo cookies: The star of the show! These chocolatey delights form the crust and add a delightful crunch.
- Unsalted butter: This helps bind the crushed Oreos together, creating a rich and buttery crust.
- Cream cheese: The creamy base of our cheesecake. Make sure it’s softened for easy mixing!
- Powdered sugar: This sweetens the filling and gives it that smooth, velvety texture we all love.
- Vanilla extract: A splash of this adds warmth and depth to the cheesecake flavor.
- Heavy whipping cream: Whipping this up creates a light and airy texture, making the cheesecake feel indulgent.
- Additional Oreo cookies: For topping! Crushed or whole, they add a fun finishing touch.
If you’re feeling adventurous, you can swap out the Oreos for other cookies like chocolate wafers or even gluten-free options. The beauty of this recipe is its flexibility! So, gather your ingredients and get ready to create a dessert that’s sure to impress.
How to Make No-Bake Oreo Cheesecake (Crowd-Pleaser!)
Now that we have our ingredients ready, let’s get to the fun part—making this No-Bake Oreo Cheesecake! Follow these simple steps, and you’ll have a dessert that’s sure to wow your family and friends.
Step 1: Prepare the Crust
Start by crushing the Oreo cookies into fine crumbs. You can use a food processor or simply place them in a zip-top bag and crush them with a rolling pin. It’s a great way to relieve stress!
Next, mix the crushed cookies with melted unsalted butter in a bowl. Stir until everything is well combined. The mixture should resemble wet sand.
Now, press this mixture firmly into the bottom of a 9-inch springform pan. Use the back of a measuring cup to pack it down evenly. This crust is the foundation of your cheesecake, so make it sturdy!
Step 2: Make the Cheesecake Filling
In a separate bowl, beat the softened cream cheese until it’s smooth and creamy. This step is crucial for a lump-free filling, so take your time!
Once smooth, add the powdered sugar and vanilla extract. Mix until everything is well combined. The sweetness of the sugar balances the cream cheese perfectly.
In another bowl, whip the heavy cream until stiff peaks form. This means it should hold its shape when you lift the whisk. Gently fold the whipped cream into the cream cheese mixture. Be careful not to deflate the whipped cream; we want that light, airy texture!
Step 3: Combine and Chill
Pour the cheesecake filling over the prepared crust in the springform pan. Use a spatula to spread it evenly. It’s like spreading a fluffy cloud over a chocolatey base!
Now, it’s time to chill. Cover the cheesecake with plastic wrap and place it in the refrigerator for at least 4 hours, or until it’s set. If you can wait overnight, even better! The flavors will meld beautifully.
Step 4: Serve and Enjoy
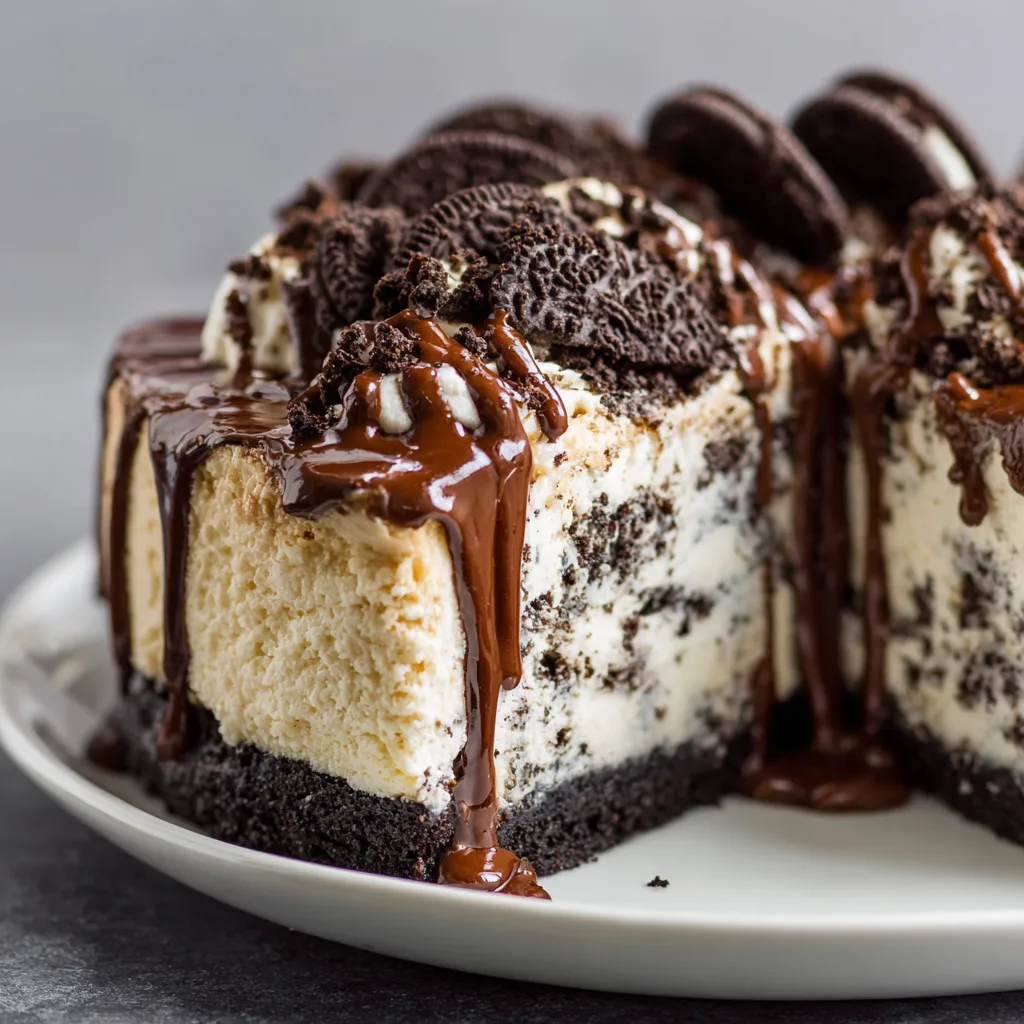
Once your cheesecake is set, it’s time to serve! Carefully remove the sides of the springform pan. Top with additional crushed Oreo cookies for that extra crunch.
Slice into generous pieces and watch as everyone’s eyes light up. This No-Bake Oreo Cheesecake is not just a dessert; it’s a celebration of flavors and textures. Enjoy every bite!
Tips for Success
- Always use room temperature cream cheese for a smooth filling.
- Don’t rush the chilling process; it’s key for the cheesecake to set properly.
- For easier slicing, let the cheesecake sit at room temperature for a few minutes before serving.
- Feel free to customize toppings—chocolate sauce or whipped cream can elevate your dessert!
- Store leftovers in the fridge, covered, for up to 3 days.
Equipment Needed
- 9-inch springform pan: Perfect for easy removal. A regular pie dish works too, but slicing will be trickier.
- Mixing bowls: Use a large bowl for the filling and a smaller one for whipping cream.
- Electric mixer: A hand mixer is great, but a stand mixer can save time.
- Spatula: Essential for folding and spreading the cheesecake mixture.
- Food processor or rolling pin: For crushing Oreos; a zip-top bag works just as well!
Variations of No-Bake Oreo Cheesecake (Crowd-Pleaser!)
- Mint Oreo Cheesecake: Swap regular Oreos for mint-flavored ones for a refreshing twist.
- Peanut Butter Oreo Cheesecake: Add creamy peanut butter to the filling for a nutty flavor that pairs perfectly with chocolate.
- Gluten-Free Option: Use gluten-free chocolate sandwich cookies to make this dessert suitable for gluten-sensitive friends.
- Fruit Topping: Top with fresh berries or a berry compote for a fruity contrast to the rich cheesecake.
- Chocolate Drizzle: Drizzle melted chocolate over the top for an extra indulgent touch.
Serving Suggestions for No-Bake Oreo Cheesecake (Crowd-Pleaser!)
- Fresh Berries: Serve with strawberries or raspberries for a pop of color and freshness.
- Whipped Cream: A dollop of whipped cream on top adds a light, fluffy touch.
- Chocolate Sauce: Drizzle chocolate sauce over each slice for an extra indulgent treat.
- Ice Cream: Pair with vanilla or cookies and cream ice cream for a delightful combination.
- Presentation: Garnish with mint leaves for a beautiful finishing touch.
FAQs about No-Bake Oreo Cheesecake (Crowd-Pleaser!)
As a passionate home cook, I often get questions about my No-Bake Oreo Cheesecake. Here are some of the most common queries I’ve encountered, along with my answers to help you navigate this delicious dessert!
Can I make this cheesecake ahead of time?
Absolutely! This No-Bake Oreo Cheesecake is perfect for making a day in advance. Just keep it covered in the fridge, and it will be ready to impress your guests when you are!
How long does the cheesecake need to chill?
For the best results, chill the cheesecake for at least 4 hours. If you can wait overnight, the flavors will meld beautifully, making it even more delicious!
Can I use low-fat cream cheese?
Yes, you can! While it may alter the texture slightly, using low-fat cream cheese is a great way to lighten up this No-Bake Oreo Cheesecake without sacrificing too much flavor.
What can I use instead of Oreos?
If you’re looking for a twist, try using chocolate wafers or gluten-free cookies. The beauty of this recipe is its flexibility, so feel free to experiment!
How should I store leftovers?
Store any leftovers in an airtight container in the fridge for up to 3 days. Just be sure to keep it covered to maintain its freshness!
Final Thoughts
Creating this No-Bake Oreo Cheesecake is more than just making a dessert; it’s about sharing joy and deliciousness with those you love. The smiles on your family’s faces as they take that first bite are priceless. This recipe is a reminder that even in our busy lives, we can whip up something special without the fuss. Whether it’s a birthday celebration or a simple family dinner, this cheesecake is sure to be the star of the show. So, roll up your sleeves, gather your ingredients, and let the magic happen in your kitchen!
Print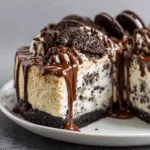
No-Bake Oreo Cheesecake (Crowd-Pleaser!) You Must Try!
- Total Time: 4 hours 20 minutes
- Yield: 8 servings 1x
- Diet: Vegetarian
Description
A delicious and easy-to-make No-Bake Oreo Cheesecake that is sure to impress your guests.
Ingredients
- 24 Oreo cookies, crushed
- 1/2 cup unsalted butter, melted
- 16 oz cream cheese, softened
- 1 cup powdered sugar
- 1 tsp vanilla extract
- 1 cup heavy whipping cream
- Additional Oreo cookies for topping
Instructions
- In a bowl, combine crushed Oreo cookies and melted butter until well mixed.
- Press the mixture into the bottom of a 9-inch springform pan to form the crust.
- In a separate bowl, beat the cream cheese until smooth.
- Add powdered sugar and vanilla extract to the cream cheese and mix until combined.
- In another bowl, whip the heavy cream until stiff peaks form.
- Gently fold the whipped cream into the cream cheese mixture until fully incorporated.
- Pour the cheesecake filling over the crust in the springform pan.
- Chill in the refrigerator for at least 4 hours or until set.
- Before serving, top with additional crushed Oreo cookies.
Notes
- For best results, use room temperature cream cheese.
- Let the cheesecake sit at room temperature for a few minutes before slicing for easier serving.
- This cheesecake can be made a day in advance.
- Prep Time: 20 minutes
- Cook Time: 0 minutes
- Category: Dessert
- Method: No-Bake
- Cuisine: American
Nutrition
- Serving Size: 1 slice
- Calories: 350
- Sugar: 25g
- Sodium: 200mg
- Fat: 25g
- Saturated Fat: 15g
- Unsaturated Fat: 5g
- Trans Fat: 0g
- Carbohydrates: 30g
- Fiber: 1g
- Protein: 4g
- Cholesterol: 70mg