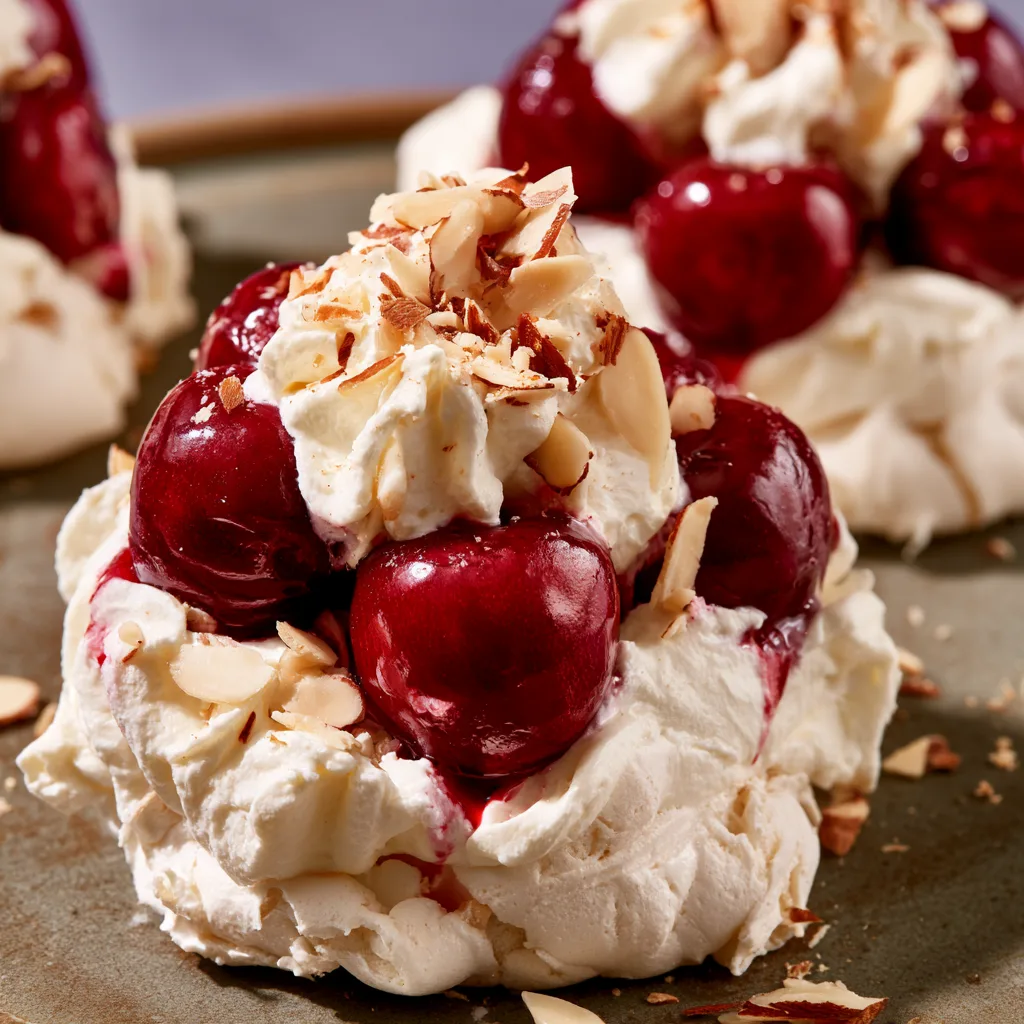
Introduction to Cherries in the Snow: A Delightful Winter Treat!
As the winter chill sets in, I find myself craving something sweet and comforting. That’s where Cherries in the Snow: A Delightful Winter Treat! comes into play. This no-bake dessert is not only a quick solution for busy days, but it also brings a touch of elegance to any holiday gathering. Imagine the joy on your loved ones’ faces as they dig into this creamy, cherry-filled delight! With just a few simple ingredients, you can create a festive treat that warms the heart and satisfies the sweet tooth. Let’s dive into this delightful recipe!
Why You’ll Love This Cherries in the Snow
This delightful winter treat is a breeze to make, perfect for those hectic holiday weeks. With just 15 minutes of prep time, you can whip up a dessert that looks and tastes like a million bucks! The creamy topping paired with sweet cherries creates a flavor explosion that will have everyone asking for seconds. Plus, it’s a no-bake recipe, so you can spend more time enjoying the festivities with your loved ones!
Ingredients for Cherries in the Snow
Gathering the right ingredients is the first step to creating this delightful winter treat. Here’s what you’ll need:
- Frozen cherries: These are the star of the show! Their natural sweetness and vibrant color make this dessert pop.
- Heavy cream: This is what gives the dessert its rich, creamy texture. If you’re looking for a lighter option, whipped topping works just as well.
- Powdered sugar: This sweetener dissolves easily into the cream, giving it that perfect sweetness without any graininess.
- Vanilla extract: A splash of this adds depth and warmth to the flavor profile, making every bite feel special.
- Chopped nuts (optional): These add a delightful crunch and a nutty flavor. Walnuts or pecans are great choices!
For exact measurements, check the bottom of the article where you can find everything listed for easy printing. Feel free to get creative with your ingredients! You can mix in other fruits or even a splash of liqueur for an adult twist. The possibilities are endless!
How to Make Cherries in the Snow
Now that you have your ingredients ready, let’s get started on making this delightful winter treat! Follow these simple steps, and you’ll have a stunning dessert that’s sure to impress.
Step 1: Thaw the Cherries
Begin by taking your frozen cherries out of the freezer. Place them in a bowl and let them thaw for about 10-15 minutes. This will make them easier to mix into the cream. Once thawed, drain any excess liquid. You want the cherries to be juicy but not watery, or they might make your dessert soggy!
Step 2: Whip the Cream
Next, grab a mixing bowl and pour in the heavy cream. Using a hand mixer or a whisk, whip the cream until soft peaks form. This means the cream should hold its shape but still be smooth and creamy. If you’re using a mixer, keep an eye on it; you don’t want to over-whip and turn it into butter!
Step 3: Sweeten the Cream
Once you have those lovely soft peaks, it’s time to sweeten the cream. Add the powdered sugar and vanilla extract to the whipped cream. Continue whipping until stiff peaks form. This will give your cream that perfect fluffy texture, making it a delightful topping for your cherries.
Step 4: Fold in the Cherries
Now comes the fun part! Gently fold the thawed cherries into the whipped cream mixture. Use a spatula and be careful not to deflate the cream. You want to keep that airy texture while ensuring the cherries are evenly distributed. The vibrant red cherries against the snowy cream is a sight to behold!
Step 5: Transfer and Garnish
Once everything is mixed, transfer the cherry-cream mixture into a serving dish. If you’re feeling fancy, you can layer it in individual cups for a more elegant presentation. Sprinkle with chopped nuts if you’re using them. This adds a lovely crunch and a pop of flavor!
Step 6: Chill Before Serving
Finally, cover the dish with plastic wrap and chill it in the refrigerator for at least one hour. This allows the flavors to meld together beautifully. Plus, it makes the dessert even more refreshing when served cold. Trust me, the wait will be worth it!
Tips for Success
- Make sure your heavy cream is cold for better whipping results.
- Don’t rush the chilling process; it enhances the flavors.
- For a fun twist, try adding a splash of almond extract!
- Use a rubber spatula to fold in the cherries gently.
- Experiment with different nuts or even chocolate shavings for added texture.
Equipment Needed
- Mixing bowl: A large bowl works best, but any bowl will do.
- Hand mixer or whisk: A hand mixer speeds things up, but a whisk gives you a workout!
- Spatula: Essential for folding in the cherries gently.
- Serving dish: Any dish will work, but a glass bowl showcases the layers beautifully.
Variations of Cherries in the Snow
- Berry Medley: Swap out the cherries for a mix of frozen berries like blueberries, raspberries, and strawberries for a colorful twist.
- Chocolate Delight: Add cocoa powder to the whipped cream for a chocolatey version that pairs beautifully with cherries.
- Nut-Free Option: Omit the nuts for a nut-free dessert, perfect for those with allergies.
- Vegan Version: Use coconut cream instead of heavy cream and maple syrup instead of powdered sugar for a dairy-free treat.
- Spiced Up: Add a pinch of cinnamon or nutmeg to the whipped cream for a warm, spiced flavor that’s perfect for winter.
Serving Suggestions for Cherries in the Snow
- Pair with a warm slice of gingerbread for a cozy holiday vibe.
- Serve alongside a cup of hot cocoa or spiced apple cider for a festive drink.
- Garnish with fresh mint leaves for a pop of color and freshness.
- Consider individual servings in clear cups for an elegant touch.
- Top with a drizzle of chocolate sauce for an extra indulgent treat!
FAQs about Cherries in the Snow
As I’ve shared this delightful winter treat with friends and family, I’ve noticed a few common questions pop up. Here are some answers to help you make the most of your Cherries in the Snow experience!
Can I use fresh cherries instead of frozen?
Absolutely! Fresh cherries can be used, but you’ll want to pit and chop them first. Just keep in mind that they may not be as sweet as frozen cherries, especially in winter.
How long can I store Cherries in the Snow?
This dessert can be stored in the refrigerator for up to three days. Just make sure to cover it well to keep it fresh. However, it’s best enjoyed within the first couple of days for optimal flavor and texture.
Can I make this dessert ahead of time?
What can I substitute for heavy cream?
If you’re looking for a lighter option, you can use whipped topping or even coconut cream for a dairy-free version. Both will still give you that creamy texture!
Is this dessert suitable for a gluten-free diet?
Yes! All the ingredients in Cherries in the Snow are naturally gluten-free, making it a perfect treat for those with gluten sensitivities.
Final Thoughts
Creating Cherries in the Snow: A Delightful Winter Treat! is more than just whipping up a dessert; it’s about sharing joy and warmth with those you love. This no-bake delight brings a festive spirit to any gathering, making it a perfect addition to your holiday table. The combination of sweet cherries and creamy topping is like a cozy hug on a chilly day. Plus, it’s so easy to make that you’ll find yourself returning to this recipe time and again. So, gather your loved ones, serve this treat, and watch the smiles unfold!
Print
Cherries in the Snow: Discover This Delightful Winter Treat!
- Total Time: 1 hour 15 minutes
- Yield: 6 servings 1x
- Diet: Vegetarian
Description
Cherries in the Snow is a delightful winter treat that combines the sweetness of cherries with a creamy, snowy topping, perfect for holiday gatherings.
Ingredients
- 2 cups frozen cherries
- 1 cup heavy cream
- 1/2 cup powdered sugar
- 1 teaspoon vanilla extract
- 1/4 cup chopped nuts (optional)
Instructions
- Thaw the frozen cherries and drain excess liquid.
- In a mixing bowl, whip the heavy cream until soft peaks form.
- Add powdered sugar and vanilla extract to the whipped cream and continue to whip until stiff peaks form.
- Fold in the thawed cherries gently into the whipped cream mixture.
- Transfer the mixture into a serving dish and sprinkle with chopped nuts if desired.
- Chill in the refrigerator for at least 1 hour before serving.
Notes
- For a lighter version, you can use whipped topping instead of heavy cream.
- Feel free to add other fruits for variation.
- This dessert can be made a day in advance for convenience.
- Prep Time: 15 minutes
- Cook Time: 0 minutes
- Category: Dessert
- Method: No-bake
- Cuisine: American
Nutrition
- Serving Size: 1 serving
- Calories: 250
- Sugar: 20g
- Sodium: 30mg
- Fat: 18g
- Saturated Fat: 10g
- Unsaturated Fat: 8g
- Trans Fat: 0g
- Carbohydrates: 22g
- Fiber: 2g
- Protein: 2g
- Cholesterol: 60mg