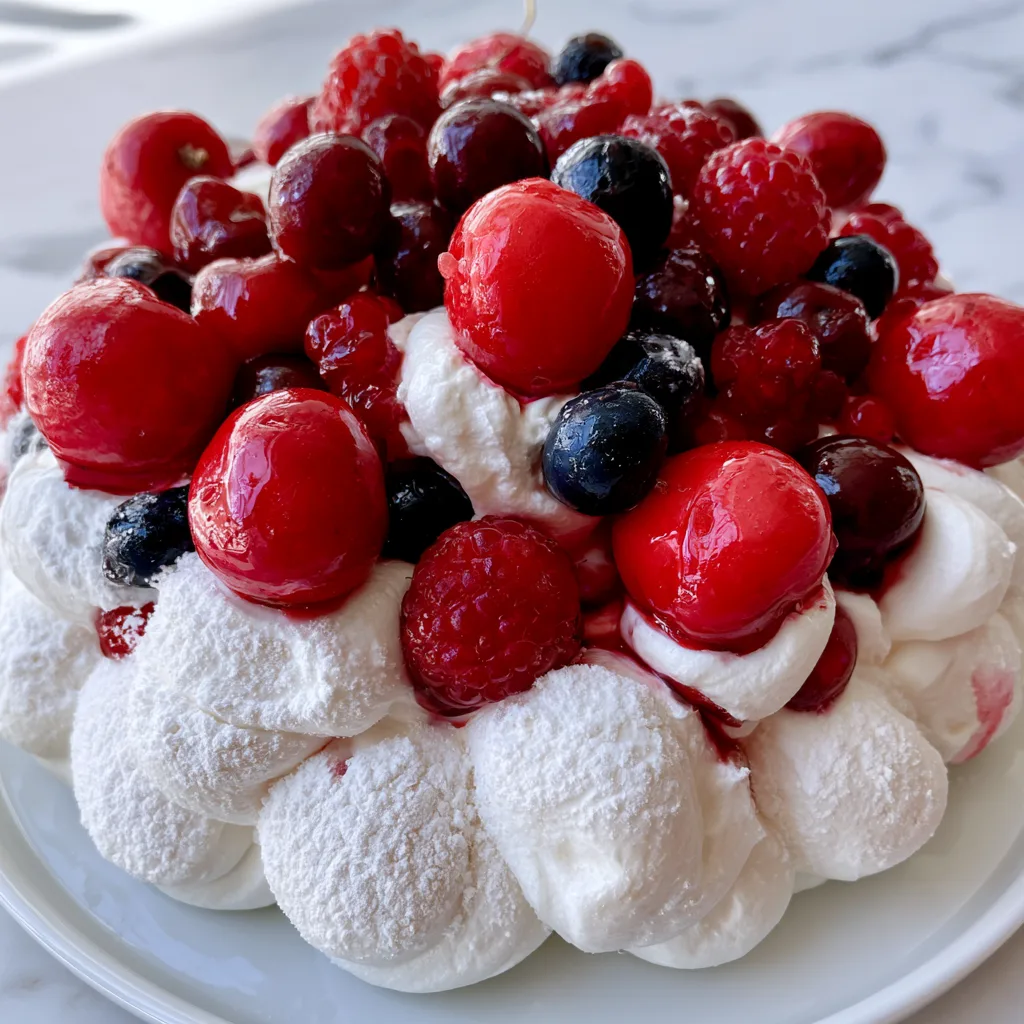
Introduction to Delight in a Dreamy Cherry Berry on a Cloud Recipe!
Hey there, fellow food lovers! If you’re anything like me, you know that life can get pretty hectic. Between juggling work, family, and everything in between, finding time to whip up a delightful dessert can feel like a daunting task. That’s where my Delight in a Dreamy Cherry Berry on a Cloud Recipe! comes in. This no-bake treat is not only a breeze to make, but it also brings a burst of summer flavors that will impress your loved ones. Trust me, this dessert is the perfect way to sweeten up your busy days!
Why You’ll Love This Delight in a Dreamy Cherry Berry on a Cloud Recipe!
This Delight in a Dreamy Cherry Berry on a Cloud Recipe! is a lifesaver for busy moms and professionals. It’s quick to prepare, taking just 20 minutes of your time, and requires no baking at all! The combination of fluffy whipped cream and fresh berries creates a taste sensation that feels indulgent yet light. Plus, it’s a fantastic way to use seasonal fruits, making it a refreshing treat for any occasion!
Ingredients for Delight in a Dreamy Cherry Berry on a Cloud Recipe!
Let’s gather our ingredients for this delightful dessert! Each component plays a crucial role in creating that dreamy experience. Here’s what you’ll need:
- Cherries: Fresh, pitted cherries add a sweet and slightly tart flavor that pairs beautifully with the cream.
- Mixed Berries: A combination of strawberries, blueberries, and raspberries brings vibrant colors and a burst of juicy goodness. Feel free to mix and match based on what you have!
- Heavy Cream: This is the star of our whipped topping. It creates that luscious, fluffy texture that feels like a cloud.
- Powdered Sugar: A touch of sweetness to balance the tartness of the fruits. It dissolves easily, making it perfect for whipped cream.
- Vanilla Extract: Just a teaspoon adds a warm, aromatic flavor that enhances the overall taste of the dessert.
- Angel Food Cake: Crumbled cake serves as the base, providing a light and airy texture that complements the cream and fruit layers.
For those looking to lighten things up, you can swap in low-fat whipped cream. And if you’re feeling adventurous, try using your favorite berries or even adding a splash of liqueur for an adult twist! You can find the exact measurements for each ingredient at the bottom of the article, ready for printing.
How to Make Delight in a Dreamy Cherry Berry on a Cloud Recipe!
Now that we have our ingredients ready, let’s dive into the fun part—making this dreamy dessert! Follow these simple steps, and you’ll have a stunning treat that’s sure to impress.
Step 1: Whip the Cream
Start by pouring the heavy cream into a mixing bowl. Using an electric mixer, whip the cream on medium speed until soft peaks form. This means the cream should hold its shape but still be a bit wobbly. It’s like creating a fluffy cloud!
Next, add the powdered sugar and vanilla extract. Continue whipping until you achieve stiff peaks. This means the cream should stand tall and proud. Be careful not to over-whip, or you might end up with butter instead of cream!
Step 2: Prepare the Cake Base
Now, let’s get our angel food cake ready. Crumble the cake into bite-sized pieces. You want it to be fluffy and airy, just like a cloud. This will be the perfect base for our layers.
In a serving dish, spread a layer of the crumbled cake at the bottom. This will soak up some of the cream and berry juices, adding flavor and moisture.
Step 3: Layer the Ingredients
Time to build our masterpiece! Start by adding a generous layer of whipped cream over the crumbled cake. Spread it evenly, making sure every bit of cake is covered.
Next, sprinkle a layer of cherries and mixed berries on top of the whipped cream. The vibrant colors will make your dessert pop! Repeat these layers until you’ve used all your ingredients. Finish with a final layer of whipped cream and a beautiful arrangement of berries on top.
Step 4: Chill and Serve
Once your layers are complete, it’s time to chill! Cover the dish with plastic wrap and place it in the refrigerator for at least one hour. This allows the flavors to meld together and the dessert to set.
When you’re ready to serve, scoop out portions and watch your loved ones delight in this dreamy cherry berry creation. Enjoy every bite of this no-bake wonder!
Tips for Success
- Make sure your heavy cream is cold for better whipping results.
- Use a clean bowl and beaters to avoid any unwanted flavors.
- Don’t rush the chilling process; it enhances the flavors.
- For a fun twist, add a splash of lemon juice to the berries.
- Keep leftovers covered in the fridge for up to two days.
Equipment Needed
- Mixing Bowl: A large bowl for whipping cream. A stand mixer works great, but a hand mixer will do just fine!
- Electric Mixer: Essential for whipping cream. If you don’t have one, a whisk and some elbow grease can work too!
- Serving Dish: Any glass or ceramic dish will showcase your layers beautifully.
Variations on Delight in a Dreamy Cherry Berry on a Cloud Recipe!
- Berry Medley: Swap out the mixed berries for your favorite seasonal fruits like peaches or mangoes for a tropical twist.
- Chocolate Drizzle: Drizzle melted chocolate over the layers for a decadent touch that chocolate lovers will adore.
- Nutty Crunch: Add a layer of crushed nuts, like almonds or walnuts, for a delightful crunch that contrasts with the creamy texture.
- Vegan Option: Use coconut cream instead of heavy cream and a vegan cake base for a plant-based version that’s just as dreamy.
- Flavor Infusion: Experiment with flavored extracts, like almond or hazelnut, to give your whipped cream a unique twist.
Serving Suggestions for Delight in a Dreamy Cherry Berry on a Cloud Recipe!
- Pair with Mint: Garnish with fresh mint leaves for a pop of color and refreshing flavor.
- Serve with Tea: A cup of herbal tea complements the sweetness beautifully.
- Presentation: Use clear glass cups to showcase the stunning layers of this dessert.
- Ice Cream: A scoop of vanilla ice cream on the side adds an extra creamy touch.
FAQs about Delight in a Dreamy Cherry Berry on a Cloud Recipe!
Can I make this dessert ahead of time?
Absolutely! This Delight in a Dreamy Cherry Berry on a Cloud Recipe! can be made a day in advance. Just keep it covered in the fridge until you’re ready to serve. The flavors will meld beautifully overnight!
What can I substitute for heavy cream?
If you’re looking for a lighter option, you can use low-fat whipped cream or even coconut cream for a dairy-free alternative. Both will still give you that fluffy texture!
How long will leftovers last?
Leftovers can be stored in the refrigerator for up to two days. Just make sure to keep it covered to maintain freshness. But trust me, it’s so delicious, you might not have any leftovers!
Can I use frozen berries instead of fresh?
Yes, frozen berries work well too! Just make sure to thaw and drain them before layering to avoid excess moisture in your dessert. This way, you can enjoy this treat any time of year!
Is this recipe suitable for kids?
Definitely! This Delight in a Dreamy Cherry Berry on a Cloud Recipe! is a fun and colorful dessert that kids will love. Plus, it’s a great way to get them excited about fruits!
Final Thoughts
Creating this Delight in a Dreamy Cherry Berry on a Cloud Recipe! is more than just making a dessert; it’s about bringing joy to your table. The vibrant colors and luscious layers are sure to spark smiles and create lasting memories with your loved ones. Whether it’s a family gathering or a quiet evening at home, this no-bake treat is a delightful way to celebrate life’s sweet moments. So, roll up your sleeves, gather your ingredients, and let the magic of this dreamy dessert brighten your day. You deserve a little sweetness in your busy life!
Delight in a Dreamy Cherry Berry on a Cloud Recipe Today!
- Total Time: 1 hour 20 minutes
- Yield: 6 servings 1x
- Diet: Vegetarian
Description
A delightful dessert featuring cherries and berries on a fluffy cloud-like base.
Ingredients
- 1 cup cherries, pitted
- 1 cup mixed berries (strawberries, blueberries, raspberries)
- 1 cup heavy cream
- 1/2 cup powdered sugar
- 1 teaspoon vanilla extract
- 1 cup angel food cake, crumbled
Instructions
- In a mixing bowl, whip the heavy cream until soft peaks form.
- Add powdered sugar and vanilla extract, and continue to whip until stiff peaks form.
- In a serving dish, layer the crumbled angel food cake at the bottom.
- Top the cake with a layer of whipped cream.
- Add a layer of cherries and mixed berries on top of the whipped cream.
- Repeat the layers until all ingredients are used, finishing with a layer of whipped cream and berries on top.
- Chill in the refrigerator for at least 1 hour before serving.
Notes
- For a lighter version, use low-fat whipped cream.
- Feel free to substitute any berries you prefer.
- This dessert can be made a day in advance for convenience.
- Prep Time: 20 minutes
- Cook Time: 0 minutes
- Category: Dessert
- Method: No-bake
- Cuisine: American
Nutrition
- Serving Size: 1 serving
- Calories: 250
- Sugar: 20g
- Sodium: 50mg
- Fat: 15g
- Saturated Fat: 10g
- Unsaturated Fat: 5g
- Trans Fat: 0g
- Carbohydrates: 30g
- Fiber: 2g
- Protein: 3g
- Cholesterol: 60mg