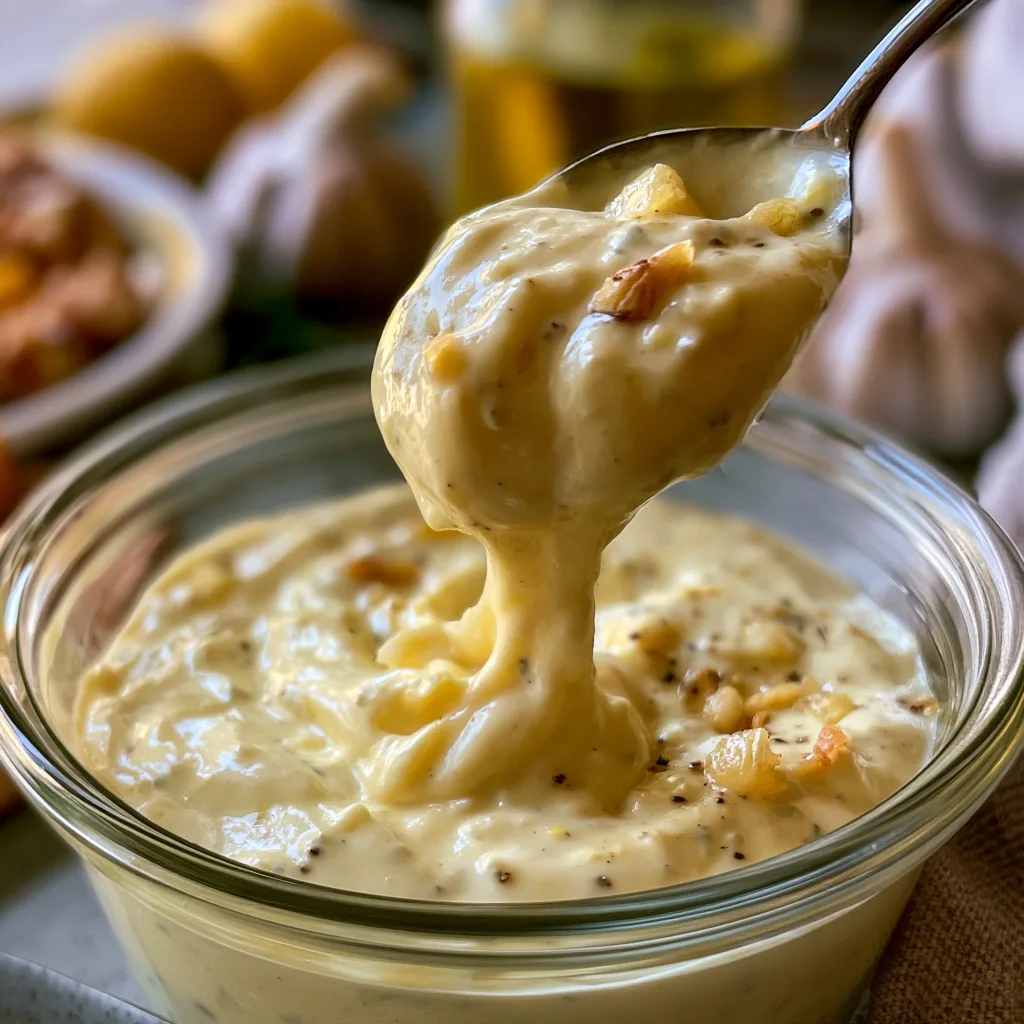
Introduction to Roasted Garlic Aioli from Scratch
As a busy mom, I know how precious time can be, especially when it comes to meal prep. That’s why I love making roasted garlic aioli from scratch. This creamy, flavorful condiment can elevate any dish, turning a simple dinner into a gourmet experience. Whether you’re dipping veggies, slathering it on sandwiches, or drizzling it over grilled meats, this aioli is a quick solution for a busy day. Plus, the aroma of roasted garlic wafting through your kitchen is simply irresistible. Trust me, your loved ones will be asking for seconds!
Why You’ll Love This Roasted Garlic Aioli from Scratch
This roasted garlic aioli from scratch is a game-changer for busy kitchens. It’s incredibly easy to whip up, taking just 45 minutes from start to finish. The rich, creamy texture and robust flavor will have your taste buds dancing with joy. Plus, it’s versatile enough to complement a variety of dishes, making it a must-have in your culinary arsenal. You’ll wonder how you ever lived without it!
Ingredients for Roasted Garlic Aioli from Scratch
Gathering the right ingredients is the first step to creating your delicious roasted garlic aioli from scratch. Here’s what you’ll need:
- Garlic: A head of garlic is the star of this recipe. Roasting it transforms its sharpness into a sweet, mellow flavor.
- Egg Yolk: This adds richness and helps emulsify the aioli. If you’re looking for a vegan option, aquafaba (the liquid from canned chickpeas) works beautifully!
- Dijon Mustard: Just a tablespoon adds a tangy kick that balances the creaminess. It’s a secret weapon for flavor!
- Lemon Juice: Freshly squeezed lemon juice brightens the aioli and adds a refreshing zing.
- Olive Oil: A cup of good-quality olive oil is essential for that luscious texture. It’s the heart of your aioli!
- Salt: A pinch of salt enhances all the flavors. Adjust to your taste for the perfect balance.
For those who want to experiment, feel free to add herbs like basil or parsley for a fresh twist. You can find the exact quantities for each ingredient at the bottom of the article, ready for printing!
How to Make Roasted Garlic Aioli from Scratch
Now that you have your ingredients ready, let’s dive into the steps for making roasted garlic aioli from scratch. This process is simple and rewarding, and I promise you’ll feel like a culinary rockstar by the end!
Step 1: Preheat the Oven
First things first, preheat your oven to 400°F (200°C). Preheating is crucial because it ensures that the garlic roasts evenly. If you skip this step, you might end up with unevenly cooked garlic, which can affect the flavor of your aioli. Trust me, you want that sweet, caramelized goodness!
Step 2: Roast the Garlic
Next, take your head of garlic and wrap it tightly in aluminum foil. This little package will trap the heat and moisture, allowing the garlic to roast beautifully. Pop it in the oven for about 30-35 minutes. As it roasts, the garlic will transform from pungent to sweet and mellow, filling your kitchen with an irresistible aroma. You’ll know it’s done when it’s soft to the touch!
Step 3: Prepare the Garlic
Once your garlic is roasted and cooled slightly, it’s time to prepare it. Carefully unwrap the foil and squeeze the roasted garlic cloves into a bowl. They should pop out easily, like little nuggets of flavor! This step is where the magic begins, as the garlic’s sweetness will shine through in your aioli.
Step 4: Combine Ingredients
In the same bowl, add the egg yolk, Dijon mustard, and lemon juice. Whisk these ingredients together until they’re well combined. This mixture is the base of your aioli, and whisking is key to creating a smooth texture. It’s like a dance—keep those whisking arms moving!
Step 5: Emulsify the Aioli
Now comes the fun part! Slowly drizzle in the olive oil while whisking continuously. This technique helps emulsify the aioli, creating that creamy consistency we all love. It might take a minute or two, but be patient. The transformation is worth it! You’ll see the mixture thicken and become luscious.
Step 6: Season to Taste
Finally, it’s time to season your aioli. Add a pinch of salt and give it a taste. This step is essential because it balances all the flavors. If you want a little more zing, feel free to add more lemon juice or even a dash of hot sauce for a kick. Adjusting the seasoning to your liking is what makes this roasted garlic aioli truly yours!
Tips for Success
- Use fresh garlic for the best flavor; older garlic can be bitter.
- Whisk vigorously to ensure proper emulsification; a hand whisk works wonders!
- Let the aioli sit for at least 30 minutes before serving to enhance the flavors.
- Store in an airtight container in the fridge for up to a week.
- Experiment with different herbs and spices to create your unique twist!
Equipment Needed
- Oven: Essential for roasting the garlic. A toaster oven works too!
- Aluminum Foil: To wrap the garlic. Parchment paper can be a substitute.
- Mixing Bowl: For combining ingredients. Any bowl will do, even a large mug!
- Whisk: To mix everything together. A fork can work in a pinch!
- Measuring Cups: For precise ingredient amounts. Use a regular cup if you don’t have them.
Variations of Roasted Garlic Aioli from Scratch
- Herbed Aioli: Add fresh herbs like basil, dill, or parsley for a burst of flavor. This adds a refreshing twist!
- Spicy Aioli: Mix in a teaspoon of sriracha or your favorite hot sauce for a spicy kick. Perfect for those who love heat!
- Lemon Basil Aioli: Substitute lemon juice with lemon zest and add fresh basil for a bright, zesty flavor.
- Smoky Aioli: Incorporate a dash of smoked paprika for a smoky depth that pairs beautifully with grilled meats.
- Vegan Aioli: Use aquafaba instead of egg yolk and add nutritional yeast for a cheesy flavor without dairy.
Serving Suggestions for Roasted Garlic Aioli from Scratch
- Serve with fresh vegetable sticks like carrots, cucumbers, and bell peppers for a healthy snack.
- Pair it with grilled chicken or fish for a gourmet touch to your dinner.
- Use as a spread on sandwiches or wraps for added creaminess.
- Drizzle over roasted potatoes or fries for a delicious twist.
- Enjoy with a glass of crisp white wine to elevate your meal experience.
FAQs about Roasted Garlic Aioli from Scratch
Can I make roasted garlic aioli without raw egg?
Absolutely! If you’re concerned about using raw egg, you can substitute the egg yolk with aquafaba. This is the liquid from canned chickpeas and works wonderfully to create a creamy texture in your aioli.
How long does roasted garlic aioli last in the fridge?
Your homemade roasted garlic aioli can be stored in an airtight container in the refrigerator for up to one week. Just make sure to give it a good stir before using, as it may separate slightly.
What can I use roasted garlic aioli for?
This versatile condiment is perfect for dipping veggies, spreading on sandwiches, or drizzling over grilled meats. It can elevate any dish, making it a fantastic addition to your culinary repertoire!
Can I freeze roasted garlic aioli?
While it’s best enjoyed fresh, you can freeze roasted garlic aioli. Just be aware that the texture may change slightly upon thawing. Store it in a freezer-safe container, and it should last for up to three months.
How can I adjust the garlic flavor in my aioli?
If you prefer a milder garlic flavor, use fewer cloves or roast them for a shorter time. Conversely, if you love garlic, feel free to add more cloves for a bolder taste. The beauty of making roasted garlic aioli from scratch is that you can customize it to your liking!
Final Thoughts
Making roasted garlic aioli from scratch is more than just a cooking task; it’s a delightful experience that brings joy to your kitchen. The rich, creamy texture and the sweet, mellow flavor of roasted garlic can transform any meal into something special. I love how this simple condiment can impress family and friends alike, making even the busiest weeknight dinners feel gourmet. Plus, the satisfaction of creating something delicious from scratch is truly rewarding. So, roll up your sleeves, embrace the process, and enjoy the magic of homemade roasted garlic aioli. Your taste buds will thank you!

Roasted garlic aioli from scratch that elevates your meals!
- Total Time: 45 minutes
- Yield: 1 cup 1x
- Diet: Vegetarian
Description
A creamy and flavorful roasted garlic aioli that enhances any dish.
Ingredients
- 1 head of garlic
- 1 large egg yolk
- 1 tablespoon Dijon mustard
- 1 tablespoon lemon juice
- 1 cup olive oil
- Salt to taste
Instructions
- Preheat the oven to 400°F (200°C).
- Wrap the head of garlic in aluminum foil and roast for 30-35 minutes until soft.
- Once cooled, squeeze the roasted garlic cloves into a bowl.
- Add the egg yolk, Dijon mustard, and lemon juice to the bowl and whisk until combined.
- Slowly drizzle in the olive oil while whisking continuously until the mixture thickens.
- Add salt to taste and mix well.
Notes
- For a vegan version, substitute the egg yolk with aquafaba.
- Store in the refrigerator for up to one week.
- Adjust the garlic amount based on your preference for garlic flavor.
- Prep Time: 10 minutes
- Cook Time: 35 minutes
- Category: Condiment
- Method: Roasting and whisking
- Cuisine: Mediterranean
Nutrition
- Serving Size: 1 tablespoon
- Calories: 100
- Sugar: 0g
- Sodium: 5mg
- Fat: 11g
- Saturated Fat: 1.5g
- Unsaturated Fat: 8g
- Trans Fat: 0g
- Carbohydrates: 0g
- Fiber: 0g
- Protein: 0g
- Cholesterol: 20mg