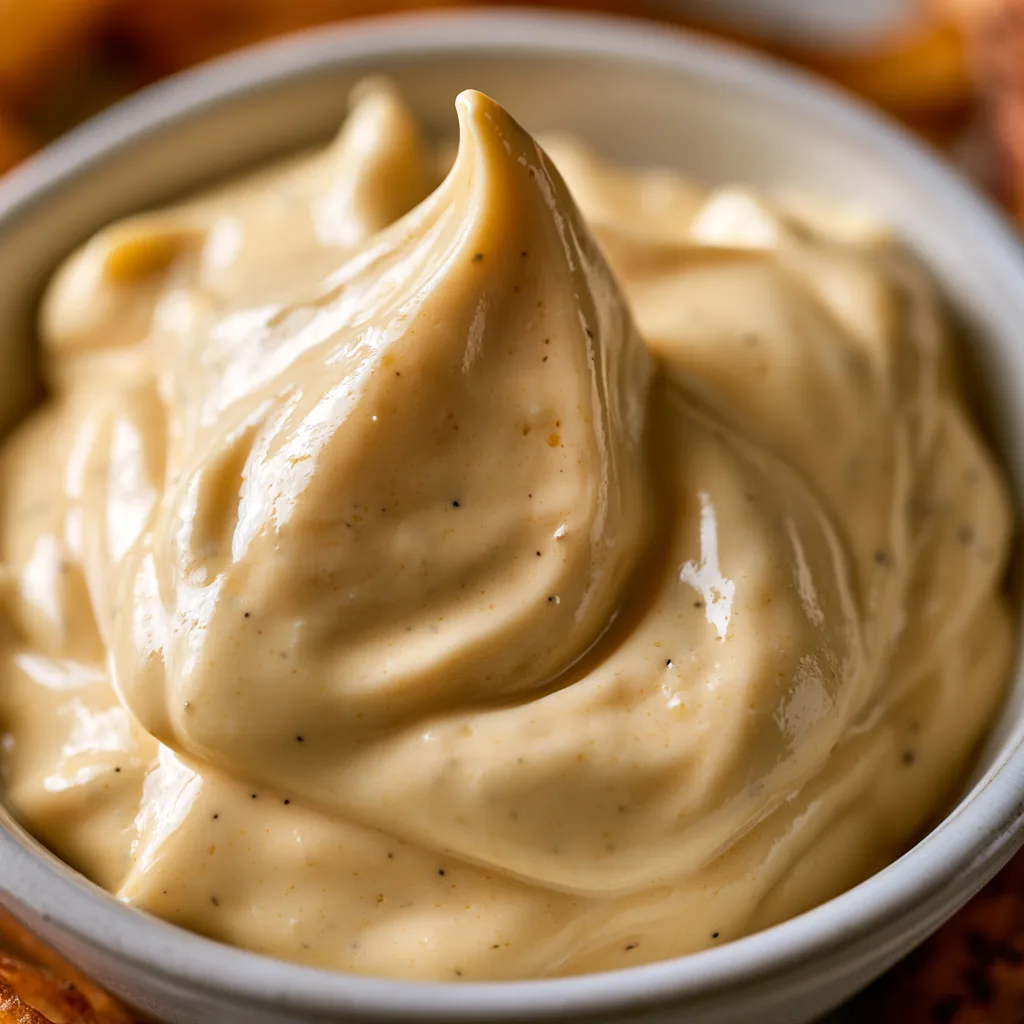
Introduction to Garlic Aioli Recipe
Welcome to my kitchen, where I’m excited to share my Garlic Aioli Recipe with you! If you’re like me, juggling a busy life, you know how important it is to have quick and delicious solutions at your fingertips. This easy homemade garlic sauce is not just a dip; it’s a creamy delight that can elevate any meal. Whether you’re looking to impress your loved ones or simply want a tasty spread for your sandwiches, this aioli is your new go-to. Let’s dive into this flavorful adventure together!
Why You’ll Love This Garlic Aioli Recipe
This Garlic Aioli Recipe is a game-changer for busy moms and professionals alike. It’s incredibly easy to whip up, taking just 10 minutes of your time. The creamy texture and rich garlic flavor make it a versatile companion for everything from veggies to burgers. Plus, it’s a fantastic way to impress guests without spending hours in the kitchen. Trust me, once you try it, you’ll wonder how you ever lived without it!
Ingredients for Garlic Aioli Recipe
Gathering the right ingredients is the first step to creating this delightful easy homemade garlic sauce. Here’s what you’ll need:
- Mayonnaise: The creamy base of our aioli. It adds richness and smoothness.
- Garlic: Freshly minced garlic is key for that bold flavor. You can adjust the amount based on your love for garlic.
- Lemon Juice: A splash of acidity to brighten the flavors. Freshly squeezed is best, but bottled works in a pinch.
- Dijon Mustard: This adds a subtle tang and depth. If you’re out, yellow mustard can be a decent substitute.
- Salt and Pepper: Essential for seasoning. Adjust to your taste for the perfect balance.
Feel free to get creative! You can add herbs like parsley or basil for a fresh twist. If you’re looking for a lighter version, consider using Greek yogurt instead of mayonnaise. For exact quantities, check the bottom of the article where you can find them available for printing.
How to Make Garlic Aioli Recipe
Now that we have our ingredients ready, let’s dive into making this creamy dipping sauce. Follow these simple steps, and you’ll have a delicious garlic aioli in no time!
Step 1: Combine Ingredients
Start by grabbing a medium-sized bowl. In it, combine the mayonnaise, minced garlic, lemon juice, and Dijon mustard. This is where the magic begins! The mayonnaise serves as a creamy base, while the garlic adds that punchy flavor we all love.
Step 2: Mix Thoroughly
Using a whisk or a fork, mix the ingredients together until they’re fully blended. You want a smooth and creamy consistency. If you notice any lumps of garlic, don’t worry; just keep mixing! This step is crucial for achieving that velvety texture.
Step 3: Season to Taste
Now it’s time to add salt and pepper. Start with a pinch of each, then taste your aioli. Adjust the seasoning as needed. Remember, this easy homemade garlic sauce should be flavorful but not overpowering. You can always add more garlic if you’re feeling adventurous!
Step 4: Chill for Flavor
Cover the bowl with plastic wrap or a lid and pop it in the refrigerator. Let it chill for at least 30 minutes. This allows the flavors to meld beautifully. Trust me, the wait is worth it! The longer it sits, the more delicious it becomes.
Step 5: Serve and Enjoy
Once your aioli has chilled, it’s ready to serve! Use it as a dip for fresh veggies, a spread for sandwiches, or a topping for burgers. The possibilities are endless! Enjoy the creamy goodness and watch your family and friends rave about your new favorite sauce.
Tips for Success
- Use fresh garlic for the best flavor; it makes a world of difference!
- Let your aioli chill longer than 30 minutes if you can; the flavors deepen beautifully.
- Experiment with different mustards for unique flavor profiles.
- Store in an airtight container to keep it fresh for up to a week.
- Pair with a variety of dippers to keep things exciting!
Equipment Needed for Garlic Aioli Recipe
- Medium-sized bowl: A mixing bowl is essential. Any bowl will do, even a large mug!
- Whisk or fork: Use a whisk for smoothness, but a fork works just as well.
- Measuring spoons: Handy for precise ingredient amounts, but eyeballing works too!
Variations of Garlic Aioli Recipe
- Herbed Aioli: Add fresh herbs like basil, parsley, or dill for a burst of flavor.
- Spicy Aioli: Mix in a dash of cayenne pepper or a few drops of hot sauce for a kick.
- Lemon Aioli: Increase the lemon juice for a zesty twist that brightens the sauce.
- Roasted Garlic Aioli: Substitute fresh garlic with roasted garlic for a sweeter, milder flavor.
- Vegan Aioli: Use vegan mayonnaise and add a splash of plant-based milk for creaminess.
Serving Suggestions for Garlic Aioli Recipe
- Pair with crispy vegetable sticks like carrots, cucumbers, and bell peppers for a refreshing snack.
- Use as a spread on sandwiches or wraps for an extra layer of flavor.
- Serve alongside grilled meats or seafood for a delicious dipping option.
- Drizzle over roasted potatoes for a gourmet touch.
- Enjoy with a chilled glass of white wine for a perfect pairing!
FAQs about Garlic Aioli Recipe
As you embark on your journey to create this creamy dipping sauce, you might have a few questions. Here are some common queries I’ve encountered, along with helpful answers!
Can I use garlic powder instead of fresh garlic?
While fresh garlic gives the best flavor, you can use garlic powder in a pinch. Start with about 1/4 teaspoon and adjust to taste. Just remember, fresh garlic has a vibrant kick that powder can’t quite match!
How long can I store garlic aioli?
This easy homemade garlic sauce can be stored in the refrigerator for up to a week. Just make sure it’s in an airtight container to keep it fresh and flavorful.
Can I make garlic aioli without mayonnaise?
Absolutely! You can substitute mayonnaise with Greek yogurt for a lighter version. It will still be creamy and delicious, just with a tangy twist!
What can I serve with garlic aioli?
This versatile sauce pairs beautifully with a variety of dishes. Think fresh veggies, sandwiches, grilled meats, or even as a topping for baked potatoes. The options are endless!
Can I freeze garlic aioli?
While it’s best enjoyed fresh, you can freeze garlic aioli. Just remember to leave some space in the container for expansion. Thaw it in the fridge before using, and give it a good stir to bring back the creamy texture.
Final Thoughts on Garlic Aioli Recipe
Creating this Garlic Aioli Recipe has been a delightful journey, and I hope it brings as much joy to your kitchen as it has to mine. This easy homemade garlic sauce is more than just a dip; it’s a way to elevate everyday meals into something special. Whether you’re hosting friends or enjoying a quiet dinner with family, this creamy dipping sauce adds a touch of gourmet flair. So, roll up your sleeves, gather your ingredients, and let the magic of garlic aioli transform your meals. Trust me, you’ll be reaching for it again and again!

Garlic Aioli Recipe: Discover Your New Favorite Sauce!
- Total Time: 10 minutes
- Yield: 1 cup 1x
- Diet: Vegetarian
Description
A creamy and flavorful garlic aioli sauce that is perfect for dipping or as a spread.
Ingredients
- 1 cup mayonnaise
- 3 cloves garlic, minced
- 1 tablespoon lemon juice
- 1 teaspoon Dijon mustard
- Salt and pepper to taste
Instructions
- In a bowl, combine the mayonnaise, minced garlic, lemon juice, and Dijon mustard.
- Mix well until all ingredients are fully incorporated.
- Add salt and pepper to taste.
- Cover and refrigerate for at least 30 minutes to allow the flavors to meld.
- Serve as a dip or spread.
Notes
- For a stronger garlic flavor, add more minced garlic.
- This aioli can be stored in the refrigerator for up to a week.
- Great for sandwiches, burgers, or as a dip for vegetables.
- Prep Time: 10 minutes
- Cook Time: 0 minutes
- Category: Sauce
- Method: Mixing
- Cuisine: Mediterranean
Nutrition
- Serving Size: 2 tablespoons
- Calories: 100
- Sugar: 0g
- Sodium: 150mg
- Fat: 10g
- Saturated Fat: 1g
- Unsaturated Fat: 9g
- Trans Fat: 0g
- Carbohydrates: 1g
- Fiber: 0g
- Protein: 1g
- Cholesterol: 5mg