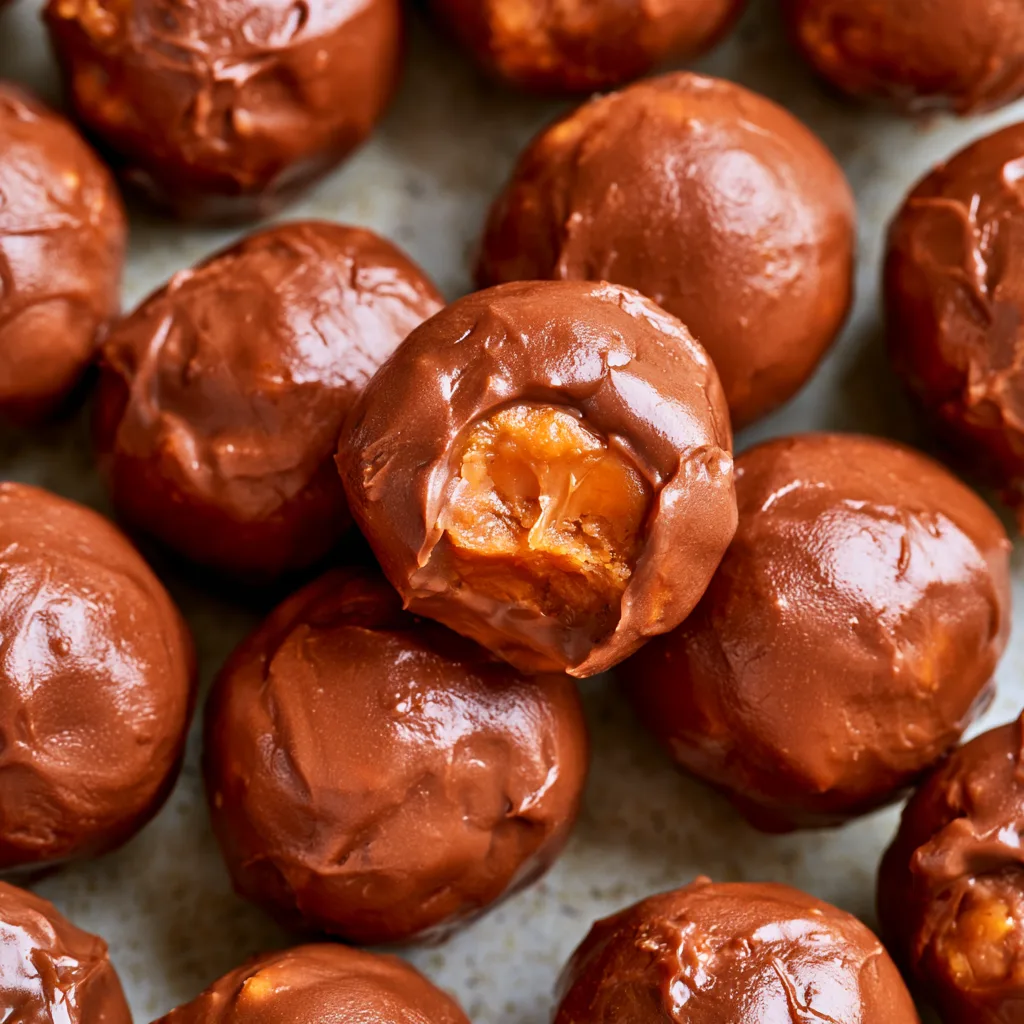
Introduction to Butterfinger Balls Chockolat
Hey there, fellow food lovers! If you’re anything like me, you know that life can get pretty hectic. Between juggling work, family, and everything in between, finding time to whip up a delightful treat can feel impossible. That’s where these Butterfinger Balls Chockolat come in! They’re quick, no-bake delights that will impress your loved ones without taking hours in the kitchen. Imagine the joy on your kids’ faces when they bite into these creamy, chocolatey bites. Trust me, this recipe is a game-changer for busy days when you need a sweet pick-me-up!
Why You’ll Love This Butterfinger Balls Chockolat
These Butterfinger Balls Chockolat are the perfect solution for busy moms and professionals alike. They come together in just 15 minutes, making them a quick and easy treat. The combination of creamy peanut butter and crunchy Butterfinger creates a flavor explosion that’s hard to resist. Plus, they’re no-bake, so you can skip the oven and still impress everyone with a delicious dessert. What’s not to love?
Ingredients for Butterfinger Balls Chockolat
Let’s gather our ingredients for these delightful Butterfinger Balls Chockolat! Each component plays a crucial role in creating that perfect balance of flavors and textures.
- Crushed Butterfinger candy bars: The star of the show! These bars add a sweet, crunchy texture that’s simply irresistible.
- Creamy peanut butter: This ingredient brings a rich, nutty flavor and helps bind everything together. You can use natural or regular peanut butter, depending on your preference.
- Chocolate chips: The luscious coating that makes these treats truly decadent. Dark, milk, or even white chocolate can be used based on your taste.
- Coconut oil (optional): This helps the chocolate melt smoothly and gives it a nice sheen. If you don’t have it, feel free to skip it!
For exact measurements, check the bottom of the article where you can find everything listed for easy printing. Now, let’s get ready to create some magic in the kitchen!
How to Make Butterfinger Balls Chockolat
Step 1: Mix the Base
Let’s kick things off by mixing our base! In a large mixing bowl, combine the crushed Butterfinger candy bars with the creamy peanut butter. I like to use a sturdy spatula for this, as it helps blend everything together smoothly. You want to ensure that the candy and peanut butter are well incorporated, creating a sticky, sweet mixture. The aroma of the Butterfinger will fill your kitchen, making it hard to resist tasting! Once it’s all mixed, you’ll have a delightful base that’s ready for the next step.
Step 2: Form the Balls
Now comes the fun part—forming the balls! With clean hands, take small portions of the mixture and roll them into bite-sized balls. Aim for about one inch in diameter; they should be easy to pop in your mouth. Place each ball on a baking sheet lined with parchment paper. This step is crucial, as it prevents sticking and makes cleanup a breeze. As you work, you might find yourself sneaking a taste or two. Don’t worry; I won’t tell anyone! Once you’ve formed all the balls, it’s time to chill them.
Step 3: Freeze the Balls
Pop the baking sheet into the freezer for about 30 minutes. This step is essential for firming up the balls, making them easier to coat in chocolate later. While you wait, you can clean up your workspace or even enjoy a little break. Trust me, the anticipation will make the final treat even more rewarding!
Step 4: Melt the Chocolate
While the balls are chilling, let’s melt the chocolate! In a microwave-safe bowl, combine the chocolate chips and coconut oil, if you’re using it. Microwave the mixture in 30-second intervals, stirring in between. This method helps prevent burning and ensures a smooth, glossy chocolate. Once melted, the chocolate should be silky and ready for dipping. The rich aroma of melted chocolate is simply irresistible, and you might find yourself daydreaming about how delicious these Butterfinger Balls Chockolat will be!
Step 5: Coat the Balls
Now it’s time to coat those frozen balls in chocolate! Using a fork or a toothpick, dip each ball into the melted chocolate, ensuring it’s fully coated. Let any excess chocolate drip off before placing it back on the parchment-lined baking sheet. This step is where the magic happens! The chocolate coating adds a rich layer of flavor that perfectly complements the sweet, crunchy filling. If you’re feeling adventurous, sprinkle some crushed nuts or colorful sprinkles on top before the chocolate sets!
Step 6: Set the Chocolate
Finally, return the chocolate-coated balls to the baking sheet and refrigerate them until the chocolate is set. This usually takes about 15-20 minutes. Once they’re firm, you can enjoy your delicious Butterfinger Balls Chockolat! The combination of flavors and textures will have everyone coming back for more.
Tips for Success
- Use a sturdy spatula for mixing to ensure everything is well combined.
- Chill the balls long enough to make coating easier; don’t rush this step!
- Experiment with different chocolate types for unique flavors.
- For a fun twist, add a pinch of sea salt on top of the chocolate before it sets.
- Keep your workspace tidy to make the process smoother and more enjoyable.
Equipment Needed
- Mixing bowl: A large bowl works best, but any bowl will do.
- Spatula: A sturdy spatula is ideal for mixing; a wooden spoon can also work.
- Baking sheet: Use any flat tray; just line it with parchment paper.
- Microwave-safe bowl: For melting chocolate; a glass bowl is perfect.
- Fork or toothpick: Great for dipping the balls in chocolate.
Variations
- Nutty Delight: Add chopped nuts like almonds or walnuts to the mixture for an extra crunch.
- Peanut Butter Swirl: Use crunchy peanut butter instead of creamy for added texture and flavor.
- Vegan Option: Substitute chocolate chips with dairy-free chocolate and use a plant-based peanut butter.
- Flavor Infusion: Mix in a teaspoon of vanilla extract or a pinch of cinnamon for a unique twist.
- Fun Toppings: Roll the finished balls in crushed graham crackers or coconut flakes for a fun finish.
Serving Suggestions
- Pair your Butterfinger Balls Chockolat with a glass of cold milk for a classic treat.
- Serve them on a colorful platter for a festive touch at parties or gatherings.
- For a fun twist, add a scoop of vanilla ice cream on the side.
- Drizzle some extra melted chocolate over the top for an elegant presentation.
- Include fresh fruit like strawberries or bananas for a refreshing contrast.
FAQs about Butterfinger Balls Chockolat
Can I use other candy bars instead of Butterfinger?
Absolutely! You can experiment with other candy bars like Snickers or Reese’s for a different flavor profile. Just make sure to crush them well for the best texture.
How do I store Butterfinger Balls Chockolat?
Store these delightful treats in an airtight container in the refrigerator. They’ll stay fresh for up to a week, but I doubt they’ll last that long!
Can I make these Butterfinger Balls Chockolat ahead of time?
Yes! These no-bake treats are perfect for making ahead. Just prepare them a day or two in advance and keep them chilled until you’re ready to serve.
What can I use instead of peanut butter?
If you have nut allergies or prefer a different flavor, try using sun butter or almond butter. They work well and still provide that creamy texture!
Are Butterfinger Balls Chockolat suitable for kids?
Definitely! These treats are a hit with kids. Just keep an eye on portion sizes, as they can be quite rich and sweet!
Final Thoughts
Making Butterfinger Balls Chockolat is more than just a recipe; it’s a delightful experience that brings joy to both the cook and the lucky eaters. The simple process allows you to create something truly special without spending hours in the kitchen. Each bite is a sweet reminder of childhood treats, evoking smiles and happy memories. Whether you’re sharing them with family or enjoying a quiet moment to yourself, these little chocolatey gems are sure to brighten your day. So, roll up your sleeves and dive into this fun culinary adventure—you won’t regret it!
Print
Butterfinger Balls Chockolat: Discover Your New Favorite Treat!
- Total Time: 45 minutes
- Yield: 24 balls 1x
- Diet: Vegetarian
Description
Butterfinger Balls Chockolat are delicious, bite-sized treats made with crushed Butterfinger candy bars, creamy peanut butter, and coated in rich chocolate.
Ingredients
- 1 cup crushed Butterfinger candy bars
- 1/2 cup creamy peanut butter
- 2 cups chocolate chips
- 1 tablespoon coconut oil (optional)
Instructions
- In a mixing bowl, combine the crushed Butterfinger candy bars and peanut butter until well mixed.
- Form the mixture into small balls and place them on a baking sheet lined with parchment paper.
- Freeze the balls for about 30 minutes to firm up.
- In a microwave-safe bowl, melt the chocolate chips and coconut oil (if using) in 30-second intervals, stirring until smooth.
- Dip each frozen ball into the melted chocolate, ensuring they are fully coated.
- Return the chocolate-coated balls to the baking sheet and refrigerate until the chocolate is set.
- Enjoy your Butterfinger Balls Chockolat!
Notes
- Store in an airtight container in the refrigerator for up to a week.
- For a fun twist, try adding crushed nuts or sprinkles on top of the chocolate before it sets.
- Prep Time: 15 minutes
- Cook Time: 0 minutes
- Category: Dessert
- Method: No-Bake
- Cuisine: American
Nutrition
- Serving Size: 1 ball
- Calories: 120
- Sugar: 10g
- Sodium: 50mg
- Fat: 7g
- Saturated Fat: 3.5g
- Unsaturated Fat: 2g
- Trans Fat: 0g
- Carbohydrates: 12g
- Fiber: 1g
- Protein: 2g
- Cholesterol: 0mg