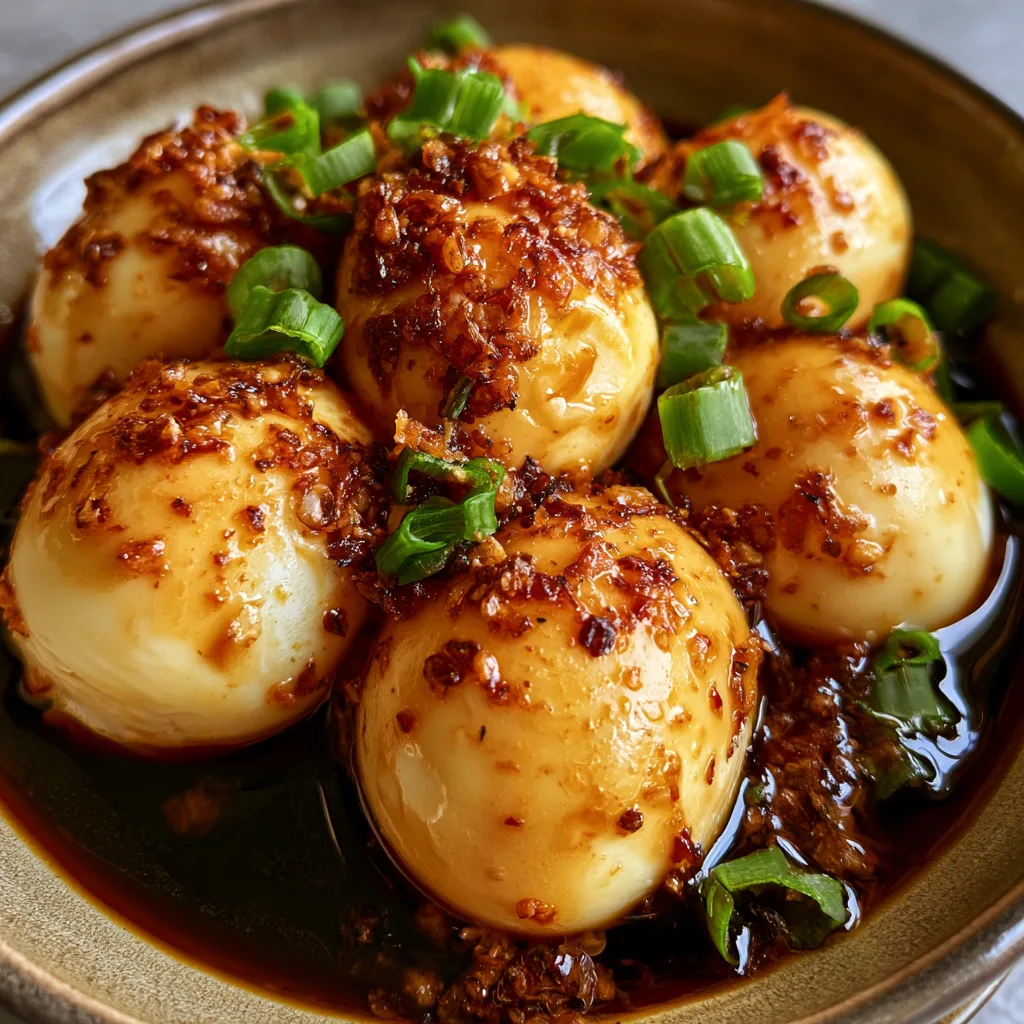
Introduction to Chili Crisp Soy Sauce Eggs
Welcome to the world of flavor with my Chili Crisp Soy Sauce Eggs! If you’re like me, juggling a busy schedule while trying to whip up something delicious can feel overwhelming. This recipe is a quick solution for those hectic mornings or a delightful dish to impress your loved ones at brunch. The combination of rich, creamy eggs with the spicy kick of chili crisp and savory soy sauce creates a taste explosion that’s simply irresistible. Trust me, once you try this, it’ll become a go-to in your kitchen!
Why You’ll Love This Chili Crisp Soy Sauce Eggs
Chili Crisp Soy Sauce Eggs are not just a meal; they’re a lifesaver for busy days! With just a few ingredients and minimal prep time, you can whip up a satisfying breakfast in under 20 minutes. The delightful blend of flavors will tantalize your taste buds, making every bite a joy. Plus, they’re versatile enough to serve any time of day, whether it’s breakfast, lunch, or a quick snack!
Ingredients for Chili Crisp Soy Sauce Eggs
Let’s gather the stars of our show! Here’s what you’ll need to create these delightful Chili Crisp Soy Sauce Eggs:
- Large Eggs: The foundation of this dish. They provide a creamy texture and are packed with protein.
- Soy Sauce: This adds a savory depth to the dish. Opt for low-sodium if you’re watching your salt intake.
- Chili Crisp: A spicy, crunchy condiment that brings heat and texture. Adjust the amount based on your spice tolerance.
- Sesame Oil: A drizzle of this fragrant oil enhances the overall flavor, giving it a nutty finish.
- Green Onion: Fresh and vibrant, chopped green onions add a pop of color and a mild onion flavor.
Feel free to get creative! You can swap out the soy sauce for tamari if you need a gluten-free option. If you want to add a bit of sweetness, a dash of honey or sugar can balance the heat from the chili crisp. For those who love a bit of crunch, consider adding some toasted sesame seeds on top!
For exact measurements, check the bottom of the article where you can find everything listed for easy printing.
How to Make Chili Crisp Soy Sauce Eggs
Now, let’s dive into the fun part—making these delicious Chili Crisp Soy Sauce Eggs! Follow these simple steps, and you’ll have a mouthwatering dish ready in no time.
Step 1: Prepare the Sauce
Start by mixing the soy sauce, chili crisp, and sesame oil in a small bowl. Stir it well until everything is combined. This sauce is the heart of the dish, so don’t rush it! Taste it and adjust the chili crisp if you want more heat. Set it aside for now; it’ll be drizzled over the eggs later.
Step 2: Boil the Eggs
Next, fill a saucepan with water and bring it to a gentle boil. Carefully add the eggs, making sure not to crack them. For soft-boiled eggs, let them cook for about 6-7 minutes. If you prefer hard-boiled, aim for 9-10 minutes. The timing is key here, so keep an eye on the clock!
Step 3: Cool and Peel the Eggs
Once the eggs are done, remove them from the boiling water and place them in an ice bath. This stops the cooking process and makes peeling easier. After a few minutes, gently tap the eggs on a hard surface to crack the shell, then peel them under running water for a smoother experience.
Step 4: Assemble the Dish
Now comes the exciting part! Slice the peeled eggs in half and place them on a plate. Drizzle the prepared chili crisp soy sauce mixture generously over the eggs. Don’t be shy! Finally, sprinkle the chopped green onion on top for a fresh touch. Your Chili Crisp Soy Sauce Eggs are ready to be devoured!
Tips for Success
- Use fresh eggs for the best flavor and texture.
- Experiment with the cooking time to find your perfect egg consistency.
- Keep the chili crisp on hand for other dishes; it’s a versatile condiment!
- For a creamier sauce, add a splash of mayonnaise or Greek yogurt.
- Don’t skip the ice bath; it makes peeling a breeze!
Equipment Needed
- Medium Saucepan: A sturdy pot for boiling the eggs. A deep skillet can work too!
- Mixing Bowl: For combining the sauce ingredients. Any bowl will do!
- Slotted Spoon: Perfect for removing eggs from boiling water. A regular spoon can work in a pinch.
- Ice Bath Container: A bowl filled with ice and water to cool the eggs quickly.
Variations
- Spicy Garlic Version: Add minced garlic to the sauce for an extra kick of flavor.
- Herb-Infused: Mix in fresh herbs like cilantro or basil for a refreshing twist.
- Vegetarian Delight: Serve the eggs on a bed of sautéed spinach or kale for added nutrition.
- Asian Fusion: Top with pickled vegetables for a tangy contrast to the rich eggs.
- Breakfast Bowl: Serve the eggs over a bowl of rice or quinoa for a hearty meal.
Serving Suggestions
- Pair your Chili Crisp Soy Sauce Eggs with a side of fluffy rice for a satisfying meal.
- Toast some crusty bread to soak up the delicious sauce.
- Serve with a refreshing cucumber salad for a crunchy contrast.
- Enjoy with a cup of green tea to complement the flavors.
FAQs about Chili Crisp Soy Sauce Eggs
Can I use different types of eggs for this recipe?
Absolutely! While large chicken eggs are the most common choice, you can use duck eggs or quail eggs for a unique twist. Just keep in mind that cooking times may vary slightly.
How can I store leftover Chili Crisp Soy Sauce Eggs?
These eggs can be stored in the refrigerator for up to 3 days. Just make sure to keep them in an airtight container to maintain their freshness. They make a great snack or quick meal option!
What can I serve with Chili Crisp Soy Sauce Eggs?
These eggs pair wonderfully with rice, toast, or even a fresh salad. You can also enjoy them as part of a larger Asian-inspired breakfast spread!
Can I make the sauce ahead of time?
Yes! You can prepare the chili crisp soy sauce mixture in advance and store it in the fridge. Just give it a good stir before drizzling it over your eggs.
Is this dish suitable for meal prep?
Definitely! Chili Crisp Soy Sauce Eggs are perfect for meal prep. Just boil and store the eggs, then add the sauce when you’re ready to eat. It’s a quick and flavorful option for busy days!
Final Thoughts
Making Chili Crisp Soy Sauce Eggs is more than just cooking; it’s about creating a moment of joy in your busy day. The rich flavors and delightful textures come together to make each bite a little celebration. Whether you’re enjoying them solo or sharing with family, these eggs bring a burst of excitement to the table. Plus, they’re so easy to whip up, you’ll find yourself making them again and again. So, gather your ingredients, embrace the process, and let the flavors transport you to a world of culinary delight. Happy cooking!
Print
Chili Crisp Soy Sauce Eggs: A Flavor Explosion Awaits!
- Total Time: 20 minutes
- Yield: 2 servings 1x
- Diet: Vegetarian
Description
Chili Crisp Soy Sauce Eggs are a delicious and flavorful dish that combines the richness of eggs with the spicy and savory notes of chili crisp and soy sauce.
Ingredients
- 4 large eggs
- 2 tablespoons soy sauce
- 1 tablespoon chili crisp
- 1 teaspoon sesame oil
- 1 green onion, chopped
Instructions
- In a small bowl, mix together the soy sauce, chili crisp, and sesame oil.
- In a saucepan, bring water to a boil and gently add the eggs.
- Boil the eggs for about 6-7 minutes for soft-boiled or 9-10 minutes for hard-boiled.
- Remove the eggs and place them in an ice bath to cool.
- Once cooled, peel the eggs and slice them in half.
- Drizzle the chili crisp soy sauce mixture over the eggs and garnish with chopped green onion.
Notes
- Adjust the amount of chili crisp based on your spice preference.
- Serve with rice or toast for a complete meal.
- These eggs can be stored in the refrigerator for up to 3 days.
- Prep Time: 10 minutes
- Cook Time: 10 minutes
- Category: Breakfast
- Method: Boiling
- Cuisine: Asian
Nutrition
- Serving Size: 1 serving
- Calories: 200
- Sugar: 1g
- Sodium: 600mg
- Fat: 14g
- Saturated Fat: 3g
- Unsaturated Fat: 10g
- Trans Fat: 0g
- Carbohydrates: 2g
- Fiber: 0g
- Protein: 12g
- Cholesterol: 370mg