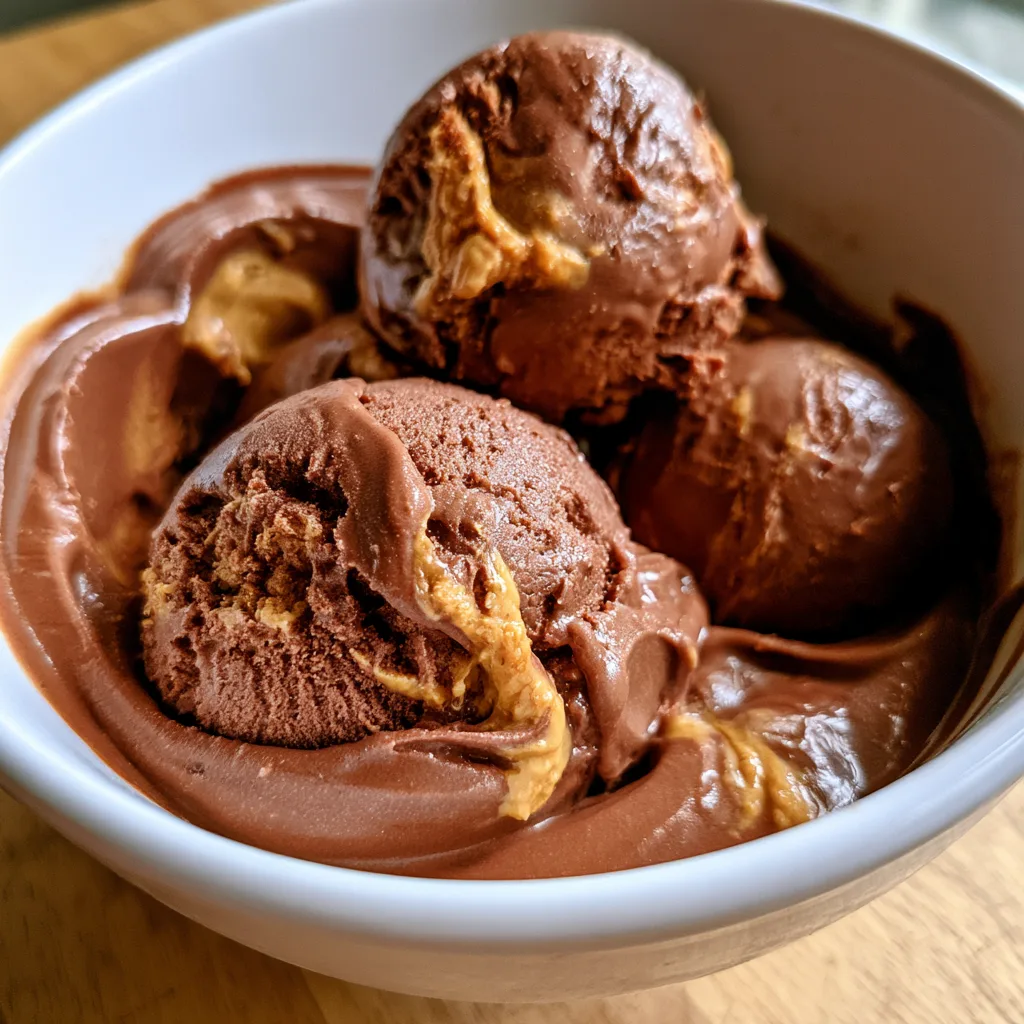
Introduction to Ninja Creami Chocolate Peanut Butter Protein Ice Cream
As a busy mom, I know how challenging it can be to find time for yourself, let alone whip up a delicious dessert. That’s why I’m excited to share my Ninja Creami Chocolate Peanut Butter Protein Ice Cream recipe with you! This delightful treat is not only quick to prepare but also satisfies your sweet tooth while packing in protein. Imagine indulging in a creamy, chocolatey scoop that feels like a guilty pleasure but is actually a healthy choice. It’s the perfect way to treat yourself after a long day or impress your loved ones with minimal effort!
Why You’ll Love This Ninja Creami Chocolate Peanut Butter Protein Ice Cream
This Ninja Creami Chocolate Peanut Butter Protein Ice Cream is a game-changer for busy days. It’s incredibly easy to make, requiring just a few minutes of blending. Plus, it’s a guilt-free indulgence that tastes like a decadent dessert. With its rich chocolate and nutty peanut butter flavor, you’ll feel like you’re treating yourself while nourishing your body. It’s the perfect balance of health and happiness in every scoop!
Ingredients for Ninja Creami Chocolate Peanut Butter Protein Ice Cream
Gathering the right ingredients is key to making this delightful Ninja Creami Chocolate Peanut Butter Protein Ice Cream. Here’s what you’ll need:
- Unsweetened almond milk: A creamy base that keeps this dessert light and dairy-free.
- Chocolate protein powder: Adds a rich chocolate flavor while boosting the protein content, perfect for a post-workout treat.
- Natural peanut butter: This brings a nutty richness and healthy fats, making every bite satisfying.
- Honey or maple syrup: A touch of sweetness to balance the flavors; use maple syrup for a vegan option.
- Vanilla extract: Just a splash enhances the overall flavor, making it more aromatic and delicious.
- Cocoa powder: Intensifies the chocolate flavor, giving it that deep, indulgent taste we all love.
- Pinch of salt: A little salt elevates the sweetness and rounds out the flavors beautifully.
Feel free to adjust the sweetness to your liking or swap out almond milk for another milk alternative. If you’re looking for a creamier texture, adding more almond milk can work wonders. For exact measurements, check the bottom of the article where you can find them available for printing!
How to Make Ninja Creami Chocolate Peanut Butter Protein Ice Cream
Making this Ninja Creami Chocolate Peanut Butter Protein Ice Cream is a breeze! Follow these simple steps, and you’ll be enjoying a delicious, protein-packed dessert in no time. Let’s dive in!
Step 1: Blend the Ingredients
Start by gathering all your ingredients. In a blender, combine the unsweetened almond milk, chocolate protein powder, natural peanut butter, honey or maple syrup, vanilla extract, cocoa powder, and a pinch of salt. Blend everything until it’s smooth and creamy. This step is crucial for achieving that delightful texture. If you want a richer flavor, don’t hesitate to add a bit more cocoa powder!
Step 2: Freeze the Mixture
Once your mixture is blended to perfection, pour it into the Ninja Creami container. Make sure to seal it tightly. Now, here comes the hard part—waiting! Freeze the mixture for at least 24 hours. This step is essential for creating that creamy ice cream texture. Trust me, the wait will be worth it!
Step 3: Process in the Ninja Creami
After your mixture has frozen solid, it’s time to bring out the Ninja Creami! Follow the manufacturer’s instructions to process the frozen mixture. This is where the magic happens. The Ninja Creami will transform your frozen block into a luscious, creamy ice cream. You’ll love watching it come to life!
Step 4: Serve and Enjoy
Now for the best part—serving! Scoop out your Ninja Creami Chocolate Peanut Butter Protein Ice Cream into bowls or cones. You can enjoy it right away or store it in the freezer for later. If you want to get fancy, top it with some chopped nuts or a drizzle of chocolate syrup. Each bite is a delightful blend of chocolate and peanut butter that will leave you craving more!
Tips for Success
- Make sure your blender is powerful enough to create a smooth mixture.
- For a creamier texture, consider adding a splash more almond milk.
- Freeze the mixture for a full 24 hours for the best results.
- Experiment with different protein powders for unique flavors.
- Store leftovers in an airtight container to maintain freshness.
Equipment Needed
- Ninja Creami: This is essential for transforming your frozen mixture into creamy ice cream.
- Blender: A high-speed blender works best for achieving a smooth consistency.
- Measuring cups: Handy for accurate ingredient measurements.
- Freezer-safe container: Use this to store your mixture while it freezes.
Variations
- Nut Butter Swap: Try almond butter or cashew butter instead of peanut butter for a different flavor profile.
- Flavor Boost: Add a tablespoon of instant coffee or espresso powder for a mocha twist.
- Fruit Fusion: Blend in some frozen bananas or strawberries for a fruity version of this ice cream.
- Chocolate Lovers: Mix in chocolate chips or chunks for an extra chocolatey treat.
- Vegan Delight: Ensure all ingredients are plant-based, using maple syrup and dairy-free chocolate protein powder.
Serving Suggestions
- Pair your Ninja Creami Chocolate Peanut Butter Protein Ice Cream with fresh berries for a refreshing contrast.
- Serve it alongside a warm slice of banana bread for a delightful dessert duo.
- Top with crushed nuts or a sprinkle of sea salt for added texture and flavor.
- Enjoy with a glass of almond milk or a protein smoothie for a balanced treat.
FAQs about Ninja Creami Chocolate Peanut Butter Protein Ice Cream
Can I use a different type of milk?
Absolutely! While unsweetened almond milk is my go-to, you can use any milk alternative you prefer. Coconut milk or oat milk can add a unique flavor and creaminess to your Ninja Creami Chocolate Peanut Butter Protein Ice Cream.
How long does it take to freeze?
For the best results, freeze the mixture for at least 24 hours. This ensures that your ice cream achieves that perfect creamy texture. Patience is key here!
Can I make this recipe without protein powder?
Yes, you can! If you prefer a protein-free version, simply omit the protein powder. You might want to adjust the sweetness slightly, as the protein powder does add a bit of flavor.
How should I store leftovers?
Store any leftover Ninja Creami Chocolate Peanut Butter Protein Ice Cream in an airtight container in the freezer. It should stay fresh for about a week, but trust me, it won’t last that long!
Is this recipe suitable for kids?
Definitely! This ice cream is a healthier alternative to store-bought options. With its delicious chocolate and peanut butter flavor, kids will love it. Plus, it’s packed with protein, making it a great snack!
Final Thoughts
Creating my Ninja Creami Chocolate Peanut Butter Protein Ice Cream has been a delightful journey. It’s more than just a dessert; it’s a moment of joy in a busy day. Each scoop brings a smile, reminding me that healthy treats can be indulgent too. Whether you’re enjoying it after a workout or sharing it with loved ones, this ice cream is a celebration of flavor and nutrition. I hope you find as much happiness in making and savoring this recipe as I do. So grab your Ninja Creami and let the deliciousness begin!

Ninja Creami Chocolate Peanut Butter Protein Ice Cream delights your taste buds!
- Total Time: 24 hours 10 minutes
- Yield: 4 servings 1x
- Diet: Vegan
Description
A delicious and healthy dessert made with chocolate and peanut butter, perfect for satisfying your sweet tooth while providing protein.
Ingredients
- 2 cups of unsweetened almond milk
- 1/2 cup of chocolate protein powder
- 1/4 cup of natural peanut butter
- 1/4 cup of honey or maple syrup
- 1 teaspoon of vanilla extract
- 1/4 cup of cocoa powder
- Pinch of salt
Instructions
- In a blender, combine almond milk, chocolate protein powder, peanut butter, honey or maple syrup, vanilla extract, cocoa powder, and salt.
- Blend until smooth and well combined.
- Pour the mixture into the Ninja Creami container and freeze for at least 24 hours.
- Once frozen, process the mixture in the Ninja Creami according to the manufacturer’s instructions.
- Serve immediately or store in the freezer for later enjoyment.
Notes
- For a creamier texture, add more almond milk.
- Feel free to adjust the sweetness to your preference.
- This recipe can be made vegan by using maple syrup instead of honey.
- Prep Time: 10 minutes
- Cook Time: N/A
- Category: Dessert
- Method: Blending and Freezing
- Cuisine: American
Nutrition
- Serving Size: 1/2 cup
- Calories: 150
- Sugar: 5g
- Sodium: 150mg
- Fat: 7g
- Saturated Fat: 1g
- Unsaturated Fat: 6g
- Trans Fat: 0g
- Carbohydrates: 15g
- Fiber: 3g
- Protein: 10g
- Cholesterol: 0mg