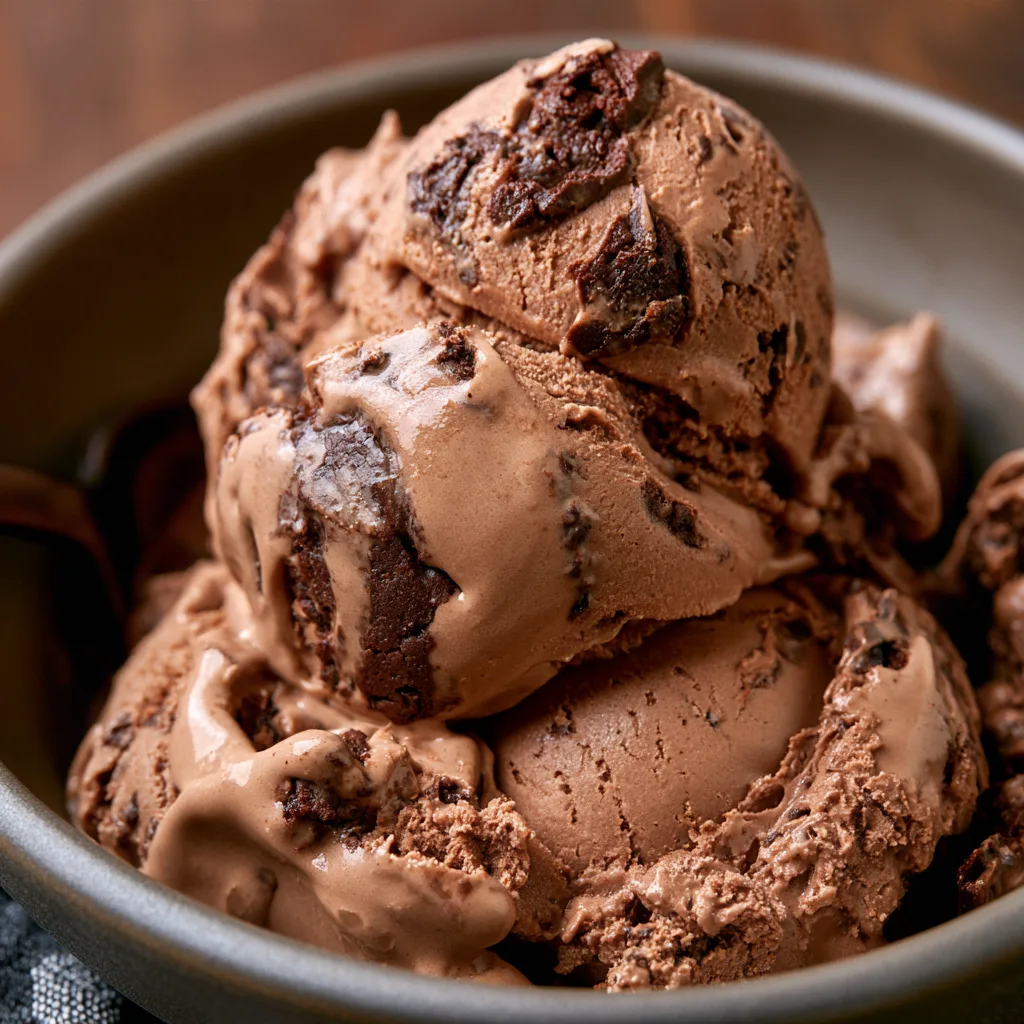
Introduction to Ninja Creami Chocolate Brownie Batter Ice Cream
As a busy mom, I know how precious those moments of indulgence can be. That’s why I’m excited to share my Ninja Creami Chocolate Brownie Batter Ice Cream recipe with you! This delightful treat is not just a dessert; it’s a little scoop of happiness that you can whip up with minimal effort. Imagine the joy on your loved ones’ faces when they taste this rich, creamy chocolate goodness. Perfect for a quick solution after a long day or a sweet surprise for family movie night, this ice cream is sure to impress!
Why You’ll Love This Ninja Creami Chocolate Brownie Batter Ice Cream
This Ninja Creami Chocolate Brownie Batter Ice Cream is a game-changer for busy lives. It’s incredibly easy to make, requiring just a few simple steps. The rich, chocolatey flavor will satisfy even the most discerning sweet tooth. Plus, it’s a fantastic way to use leftover brownie batter, turning it into a creamy delight. You’ll love how quickly it comes together, making it a perfect treat for any occasion!
Ingredients for Ninja Creami Chocolate Brownie Batter Ice Cream
Gathering the right ingredients is the first step to creating your delicious Ninja Creami Chocolate Brownie Batter Ice Cream. Here’s what you’ll need:
- Heavy cream: This adds a rich, velvety texture that makes the ice cream creamy and indulgent.
- Whole milk: It balances the richness of the heavy cream, ensuring a smooth consistency.
- Brownie batter: Use your favorite homemade or store-bought brownie batter. Just make sure it’s fully cooled before mixing!
- Granulated sugar: This sweetens the mixture, enhancing the chocolate flavor and making it irresistible.
- Vanilla extract: A splash of vanilla adds depth and rounds out the flavors beautifully.
- Chocolate chips: These little morsels of joy provide delightful bursts of chocolate in every bite. Dark chocolate chips can elevate the flavor even more!
For those looking to customize, consider adding a pinch of sea salt to enhance the sweetness or using almond milk for a lighter version. You can find the exact quantities for each ingredient at the bottom of the article, ready for printing!
How to Make Ninja Creami Chocolate Brownie Batter Ice Cream
Making your own Ninja Creami Chocolate Brownie Batter Ice Cream is a delightful adventure! Follow these simple steps, and you’ll be savoring this creamy treat in no time. Let’s dive in!
Step 1: Combine the Base Ingredients
Start by grabbing a mixing bowl. Pour in the heavy cream and whole milk. Then, add the granulated sugar and vanilla extract. Whisk everything together until it’s well combined. You want the sugar to dissolve completely, creating a smooth base. This creamy mixture is the heart of your ice cream!
Step 2: Incorporate the Brownie Batter
Now, it’s time to bring in the star of the show: the brownie batter! Gently stir in the prepared brownie batter into your creamy mixture. Make sure it’s fully mixed, but don’t overdo it. You want those delicious brownie chunks to remain intact, adding texture to your ice cream.
Step 3: Freeze the Mixture
Pour your delightful mixture into the Ninja Creami container. Make sure it’s sealed tightly. Now, here comes the hardest part—patience! Place the container in the freezer for at least 24 hours. This step is crucial for achieving that perfect ice cream consistency.
Step 4: Process in the Ninja Creami
Once your mixture is frozen solid, it’s time to process it in the Ninja Creami. Follow the manufacturer’s instructions for your specific model. Typically, you’ll need to attach the container to the machine and select the ice cream setting. Watch as it transforms into a creamy delight!
Step 5: Add Chocolate Chips
After processing, it’s time to fold in the chocolate chips. Gently mix them into your ice cream, ensuring they’re evenly distributed. These little bursts of chocolate will take your Ninja Creami Chocolate Brownie Batter Ice Cream to the next level!
Step 6: Serve or Store
Now for the best part—serving! Scoop out your delicious ice cream into bowls and enjoy immediately. If you have leftovers, store them in the freezer in an airtight container. Just remember to let it sit for a few minutes at room temperature before scooping again. Enjoy your homemade treat!
Tips for Success
- Make sure your heavy cream and milk are cold for a creamier texture.
- Use a whisk to combine ingredients thoroughly, ensuring no lumps remain.
- Let the brownie batter cool completely before mixing to avoid melting the ice cream base.
- For a smoother ice cream, process it twice in the Ninja Creami.
- Experiment with different mix-ins like nuts or caramel for added flavor!
Equipment Needed
- Ninja Creami: This is essential for creating your ice cream. If you don’t have one, a traditional ice cream maker can work too.
- Mixing bowl: A large bowl for combining your ingredients. Any size will do!
- Whisk: Perfect for mixing the base ingredients smoothly. A fork can also work in a pinch.
- Measuring cups: To ensure you get the right amounts. You can use any standard measuring tools.
Variations
- Nutty Delight: Add chopped walnuts or pecans for a crunchy texture that complements the creamy ice cream.
- Mint Chocolate Chip: Stir in a few drops of peppermint extract and replace some chocolate chips with mint-flavored ones for a refreshing twist.
- Peanut Butter Swirl: Drizzle in some creamy peanut butter before processing for a rich, nutty flavor that pairs beautifully with chocolate.
- Vegan Option: Substitute heavy cream and whole milk with coconut cream and almond milk for a dairy-free version.
- Fruit Fusion: Mix in fresh raspberries or strawberries for a fruity contrast to the chocolatey goodness.
Serving Suggestions for Ninja Creami Chocolate Brownie Batter Ice Cream
- Top with a dollop of whipped cream for an extra indulgent treat.
- Serve alongside warm brownies for a delightful dessert duo.
- Pair with a rich espresso or cold brew coffee for a perfect afternoon pick-me-up.
- Garnish with chocolate shavings or sprinkles for a fun presentation.
- Enjoy in a waffle cone for a nostalgic ice cream experience!
FAQs about Ninja Creami Chocolate Brownie Batter Ice Cream
Can I use store-bought brownie batter for this recipe?
Absolutely! Using store-bought brownie batter can save you time and still deliver delicious results. Just make sure it’s fully cooled before mixing it into your ice cream base.
How long does the Ninja Creami Chocolate Brownie Batter Ice Cream last in the freezer?
This ice cream can last up to two weeks in the freezer if stored in an airtight container. However, I doubt it will last that long once your family gets a taste!
Can I make this recipe without a Ninja Creami?
Yes, you can! If you don’t have a Ninja Creami, a traditional ice cream maker will work just fine. Just follow the manufacturer’s instructions for churning.
What can I do if my ice cream is too hard after freezing?
If your ice cream is too hard, let it sit at room temperature for a few minutes before scooping. This will soften it up, making it easier to serve.
Can I customize the flavors in this ice cream?
Definitely! Feel free to experiment with different mix-ins or flavorings. Adding nuts, caramel, or even a hint of espresso can elevate your Ninja Creami Chocolate Brownie Batter Ice Cream to new heights!
Final Thoughts
Creating your own Ninja Creami Chocolate Brownie Batter Ice Cream is more than just making a dessert; it’s about crafting moments of joy. Each scoop is a reminder of the sweet little pleasures in life, perfect for sharing with family or enjoying solo after a long day. The rich chocolate flavor and creamy texture will transport you to a happy place, making every bite a delightful experience. So, gather your ingredients, unleash your inner ice cream maker, and let this recipe bring a smile to your face and warmth to your heart!

Ninja Creami Chocolate Brownie Batter Ice Cream Will Delight You!
- Total Time: 24 hours 15 minutes
- Yield: 4 servings 1x
- Diet: Vegetarian
Description
A rich and creamy chocolate brownie batter ice cream made using the Ninja Creami, perfect for chocolate lovers.
Ingredients
- 2 cups heavy cream
- 1 cup whole milk
- 1 cup brownie batter (prepared)
- 3/4 cup granulated sugar
- 1 teaspoon vanilla extract
- 1/2 cup chocolate chips
Instructions
- In a mixing bowl, combine heavy cream, whole milk, granulated sugar, and vanilla extract.
- Stir in the prepared brownie batter until well mixed.
- Pour the mixture into the Ninja Creami container and freeze for at least 24 hours.
- After freezing, process the mixture in the Ninja Creami according to the manufacturer’s instructions.
- Once processed, fold in the chocolate chips.
- Serve immediately or store in the freezer for later enjoyment.
Notes
- Ensure the brownie batter is fully cooled before mixing.
- For a richer flavor, use dark chocolate chips.
- Can be topped with whipped cream or additional brownie pieces.
- Prep Time: 15 minutes
- Cook Time: 0 minutes
- Category: Dessert
- Method: Ice Cream Maker
- Cuisine: American
Nutrition
- Serving Size: 1/2 cup
- Calories: 350
- Sugar: 25g
- Sodium: 50mg
- Fat: 25g
- Saturated Fat: 15g
- Unsaturated Fat: 10g
- Trans Fat: 0g
- Carbohydrates: 30g
- Fiber: 2g
- Protein: 5g
- Cholesterol: 80mg