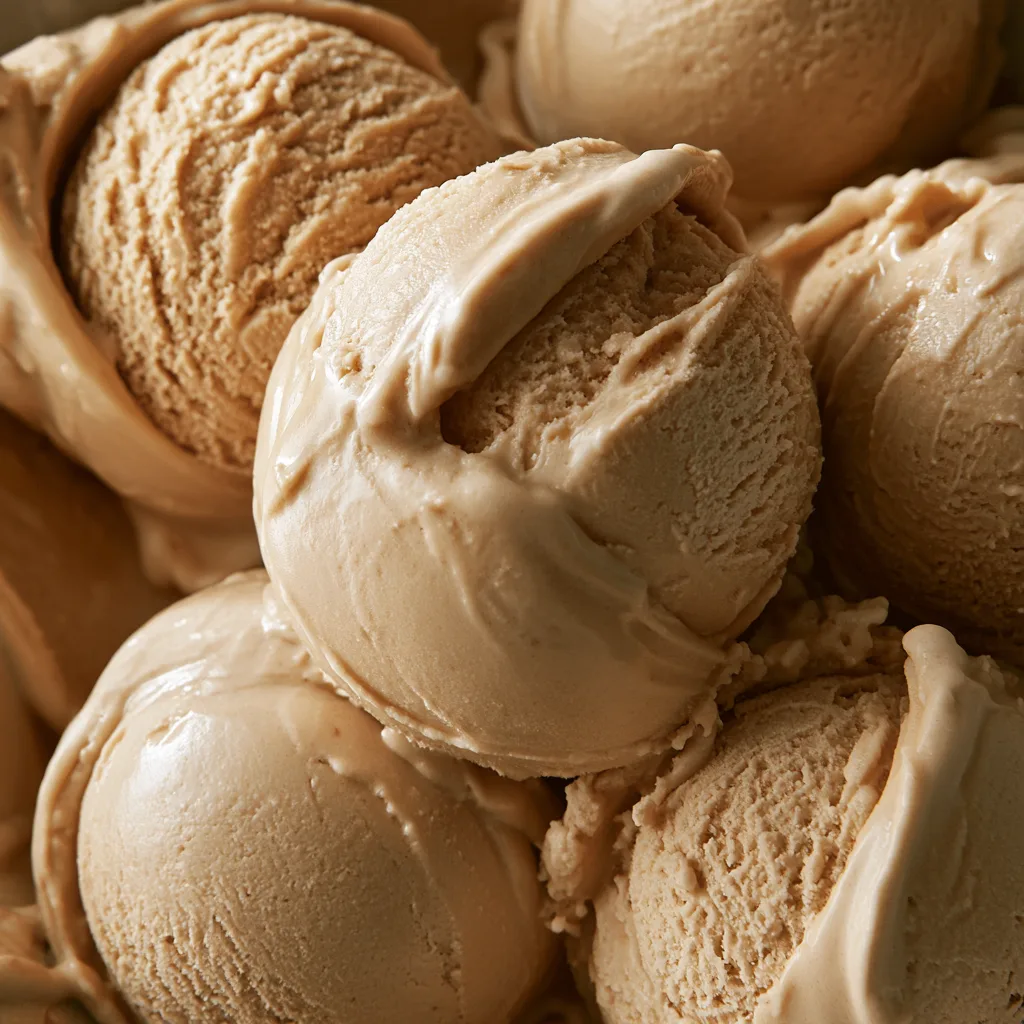
Introduction to Ninja Creami High-Protein Coffee Ice Cream
As a busy mom, I know how challenging it can be to find time for yourself, let alone whip up a delicious dessert. That’s why I’m excited to share my Ninja Creami High-Protein Coffee Ice Cream recipe with you! This guilt-free treat is not only quick to prepare but also satisfies your sweet tooth while keeping your health goals in check. Imagine indulging in a creamy, coffee-flavored delight that fuels your day. Whether you’re looking for a post-workout snack or a sweet finish to dinner, this ice cream is the perfect solution for your hectic lifestyle!
Why You’ll Love This Ninja Creami High-Protein Coffee Ice Cream
This Ninja Creami High-Protein Coffee Ice Cream is a game-changer for busy days. It’s incredibly easy to make, requiring just a few simple steps. Plus, it’s ready to enjoy after a quick freeze! The rich coffee flavor combined with a creamy texture makes it a delightful treat. You can indulge without the guilt, knowing you’re fueling your body with protein and keeping your health goals on track.
Ingredients for Ninja Creami High-Protein Coffee Ice Cream
Gathering the right ingredients is the first step to creating your Ninja Creami High-Protein Coffee Ice Cream. Here’s what you’ll need:
- Brewed coffee: Use your favorite blend. For a bolder flavor, cold brew works wonders!
- Unsweetened almond milk: This adds creaminess without the calories. You can substitute with oat milk or coconut milk if you prefer.
- Protein powder: Vanilla or chocolate will enhance the flavor. Choose a brand you trust for quality.
- Sweetener: I love using stevia or erythritol for a guilt-free sweetness. Adjust to your taste!
- Vanilla extract: A splash of this adds depth and warmth to your ice cream.
- Salt: Just a pinch enhances all the flavors, making each bite more delicious.
For exact measurements, check the bottom of the article where you can find a printable version of the recipe. Happy cooking!
How to Make Ninja Creami High-Protein Coffee Ice Cream
Making your own Ninja Creami High-Protein Coffee Ice Cream is a breeze! Follow these simple steps, and you’ll be savoring a delicious, creamy treat in no time. Let’s dive in!
Step 1: Combine Ingredients
Start by gathering all your ingredients. In a mixing bowl, pour in the brewed coffee and almond milk. Then, add the protein powder, sweetener, vanilla extract, and salt. This is where the magic begins!
Step 2: Whisk Until Smooth
Grab a whisk and mix everything together. You want a smooth, well-combined mixture. This step is crucial because it ensures that the protein powder dissolves completely, giving you a creamy texture. Trust me, no one wants clumps in their ice cream!
Step 3: Freeze the Mixture
Once your mixture is smooth, pour it into the Ninja Creami container. Seal it tightly and pop it in the freezer. Let it freeze for at least 24 hours. I know waiting can be tough, but good things come to those who wait!
Step 4: Process in the Ninja Creami
After the mixture is frozen solid, it’s time for the fun part! Remove the container from the freezer and place it in your Ninja Creami. Follow the manufacturer’s instructions to process it until it reaches that creamy, dreamy consistency. You’ll love watching it transform!
Step 5: Serve or Store
Now that your Ninja Creami High-Protein Coffee Ice Cream is ready, it’s time to indulge! Serve it immediately for a soft-serve experience, or store it in the freezer for later. Just remember to let it sit out for a few minutes before scooping if it hardens too much. Enjoy every guilt-free bite!
Tips for Success
- Use cold brew coffee for a richer flavor.
- Adjust the sweetness to suit your taste; start with less and add more if needed.
- Make sure your Ninja Creami container is completely frozen for best results.
- For a creamier texture, let the ice cream sit at room temperature for a few minutes before serving.
- Experiment with different protein powder flavors for a unique twist!
Equipment Needed
- Ninja Creami: This is essential for creating that creamy texture. If you don’t have one, a traditional ice cream maker can work too.
- Mixing bowl: Any large bowl will do for combining your ingredients.
- Whisk: A simple whisk or even a fork will help you mix everything smoothly.
- Freezer-safe container: Use this to store your mixture while it freezes.
Variations
- Chocolate Delight: Swap out the vanilla protein powder for chocolate for a rich, indulgent flavor.
- Nutty Twist: Add a tablespoon of almond or peanut butter for a nutty flavor and extra creaminess.
- Mocha Madness: Mix in a tablespoon of cocoa powder for a chocolate-coffee fusion that’s irresistible.
- Spiced Coffee: Add a pinch of cinnamon or nutmeg for a warm, cozy twist on your ice cream.
- Vegan Option: Use plant-based protein powder and coconut milk for a completely dairy-free treat.
Serving Suggestions
- Top your ice cream with a sprinkle of cocoa powder or crushed nuts for added texture.
- Pair it with a shot of espresso for an energizing coffee float.
- Serve alongside fresh berries for a refreshing contrast.
- Drizzle with sugar-free chocolate syrup for a decadent touch.
- Garnish with a mint leaf for a pop of color and freshness.
FAQs about Ninja Creami High-Protein Coffee Ice Cream
Can I use decaf coffee for this recipe?
Absolutely! If you prefer a caffeine-free option, decaf coffee works perfectly. You’ll still enjoy that rich coffee flavor without the jitters.
How long can I store the ice cream?
Your Ninja Creami High-Protein Coffee Ice Cream can be stored in the freezer for up to two weeks. Just remember to let it sit out for a few minutes before scooping if it hardens too much.
Can I make this ice cream without a Ninja Creami?
Yes, you can! If you don’t have a Ninja Creami, a traditional ice cream maker will do the trick. Just follow the manufacturer’s instructions for churning.
What if I don’t have protein powder?
No worries! You can skip the protein powder, but keep in mind that it will change the texture and nutritional profile. You might want to add a bit more almond milk to maintain creaminess.
Is this ice cream suitable for kids?
Definitely! This Ninja Creami High-Protein Coffee Ice Cream is a healthier dessert option that kids will love. Just be mindful of the caffeine content if serving to younger ones.
Final Thoughts
Creating your own Ninja Creami High-Protein Coffee Ice Cream is more than just a recipe; it’s a delightful experience that brings joy to your busy days. Each scoop is a reminder that you can indulge without compromising your health goals. The rich coffee flavor and creamy texture make it a treat you’ll look forward to after a long day. Plus, knowing you’ve made something nutritious for yourself and your family adds a sprinkle of satisfaction. So, grab your Ninja Creami and let the sweet adventure begin—because you deserve a little indulgence in your life!
Print
Ninja Creami High-Protein Coffee Ice Cream: Indulge Guilt-Free!
- Total Time: 24 hours 10 minutes
- Yield: 4 servings 1x
- Diet: Low Calorie
Description
A delicious and guilt-free high-protein coffee ice cream made using the Ninja Creami, perfect for satisfying your sweet tooth while maintaining a healthy diet.
Ingredients
- 2 cups brewed coffee, cooled
- 1 cup unsweetened almond milk
- 1/2 cup protein powder (vanilla or chocolate)
- 1/4 cup sweetener of choice (like stevia or erythritol)
- 1 teaspoon vanilla extract
- 1/4 teaspoon salt
Instructions
- In a mixing bowl, combine the brewed coffee, almond milk, protein powder, sweetener, vanilla extract, and salt.
- Whisk until all ingredients are well combined and smooth.
- Pour the mixture into the Ninja Creami container and freeze for at least 24 hours.
- Once frozen, process the mixture in the Ninja Creami according to the manufacturer’s instructions until creamy.
- Serve immediately or store in the freezer for later enjoyment.
Notes
- For a richer flavor, use cold brew coffee instead of regular brewed coffee.
- Adjust the sweetness according to your taste preference.
- This ice cream can be stored in the freezer for up to 2 weeks.
- Prep Time: 10 minutes
- Cook Time: 0 minutes
- Category: Dessert
- Method: Ice Cream Maker
- Cuisine: American
Nutrition
- Serving Size: 1/2 cup
- Calories: 120
- Sugar: 1g
- Sodium: 150mg
- Fat: 2g
- Saturated Fat: 0g
- Unsaturated Fat: 2g
- Trans Fat: 0g
- Carbohydrates: 6g
- Fiber: 1g
- Protein: 15g
- Cholesterol: 0mg