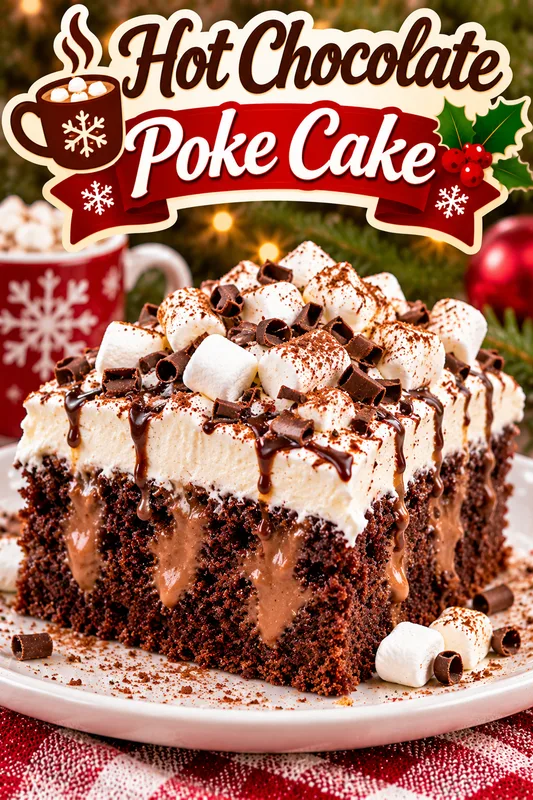
Introduction to Hot Chocolate Poke Cake
As a busy mom, I know how precious time can be, especially when it comes to whipping up something delicious for my family. That’s why I absolutely adore this Hot Chocolate Poke Cake! It’s not just a dessert; it’s a warm hug on a plate. Imagine a moist chocolate cake infused with rich hot chocolate flavor, topped with fluffy whipped cream. This recipe is perfect for those hectic days when you want to impress your loved ones without spending hours in the kitchen. Trust me, this cake will melt your heart and satisfy your sweet cravings!
Why You’ll Love This Hot Chocolate Poke Cake
This Hot Chocolate Poke Cake is a game-changer for busy days. It’s incredibly easy to make, requiring just a few simple ingredients and minimal prep time. The rich, chocolatey flavor is sure to please even the pickiest eaters in your family. Plus, it’s a delightful treat that can be made ahead of time, allowing you to enjoy sweet moments without the stress. Who wouldn’t love that?
Ingredients for Hot Chocolate Poke Cake
Gathering the right ingredients is the first step to creating this delightful Hot Chocolate Poke Cake. Here’s what you’ll need:
- Chocolate cake mix: This is the base of our cake. You can use any brand you prefer, but I love the rich flavor of dark chocolate cake mix for an extra indulgent touch.
- Hot water: Adding hot water helps to activate the cocoa in the cake mix, making it moist and flavorful. It’s like giving your cake a warm bath!
- Milk: This adds creaminess to the batter. Whole milk works best, but you can substitute with almond or oat milk for a dairy-free option.
- Hot chocolate mix: This is the secret ingredient that infuses the cake with that cozy hot chocolate flavor. You can use any brand you love, or even homemade hot chocolate mix if you’re feeling adventurous!
- Whipped cream: A fluffy topping that adds a light, airy texture to balance the rich cake. You can use store-bought or whip your own for a fresher taste.
- Chocolate shavings: These are for garnish, adding a touch of elegance and extra chocolatey goodness. You can easily make them by using a vegetable peeler on a chocolate bar.
For exact quantities, check the bottom of the article where you can find everything listed for easy printing. Happy baking!
How to Make Hot Chocolate Poke Cake
Now that we have our ingredients ready, let’s dive into the fun part—making this delightful Hot Chocolate Poke Cake! Follow these simple steps, and you’ll have a dessert that’s sure to impress.
Step 1: Preheat the Oven
First things first, preheat your oven according to the cake mix instructions. This step is crucial because it ensures that your cake bakes evenly. A hot oven helps the cake rise beautifully, giving you that perfect fluffy texture. Trust me, you don’t want to skip this!
Step 2: Prepare the Cake Mix
In a large mixing bowl, combine the chocolate cake mix with hot water and milk. The hot water activates the cocoa, making the cake moist and rich. Stir until everything is well blended, and don’t worry if there are a few lumps; they’ll bake out. This is where the magic begins!
Step 3: Bake the Cake
Pour the batter into a greased 9×13 inch pan and pop it into the oven. Bake according to the package instructions, usually around 30 minutes. To check if it’s done, insert a toothpick in the center. If it comes out clean, your cake is ready to shine!
Step 4: Cool the Cake
Once baked, let the cake cool in the pan for about 10 minutes. This cooling period is essential because it allows the cake to set. If you poke holes too soon, it might crumble. Patience is key here, my friends!
Step 5: Poke Holes in the Cake
Using a fork, gently poke holes all over the top of the cake. This step is where the “poke” in Hot Chocolate Poke Cake comes into play! The holes allow the hot chocolate mixture to seep in, creating that deliciously moist texture we all crave.
Step 6: Add Hot Chocolate Mixture
Now, mix the hot chocolate packet with hot water until it’s smooth. Pour this luscious mixture evenly over the cake, making sure it fills those holes. This is the secret to infusing your cake with that cozy hot chocolate flavor. It’s like a warm hug for your taste buds!
Step 7: Final Cooling
Let the cake cool completely before adding the toppings. This step is important because it ensures that the whipped cream doesn’t melt into the cake. You want that beautiful layer of whipped cream to sit proudly on top!
Step 8: Top with Whipped Cream
Finally, it’s time to add the whipped cream. You can either spread it on with a spatula or pipe it on for a fancy touch. For an extra treat, sprinkle chocolate shavings on top. This adds a delightful crunch and makes your cake look like a masterpiece!
Tips for Success
- Always preheat your oven for even baking.
- Use room temperature ingredients for a smoother batter.
- Don’t rush the cooling process; it’s key for texture.
- Feel free to experiment with flavored whipped cream, like vanilla or peppermint.
- For a fun twist, add mini marshmallows on top before serving!
Equipment Needed
- Mixing bowl: A large bowl for combining ingredients. A sturdy plastic or glass bowl works well.
- Whisk or electric mixer: For blending the batter smoothly. A whisk is great for a workout!
- 9×13 inch baking pan: Essential for baking the cake. If you don’t have one, a similar-sized dish will do.
- Fork: For poking holes in the cake. Any fork will suffice!
- Spatula: Perfect for spreading whipped cream evenly on top.
Variations
- Gluten-Free Option: Use a gluten-free chocolate cake mix to make this dessert suitable for those with gluten sensitivities.
- Minty Delight: Add a few drops of peppermint extract to the hot chocolate mixture for a refreshing twist.
- Nutty Flavor: Incorporate chopped nuts, like walnuts or pecans, into the batter for added texture and flavor.
- Vegan Version: Substitute the cake mix with a vegan chocolate cake mix and use almond or coconut milk instead of dairy.
- Fruit Infusion: Top the whipped cream with fresh berries or banana slices for a fruity contrast to the rich chocolate.
Serving Suggestions
- Pair with a steaming cup of coffee or hot cocoa for a cozy treat.
- Serve alongside vanilla ice cream for an indulgent dessert experience.
- Garnish with fresh berries for a pop of color and freshness.
- Present on a decorative platter for a beautiful table display.
- Sprinkle extra chocolate shavings on top for an elegant touch.
FAQs about Hot Chocolate Poke Cake
Can I make Hot Chocolate Poke Cake ahead of time?
Absolutely! This cake actually tastes better the next day as the flavors meld together. Just make sure to store it in the refrigerator after it cools completely.
What can I use instead of whipped cream?
If you’re not a fan of whipped cream, you can use whipped topping or even a scoop of ice cream. Both options add a delightful creaminess to the cake!
Can I freeze Hot Chocolate Poke Cake?
Yes, you can freeze this cake! Just make sure to wrap it tightly in plastic wrap and then foil. When you’re ready to enjoy it, let it thaw in the fridge overnight.
How do I store leftovers?
Store any leftover cake in an airtight container in the refrigerator. It should stay fresh for about 3-4 days, but I doubt it will last that long!
Can I use a different flavor of cake mix?
Of course! While chocolate is the star here, you can experiment with other flavors like vanilla or red velvet. Just adjust the hot chocolate mix accordingly for a unique twist!
Final Thoughts
Making this Hot Chocolate Poke Cake is more than just baking; it’s about creating sweet memories with your loved ones. The joy of watching their faces light up as they take that first bite is priceless. This cake is a delightful reminder that even on the busiest days, we can carve out moments of happiness. Whether it’s a family gathering or a cozy night in, this dessert brings warmth and comfort to any occasion. So, roll up your sleeves, embrace the chocolatey goodness, and let this cake melt your heart and fill your home with love!

Hot Chocolate Poke Cake That Will Melt Your Heart!
- Total Time: 50 minutes
- Yield: 12 servings 1x
- Diet: Vegetarian
Description
A deliciously moist chocolate cake infused with rich hot chocolate flavor, topped with whipped cream and chocolate shavings.
Ingredients
- 1 box chocolate cake mix
- 1 cup hot water
- 1 cup milk
- 1 packet hot chocolate mix
- 1 cup whipped cream
- Chocolate shavings for garnish
Instructions
- Preheat the oven according to the cake mix instructions.
- Prepare the chocolate cake mix as directed, adding hot water and milk.
- Bake the cake in a 9×13 inch pan.
- Once baked, let the cake cool for 10 minutes.
- Poke holes in the cake using a fork.
- Mix the hot chocolate mix with hot water and pour it over the cake.
- Allow the cake to cool completely.
- Top with whipped cream and garnish with chocolate shavings.
Notes
- For a richer flavor, use dark chocolate cake mix.
- Can be made a day in advance for better flavor.
- Store leftovers in the refrigerator.
- Prep Time: 20 minutes
- Cook Time: 30 minutes
- Category: Dessert
- Method: Baking
- Cuisine: American
Nutrition
- Serving Size: 1 slice
- Calories: 350
- Sugar: 25g
- Sodium: 200mg
- Fat: 15g
- Saturated Fat: 8g
- Unsaturated Fat: 5g
- Trans Fat: 0g
- Carbohydrates: 45g
- Fiber: 2g
- Protein: 5g
- Cholesterol: 30mg