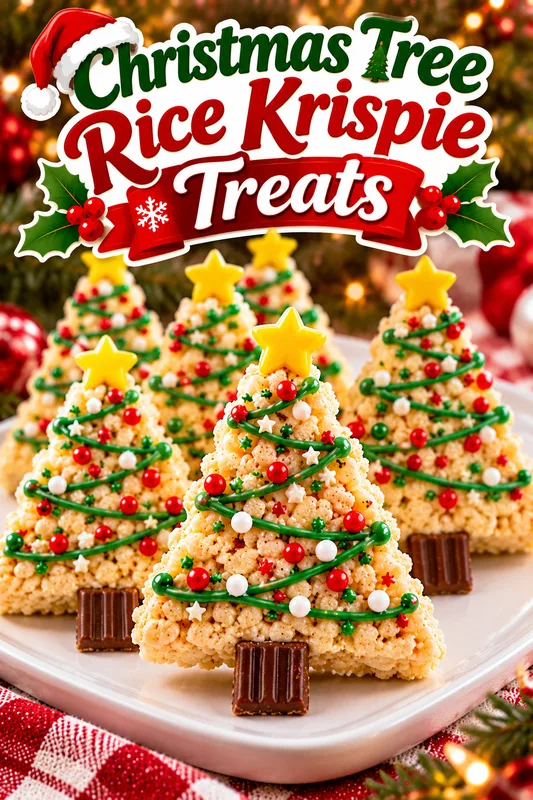
Introduction to Christmas Tree Rice Krispie Treats
As the holiday season approaches, I find myself searching for festive treats that bring joy without consuming my entire day. That’s where these delightful Christmas Tree Rice Krispie Treats come in! They’re not just a quick solution for busy moms like me; they’re also a fun way to engage the kids in the kitchen. Picture this: colorful, tree-shaped goodies that sparkle with sprinkles, ready to impress your loved ones. With just a few simple ingredients, you can create a magical dessert that captures the spirit of Christmas and fills your home with warmth and laughter.
Why You’ll Love This Christmas Tree Rice Krispie Treats
These Christmas Tree Rice Krispie Treats are a holiday miracle for busy families! They come together in just 25 minutes, making them perfect for last-minute gatherings. The delightful combination of gooey marshmallows and crispy cereal creates a taste that’s simply irresistible. Plus, the kids will love helping out, turning a simple treat into a cherished family memory. Who knew festive fun could be this easy and delicious?
Ingredients for Christmas Tree Rice Krispie Treats
Gathering the right ingredients is the first step to creating these festive delights. Here’s what you’ll need:
- Butter: This adds richness and helps bind everything together. I prefer unsalted for better control over the sweetness.
- Marshmallows: The star of the show! They provide that gooey texture we all love. Mini marshmallows work great, but regular ones can be cut up.
- Rice Krispies cereal: This gives the treats their signature crunch. You can also use other puffed cereals if you’re feeling adventurous.
- Green food coloring: A few drops transform your treats into festive trees. Feel free to adjust the amount for a deeper hue!
- Decorative sprinkles: These add a pop of color and fun. Choose holiday-themed sprinkles for an extra festive touch.
- Mini chocolate candies: Perfect for ornaments on your Christmas trees! Use any small candies you have on hand for a sweet surprise.
For exact quantities, check the bottom of the article where you can find everything listed for easy printing. Happy cooking!
How to Make Christmas Tree Rice Krispie Treats
Now that we have our ingredients ready, let’s dive into the fun part—making these delightful Christmas Tree Rice Krispie Treats! Follow these simple steps, and you’ll have a festive treat that’s sure to bring smiles.
Step 1: Melt the Butter
Start by grabbing a large saucepan and placing it over low heat. Add the butter and let it melt slowly. Stir occasionally to ensure it doesn’t burn. The aroma of melting butter is like a warm hug, isn’t it? Just wait until you add the marshmallows!
Step 2: Add the Marshmallows
Once the butter is fully melted, it’s time to add the marshmallows. Pour them into the saucepan and stir continuously. You want them to melt completely, creating a gooey mixture. This step is where the magic begins! Keep stirring until you have a smooth, creamy consistency.
Step 3: Color the Mixture
Now, remove the saucepan from the heat. It’s time to add a few drops of green food coloring. Mix it in until you achieve your desired shade of green. This is where your Christmas trees start to come to life! Don’t be shy—add more coloring if you want a vibrant hue.
Step 4: Combine with Rice Krispies
Next, it’s time to add the Rice Krispies cereal. Pour it into the marshmallow mixture and stir gently. You want every piece of cereal to be well-coated in that sweet, sticky goodness. This step is like a crunchy hug for your taste buds!
Step 5: Shape the Treats
Now comes the fun part! Take a greased Christmas tree-shaped mold and press the mixture firmly into it. Make sure to pack it down well so the treats hold their shape. If you don’t have a mold, you can shape them by hand into tree forms. Get creative!
Step 6: Cool and Set
Once shaped, let the treats cool and set for about 30 minutes. This is the perfect time to clean up your kitchen or sip on some hot cocoa. The anticipation of tasting these treats makes the wait worthwhile!
Step 7: Decorate
After they’ve set, gently remove the treats from the mold. Now, it’s time to unleash your inner artist! Decorate them with sprinkles and mini chocolate candies. These little touches make your Christmas Tree Rice Krispie Treats sparkle and shine, just like the holiday season!
Tips for Success
- Use fresh marshmallows for the best texture and flavor.
- Grease your hands with butter when shaping the treats to prevent sticking.
- Experiment with different molds for unique shapes.
- Let the treats cool completely before decorating for better adhesion.
- Store leftovers in an airtight container to keep them fresh and chewy.
Equipment Needed
- Large saucepan: A non-stick option works best for easy cleanup.
- Wooden spoon: Perfect for stirring; a silicone spatula can also do the trick.
- Christmas tree-shaped mold: If you don’t have one, use your hands to shape the treats.
- Measuring cups: Essential for accurate ingredient portions.
Variations
- Chocolate Drizzle: Melt some chocolate and drizzle it over the decorated treats for an extra layer of sweetness.
- Nutty Twist: Add chopped nuts or nut butter to the mixture for a crunchy texture and nutty flavor.
- Gluten-Free Option: Substitute Rice Krispies with gluten-free puffed rice cereal to accommodate dietary needs.
- Vegan Version: Use vegan marshmallows and dairy-free butter for a plant-based treat everyone can enjoy.
- Flavor Infusion: Mix in a teaspoon of vanilla or almond extract for a delightful flavor boost.
Serving Suggestions
- Pair these treats with a warm cup of hot chocolate for a cozy holiday snack.
- Serve alongside festive cookies for a delightful dessert platter.
- Present them on a decorative holiday tray to impress your guests.
- Wrap individual treats in clear cellophane for a sweet gift idea.
FAQs about Christmas Tree Rice Krispie Treats
Can I make these treats ahead of time?
Absolutely! You can prepare your Christmas Tree Rice Krispie Treats a day or two in advance. Just store them in an airtight container to keep them fresh. They’ll still taste delightful when it’s time to serve!
What can I use instead of green food coloring?
If you prefer a natural option, try using matcha powder or spirulina for a green hue. Just remember, the color might not be as vibrant, but it’ll still be festive!
How do I store leftover treats?
To keep your treats fresh, store them in an airtight container at room temperature. They should stay delicious for about a week. Just be prepared for them to disappear quickly!
Can I use different shapes for these treats?
Are these treats suitable for kids with allergies?
It depends on the specific allergies. Always check the labels on your ingredients. You can easily make them nut-free or gluten-free by choosing the right products. Just be cautious and customize as needed!
Final Thoughts
Creating these Christmas Tree Rice Krispie Treats is more than just a cooking project; it’s a joyful experience that brings families together. The laughter shared while decorating and the smiles that light up when you present these festive treats are priceless. Each bite is a reminder of the warmth of the holiday season, filled with love and creativity. Whether you’re making them for a party or just for fun, these treats are sure to become a cherished tradition in your home. So, gather your loved ones, roll up your sleeves, and let the festive fun begin!
Print
Christmas Tree Rice Krispie Treats for Festive Fun!
- Total Time: 25 minutes
- Yield: 12 servings 1x
- Diet: Vegetarian
Description
Delicious and festive Rice Krispie Treats shaped like Christmas trees, perfect for holiday celebrations.
Ingredients
- 3 tablespoons butter
- 1 package (10 oz) marshmallows
- 6 cups Rice Krispies cereal
- Green food coloring
- Decorative sprinkles
- Mini chocolate candies
Instructions
- In a large saucepan, melt the butter over low heat.
- Add the marshmallows and stir until completely melted.
- Remove from heat and add a few drops of green food coloring, mixing until the desired color is achieved.
- Stir in the Rice Krispies cereal until well coated.
- Press the mixture into a greased Christmas tree-shaped mold.
- Allow to cool and set for about 30 minutes.
- Once set, remove from the mold and decorate with sprinkles and mini chocolate candies.
Notes
- For a more vibrant color, add more food coloring.
- Use different shapes for variety.
- Store in an airtight container for freshness.
- Prep Time: 15 minutes
- Cook Time: 10 minutes
- Category: Dessert
- Method: No-Bake
- Cuisine: American
Nutrition
- Serving Size: 1 treat
- Calories: 150
- Sugar: 10g
- Sodium: 50mg
- Fat: 5g
- Saturated Fat: 3g
- Unsaturated Fat: 2g
- Trans Fat: 0g
- Carbohydrates: 22g
- Fiber: 0g
- Protein: 1g
- Cholesterol: 10mg