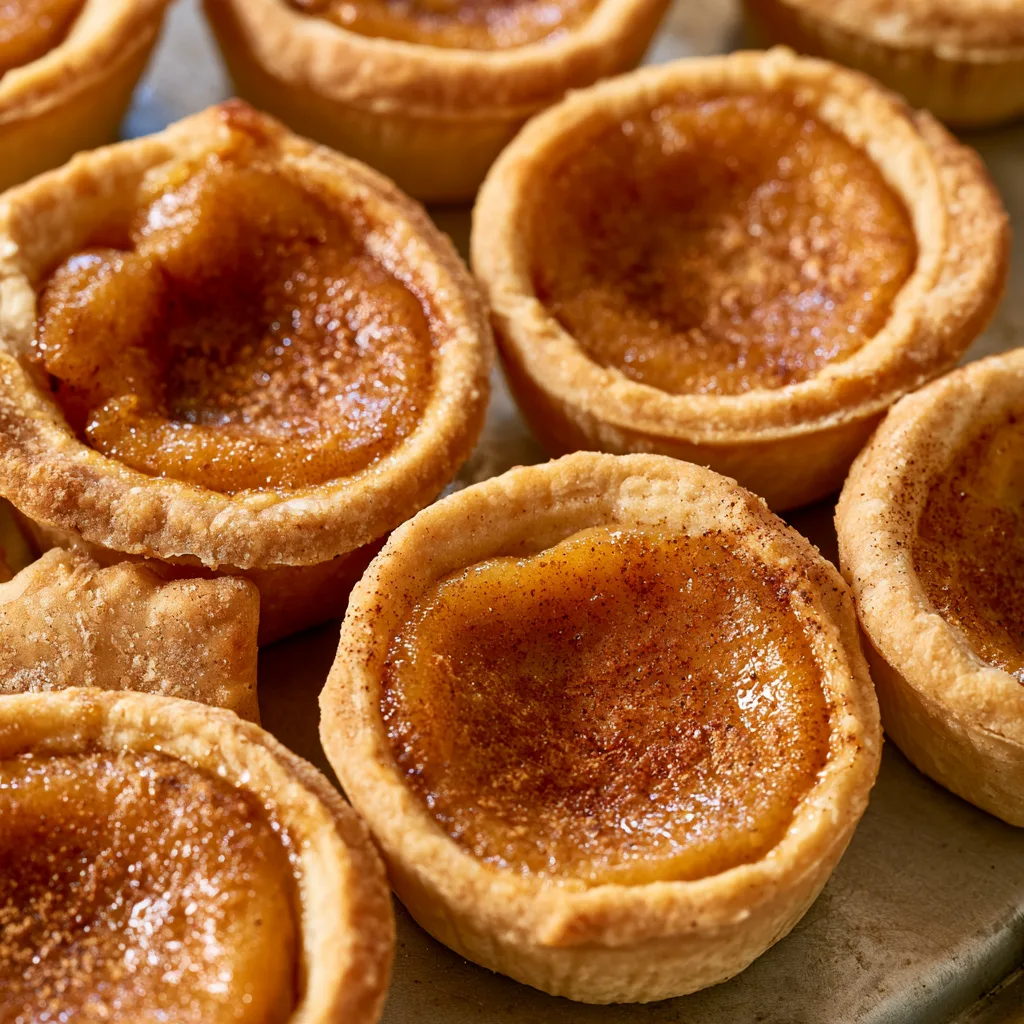
Introduction to Bite-Sized Bliss: Mini Pumpkin Pies for Your Fall Cravings!
As the leaves turn and the air gets crisp, I find myself craving the warm, comforting flavors of fall. That’s where these Bite-Sized Bliss: Mini Pumpkin Pies for Your Fall Cravings! come in! They’re the perfect solution for busy days when you want to whip up something special without spending hours in the kitchen. These little delights are not only easy to make, but they also impress family and friends alike. Imagine serving these adorable mini pies at your next gathering, and watch everyone smile with delight!
Why You’ll Love This Bite-Sized Bliss: Mini Pumpkin Pies
These mini pumpkin pies are a dream come true for busy moms and professionals alike. They come together in just 35 minutes, making them a quick and delightful treat. The rich, spiced filling is a taste of fall in every bite, and their small size means you can indulge without guilt. Plus, they’re perfect for sharing, so you can spread the joy of fall flavors with loved ones!
Ingredients for Bite-Sized Bliss: Mini Pumpkin Pies
Gathering the right ingredients is the first step to creating these delightful mini pumpkin pies. Here’s what you’ll need:
- Pumpkin puree: This is the star of the show! It gives the pies their rich flavor and creamy texture. You can use canned pumpkin puree for convenience or make your own from fresh pumpkins.
- Sugar: A touch of sweetness balances the spices and enhances the pumpkin flavor. Feel free to experiment with brown sugar for a deeper taste.
- Cinnamon: This warm spice is a must for that classic fall flavor. It adds a cozy aroma that fills your kitchen.
- Nutmeg: Just a pinch of nutmeg adds a nutty, slightly sweet note that complements the pumpkin beautifully.
- Ginger: Fresh or ground ginger brings a zesty kick to the filling, making each bite a little more exciting.
- Salt: A small amount of salt enhances all the flavors, making the sweetness pop.
- Eggs: These help bind the filling together, giving it a smooth and custardy texture.
- Evaporated milk: This adds creaminess and richness to the filling. You can substitute with coconut milk for a dairy-free option.
- Mini pie crusts: These are the perfect vessel for your filling. You can buy pre-made crusts or make your own if you’re feeling adventurous!
For exact measurements, check the bottom of the article where you can find everything listed for easy printing. Happy baking!
How to Make Bite-Sized Bliss: Mini Pumpkin Pies
Step 1: Preheat the Oven
First things first, let’s get that oven preheated to 425°F (220°C). Preheating is crucial because it ensures your mini pumpkin pies bake evenly. If you skip this step, you might end up with a soggy crust or uneven filling. Trust me, no one wants that!
Step 2: Mix the Pumpkin Filling
In a mixing bowl, combine the pumpkin puree, sugar, cinnamon, nutmeg, ginger, and salt. Whisk them together until everything is well blended. Then, add the eggs and evaporated milk. Keep whisking until the mixture is smooth and creamy. This is where the magic happens! The right consistency is key, so make sure there are no lumps.
Step 3: Prepare the Mini Pie Crusts
Now, let’s get those mini pie crusts ready! Place them on a baking sheet, making sure they’re spaced out evenly. This allows hot air to circulate around them, ensuring they bake perfectly. If you’re using frozen crusts, let them thaw a bit before handling. They’re delicate, so be gentle!
Step 4: Fill the Crusts
It’s time to fill those crusts! Carefully pour the pumpkin filling into each mini pie crust. I like to use a measuring cup for this—it makes pouring easier and helps avoid spills. Fill them about three-quarters full to give the filling room to rise. You want to keep it neat and tidy!
Step 5: Bake the Mini Pies
Pop the baking sheet into your preheated oven and bake for 15-20 minutes. Keep an eye on them! You’ll know they’re done when the filling is set and a toothpick inserted in the center comes out clean. The aroma will fill your kitchen, making it hard to resist sneaking a taste!
Step 6: Cool and Serve
Once baked, remove the mini pies from the oven and let them cool on a wire rack. This cooling step is important; it helps the filling firm up a bit more. Serve them warm or at room temperature. For an extra touch, top with whipped cream or a sprinkle of cinnamon. Enjoy every bite of your delicious creation!
Tips for Success
- Use room temperature ingredients for a smoother filling.
- Don’t overfill the crusts; three-quarters full is perfect.
- Check for doneness by inserting a toothpick; it should come out clean.
- Let the pies cool completely for the best texture.
- Experiment with spices to find your perfect flavor balance!
Equipment Needed
- Mixing bowl: A large bowl for combining ingredients. A sturdy pot can work in a pinch.
- Whisk: Essential for mixing. A fork can also do the job if you’re in a hurry.
- Baking sheet: To hold your mini pies. A shallow dish can serve as an alternative.
- Measuring cups: For accurate ingredient portions. Use a regular cup if you don’t have measuring ones.
- Wire rack: For cooling. A plate can work if you don’t have one handy.
Variations of Bite-Sized Bliss: Mini Pumpkin Pies
- Chocolate Chip Mini Pumpkin Pies: Add a handful of chocolate chips to the filling for a sweet twist that chocolate lovers will adore.
- Maple Pumpkin Pies: Substitute sugar with maple syrup for a deeper, more complex sweetness that pairs beautifully with pumpkin.
- Gluten-Free Option: Use gluten-free mini pie crusts or make your own with almond flour for a delicious alternative.
- Dairy-Free Version: Replace evaporated milk with coconut milk or almond milk for a creamy, dairy-free filling.
- Spiced Pumpkin Pies: Experiment with additional spices like allspice or cloves for a more robust flavor profile.
Serving Suggestions for Bite-Sized Bliss: Mini Pumpkin Pies
- Whipped Cream: A dollop of whipped cream on top adds a delightful creaminess.
- Cinnamon Sugar Dusting: Sprinkle a little cinnamon sugar for an extra touch of sweetness.
- Hot Apple Cider: Pair with warm apple cider for a cozy fall experience.
- Festive Platter: Arrange on a decorative platter for a beautiful presentation at gatherings.
- Ice Cream: Serve with a scoop of vanilla ice cream for a decadent treat!
FAQs about Bite-Sized Bliss: Mini Pumpkin Pies
Can I make these mini pumpkin pies ahead of time?
Absolutely! These mini pumpkin pies can be made a day in advance. Just store them in the refrigerator after they cool. They’ll be just as delicious when you’re ready to serve!
What can I use instead of pumpkin puree?
If you can’t find pumpkin puree, you can use butternut squash puree as a great alternative. It has a similar texture and flavor that works beautifully in this recipe.
How do I know when the mini pies are done baking?
Check for doneness by inserting a toothpick into the center of a pie. If it comes out clean, your mini pumpkin pies are ready to be enjoyed!
Can I freeze the mini pumpkin pies?
What’s the best way to serve these mini pumpkin pies?
For a delightful presentation, serve them on a festive platter with a dollop of whipped cream on top. You can also sprinkle a little cinnamon sugar for an extra touch of sweetness!
Final Thoughts
Creating these Bite-Sized Bliss: Mini Pumpkin Pies for Your Fall Cravings! has been a delightful journey. Each mini pie is a little hug of warmth and flavor, perfect for sharing with family and friends. The joy of watching loved ones savor these treats is truly priceless. Plus, they’re so easy to whip up, making them a go-to recipe for busy days. Whether you’re hosting a gathering or simply indulging on a cozy evening, these mini pies will surely bring smiles and satisfaction. So, roll up your sleeves and enjoy the magic of fall in every bite!
Print
Bite-Sized Bliss: Discover Mini Pumpkin Pies Today!
- Total Time: 35 minutes
- Yield: 12 mini pies 1x
- Diet: Vegetarian
Description
Delicious mini pumpkin pies perfect for satisfying your fall cravings.
Ingredients
- 1 cup pumpkin puree
- 1/2 cup sugar
- 1/2 teaspoon cinnamon
- 1/4 teaspoon nutmeg
- 1/4 teaspoon ginger
- 1/4 teaspoon salt
- 2 large eggs
- 1/2 cup evaporated milk
- 1 package of mini pie crusts
Instructions
- Preheat the oven to 425°F (220°C).
- In a mixing bowl, combine pumpkin puree, sugar, cinnamon, nutmeg, ginger, and salt.
- Add eggs and evaporated milk to the mixture and whisk until smooth.
- Place the mini pie crusts on a baking sheet.
- Pour the pumpkin filling into each mini pie crust.
- Bake for 15-20 minutes or until the filling is set.
- Let cool before serving.
Notes
- These mini pies can be made ahead of time and stored in the refrigerator.
- Top with whipped cream for extra indulgence.
- Adjust spices according to your taste preference.
- Prep Time: 15 minutes
- Cook Time: 20 minutes
- Category: Dessert
- Method: Baking
- Cuisine: American
Nutrition
- Serving Size: 1 mini pie
- Calories: 150
- Sugar: 10g
- Sodium: 100mg
- Fat: 6g
- Saturated Fat: 2g
- Unsaturated Fat: 3g
- Trans Fat: 0g
- Carbohydrates: 20g
- Fiber: 1g
- Protein: 2g
- Cholesterol: 30mg