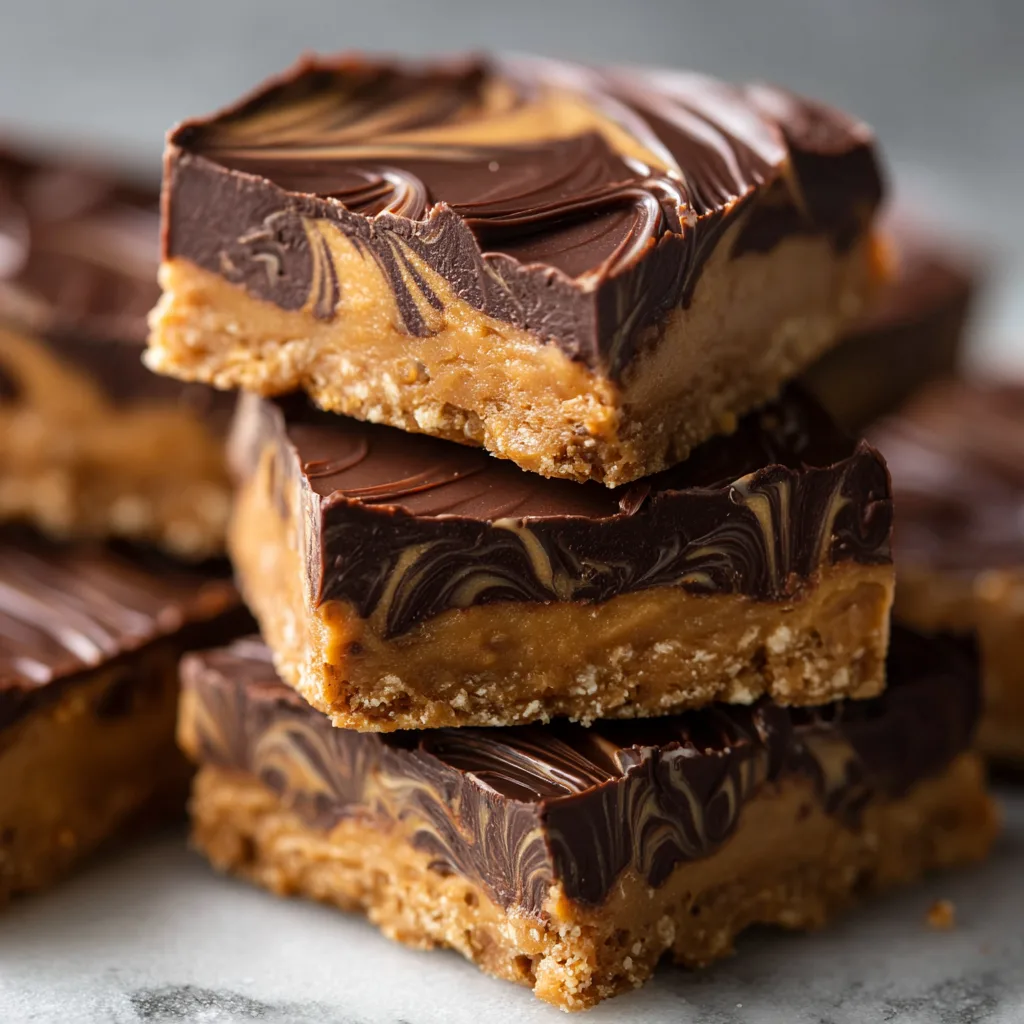
Introduction to Chocolate Peanut Butter No-Bake Bars
As a busy mom, I know how precious time can be, especially when it comes to whipping up something delicious. That’s why I absolutely adore these Chocolate Peanut Butter No-Bake Bars! They’re the perfect treat for those hectic days when you crave something sweet but don’t have the time to bake. With just a few simple ingredients, you can create a delightful dessert that will impress your family and friends. Plus, they’re a fantastic way to sneak in some wholesome oats and peanut butter. Trust me, these bars will become your go-to recipe!
Why You’ll Love This Chocolate Peanut Butter No-Bake Bars
These Chocolate Peanut Butter No-Bake Bars are a lifesaver for busy days! They come together in just 10 minutes, making them a quick solution for satisfying your sweet tooth. The rich chocolate and creamy peanut butter create a flavor explosion that’s hard to resist. Plus, they’re a healthier alternative to store-bought treats, packed with wholesome ingredients. You’ll love how easy they are to make and how delicious they taste!
Ingredients for Chocolate Peanut Butter No-Bake Bars
Gathering the right ingredients is the first step to creating these delightful Chocolate Peanut Butter No-Bake Bars. Here’s what you’ll need:
- Peanut Butter: This creamy goodness is the star of the show! It adds richness and a nutty flavor that pairs perfectly with chocolate.
- Honey: A natural sweetener that binds everything together while adding a touch of sweetness. You can substitute it with maple syrup for a vegan option.
- Rolled Oats: These provide a hearty texture and are a great source of fiber. They help keep you full and satisfied.
- Chocolate Chips: Who can resist chocolate? These little morsels melt beautifully and add a decadent touch to the bars.
- Cocoa Powder: This adds an extra layer of chocolate flavor, making the bars even more indulgent. Opt for unsweetened cocoa for a richer taste.
Feel free to get creative! You can add nuts for crunch or dried fruit for a chewy texture. If you’re looking for a nut-free option, sunflower seed butter works wonders too. For exact measurements, check the bottom of the article where you can find everything available for printing.
How to Make Chocolate Peanut Butter No-Bake Bars
Making these Chocolate Peanut Butter No-Bake Bars is a breeze! Follow these simple steps, and you’ll have a delicious treat ready in no time. Let’s dive in!
Step 1: Melt Peanut Butter and Honey
Start by grabbing a medium saucepan. Over low heat, combine the peanut butter and honey. Stir gently until the mixture is melted and smooth. This step is crucial because it creates a lovely, gooey base for your bars. Just be patient; it only takes a few minutes!
Step 2: Combine with Oats and Chocolate
Once your peanut butter and honey are melted, remove the saucepan from heat. Now, it’s time to add the rolled oats, chocolate chips, and cocoa powder. Stir everything together until well combined. The chocolate chips will start to melt, creating a rich, chocolatey mixture. It’s like a warm hug for your taste buds!
Step 3: Press into Baking Dish
Next, take an 8×8 inch baking dish and line it with parchment paper. This makes it easier to remove the bars later. Pour the mixture into the dish and press it down firmly with a spatula or your hands. Make sure it’s evenly spread out. This step is key to getting those perfect bars!
Step 4: Refrigerate to Set
Now, it’s time for a little patience. Place the baking dish in the refrigerator and let it chill for at least one hour. This allows the bars to set properly. While you wait, you can daydream about how delicious they’ll be!
Step 5: Cut and Serve
Once the hour is up, take the dish out of the fridge. Carefully lift the bars out using the parchment paper. Cut them into squares or rectangles, whatever you prefer! Now, it’s time to enjoy your homemade Chocolate Peanut Butter No-Bake Bars. They’re perfect for a quick snack or a sweet treat after dinner!
Tips for Success
- Use natural peanut butter for a creamier texture and better flavor.
- Let the mixture cool slightly before adding chocolate chips to prevent them from melting too much.
- Press the mixture firmly into the baking dish for well-formed bars.
- Experiment with different add-ins like chia seeds or coconut flakes for extra flavor.
- Store leftovers in an airtight container to keep them fresh and delicious!
Equipment Needed
- Medium saucepan: A non-stick option works best for easy melting.
- Spatula: Use a silicone spatula for easy mixing and scraping.
- Baking dish: An 8×8 inch dish is ideal, but any similar size will do.
- Parchment paper: This helps with easy removal; aluminum foil can be a substitute.
Variations of Chocolate Peanut Butter No-Bake Bars
- Nutty Delight: Add chopped almonds or walnuts for a crunchy texture that complements the creamy peanut butter.
- Fruit Fusion: Toss in dried cranberries or raisins for a sweet and chewy surprise in every bite.
- Chocolate Mint: Mix in a few drops of peppermint extract for a refreshing twist that’s perfect for the holidays.
- Protein Boost: Stir in a scoop of your favorite protein powder to make these bars a post-workout snack.
- Vegan Option: Substitute honey with agave syrup or maple syrup to keep it plant-based and just as delicious.
Serving Suggestions for Chocolate Peanut Butter No-Bake Bars
- Pair these bars with a glass of cold almond milk for a delightful treat.
- Serve alongside fresh fruit like strawberries or bananas for a refreshing contrast.
- For a fun presentation, drizzle melted chocolate on top before serving.
- Enjoy them as a quick breakfast option with a cup of coffee.
- Pack them in lunchboxes for a sweet surprise that kids will love!
FAQs about Chocolate Peanut Butter No-Bake Bars
As I’ve shared my love for these Chocolate Peanut Butter No-Bake Bars, I often get questions from fellow home cooks. Here are some of the most common queries I’ve encountered:
Can I use crunchy peanut butter instead of creamy?
Absolutely! Crunchy peanut butter adds a delightful texture to the bars. Just keep in mind that it may change the overall consistency slightly, but it will still be delicious!
How long do these bars last in the fridge?
These bars can last up to a week in the refrigerator when stored in an airtight container. If you want to keep them longer, consider freezing them for up to three months!
Can I make these bars gluten-free?
Yes! Just make sure to use certified gluten-free rolled oats. This way, you can enjoy these tasty treats without any worries.
What can I substitute for honey?
If you’re looking for a vegan option, maple syrup or agave syrup works wonderfully as a substitute for honey. Both will keep the bars sweet and sticky!
Can I add protein powder to these bars?
Definitely! Adding a scoop of your favorite protein powder is a great way to boost the nutritional value. Just mix it in when you combine the oats and chocolate.
Final Thoughts
Creating these Chocolate Peanut Butter No-Bake Bars is more than just a cooking experience; it’s a delightful journey filled with joy and satisfaction. Each bite is a reminder that simple ingredients can come together to create something truly special. Whether you’re enjoying them as a quick snack or sharing them with loved ones, these bars bring smiles all around. Plus, knowing they’re made with wholesome ingredients makes them even sweeter. So, roll up your sleeves, gather your ingredients, and let the magic happen in your kitchen. You won’t regret it!

Chocolate Peanut Butter No-Bake Bars: Delight in Every Bite!
- Total Time: 1 hour 10 minutes
- Yield: 16 bars 1x
- Diet: Vegetarian
Description
Delicious and easy-to-make no-bake bars combining chocolate and peanut butter for a perfect treat.
Ingredients
- 1 cup peanut butter
- 1/2 cup honey
- 2 cups rolled oats
- 1/2 cup chocolate chips
- 1/4 cup cocoa powder
Instructions
- In a medium saucepan, combine peanut butter and honey over low heat until melted and smooth.
- Remove from heat and stir in rolled oats, chocolate chips, and cocoa powder until well combined.
- Press the mixture into a lined 8×8 inch baking dish.
- Refrigerate for at least 1 hour to set.
- Cut into bars and enjoy!
Notes
- Store in an airtight container in the refrigerator.
- Feel free to add nuts or dried fruit for extra texture.
- These bars can be frozen for longer storage.
- Prep Time: 10 minutes
- Cook Time: 0 minutes
- Category: Dessert
- Method: No-Bake
- Cuisine: American
Nutrition
- Serving Size: 1 bar
- Calories: 150
- Sugar: 8g
- Sodium: 50mg
- Fat: 8g
- Saturated Fat: 2g
- Unsaturated Fat: 6g
- Trans Fat: 0g
- Carbohydrates: 18g
- Fiber: 2g
- Protein: 4g
- Cholesterol: 0mg