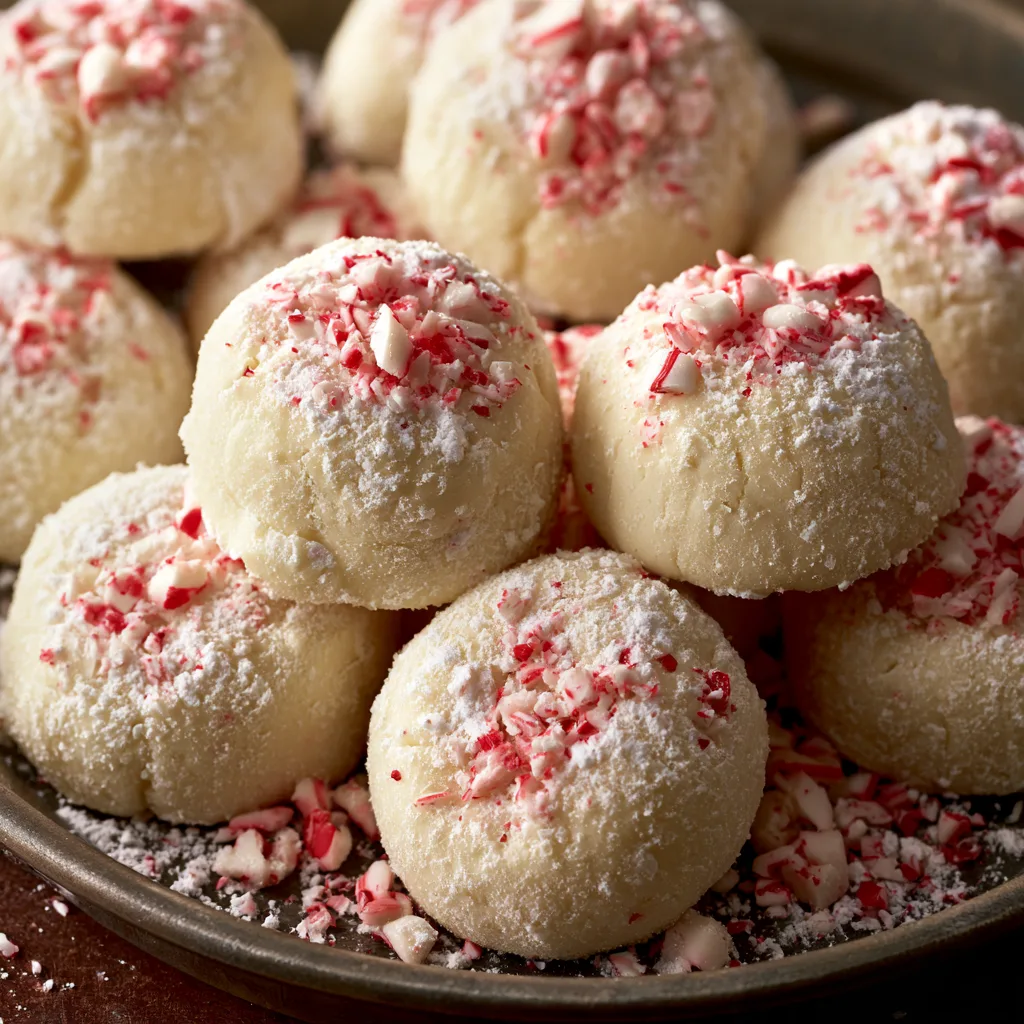
Introduction to Irresistible Peppermint Meltaways: A Festive Treat for Your Sweet Tooth!
As the holiday season approaches, I find myself craving something sweet and festive. That’s where my Irresistible Peppermint Meltaways come in! These delightful treats are not just a quick solution for a busy day; they’re a way to bring joy to your loved ones. With their creamy texture and refreshing peppermint flavor, they melt in your mouth, making them perfect for satisfying your sweet tooth. Whether you’re hosting a gathering or simply indulging after a long day, these cookies are sure to impress and spread holiday cheer!
Why You’ll Love This Irresistible Peppermint Meltaways
These Irresistible Peppermint Meltaways are a dream come true for busy moms and professionals alike. They come together in just 32 minutes, making them a quick and easy treat for any occasion. The melt-in-your-mouth texture paired with the refreshing peppermint flavor is simply divine. Plus, they’re perfect for sharing, so you can spread the joy of the season without spending hours in the kitchen!
Ingredients for Irresistible Peppermint Meltaways
Gathering the right ingredients is the first step to creating these delightful Irresistible Peppermint Meltaways. Here’s what you’ll need:
- Unsalted butter: This is the base of our cookies, providing a rich, creamy texture. Make sure it’s softened for easy mixing.
- Powdered sugar: This sweetener gives the cookies their melt-in-your-mouth quality. It blends smoothly with the butter.
- Peppermint extract: The star of the show! This adds that refreshing minty flavor that makes these cookies festive.
- All-purpose flour: This is the backbone of the dough, giving structure to our meltaways. It helps them hold their shape while baking.
- Salt: Just a pinch enhances the sweetness and balances the flavors beautifully.
- Semi-sweet chocolate chips: These are for dipping! They add a luscious chocolatey coating that complements the peppermint perfectly.
- Vegetable oil: This helps the chocolate melt smoothly, ensuring a glossy finish when you dip the cookies.
If you want to amp up the peppermint flavor, feel free to increase the peppermint extract to suit your taste. You can also decorate your meltaways with crushed candy canes for an extra festive touch!
For exact measurements, check the bottom of the article where you can find everything you need for printing.
How to Make Irresistible Peppermint Meltaways
Making these Irresistible Peppermint Meltaways is a delightful journey that fills your kitchen with the sweet scent of the holidays. Follow these simple steps, and you’ll have a batch of cookies that will make your sweet tooth sing!
Step 1: Preheat the Oven
First things first, preheat your oven to 350°F (175°C). Preheating is crucial because it ensures even baking. If the oven isn’t hot enough, your cookies might spread too much or not bake properly. Trust me, a well-preheated oven is your best friend in baking!
Step 2: Cream the Butter and Sugar
In a large bowl, cream together the softened butter and powdered sugar until it’s light and fluffy. This step is vital for achieving that melt-in-your-mouth texture. The air you incorporate while mixing will help the cookies rise and create a tender crumb. Don’t rush this; take your time to get it just right!
Step 3: Add Peppermint Extract
Next, add the peppermint extract to the mixture. This is where the magic happens! The extract infuses the dough with that refreshing minty flavor we all love. If you’re a peppermint fan, feel free to add a bit more for an extra kick!
Step 4: Combine Dry Ingredients
Now, it’s time to combine the dry ingredients. Gradually add the all-purpose flour and salt to the butter mixture. Mix until just combined. Overmixing can lead to tough cookies, and we want them to be soft and tender. So, mix gently and stop as soon as you don’t see any dry flour!
Step 5: Shape the Dough
Once your dough is ready, it’s time to shape it into small balls. Aim for about one inch in diameter. This size helps them bake evenly. Place them on a baking sheet lined with parchment paper, giving them some space to spread. Trust me, they’ll puff up beautifully!
Step 6: Bake the Cookies
Pop the baking sheet into your preheated oven and bake for 10-12 minutes. Keep an eye on them! You want the edges to be lightly golden while the centers remain soft. If you see a little golden edge, it’s time to take them out!
Step 7: Cool the Cookies
After baking, let the cookies cool completely on a wire rack. This step is essential before dipping them in chocolate. If they’re warm, the chocolate will melt too quickly, and you won’t get that perfect coating!
Step 8: Melt the Chocolate
In a microwave-safe bowl, melt the semi-sweet chocolate chips and vegetable oil together until smooth. Heat in short bursts, stirring in between to avoid burning. A smooth chocolate is key for a beautiful dip!
Step 9: Dip the Cookies
Now comes the fun part! Dip each cooled cookie into the melted chocolate, allowing the excess to drip off. You want a nice, even coating. If you like, you can sprinkle crushed candy canes on top for an extra festive touch!
Step 10: Let the Chocolate Set
Finally, place the chocolate-dipped cookies back on the parchment paper and let them set until the chocolate hardens. You can speed this up by placing them in the fridge for a few minutes. Once set, they’re ready to be enjoyed!
Tips for Success
- Make sure your butter is at room temperature for easy creaming.
- Don’t skip the cooling step; it’s crucial for a perfect chocolate dip.
- Use a cookie scoop for uniform cookie sizes.
- Experiment with different chocolate types for unique flavors.
- Store cookies in an airtight container to keep them fresh longer.
Equipment Needed
- Baking sheet: A standard baking sheet works well, but you can use a stoneware pan for even heat distribution.
- Parchment paper: This helps prevent sticking; aluminum foil can be a substitute.
- Mixing bowls: Use any size, but a large bowl is best for creaming.
- Wire rack: Essential for cooling; a plate can work in a pinch.
- Microwave-safe bowl: For melting chocolate; a small saucepan can also do the trick.
Variations of Irresistible Peppermint Meltaways
- Dark Chocolate Dip: Swap semi-sweet chocolate for dark chocolate for a richer flavor that pairs beautifully with peppermint.
- Gluten-Free Option: Use a gluten-free all-purpose flour blend to make these meltaways suitable for those with gluten sensitivities.
- Mint Chocolate Chip: Add mini chocolate chips to the dough for an extra chocolatey surprise in every bite.
- White Chocolate Drizzle: Instead of dipping, drizzle melted white chocolate over the cookies for a beautiful presentation.
- Nutty Twist: Incorporate finely chopped nuts, like walnuts or pecans, into the dough for added texture and flavor.
Serving Suggestions for Irresistible Peppermint Meltaways
- Pair these meltaways with a warm cup of hot cocoa for a cozy treat.
- Serve alongside a scoop of vanilla ice cream for a delightful dessert experience.
- Present them on a festive platter, garnished with crushed candy canes for a pop of color.
- Include them in holiday gift boxes for a sweet surprise.
FAQs about Irresistible Peppermint Meltaways
Can I make these meltaways ahead of time?
Absolutely! These Irresistible Peppermint Meltaways can be made a few days in advance. Just store them in an airtight container at room temperature. They’ll stay fresh and delicious, ready to impress your guests!
What can I use instead of peppermint extract?
If you’re not a fan of peppermint, you can substitute it with vanilla extract or almond extract. Each will give a unique twist to your cookies while still keeping them delightful!
How do I store leftover cookies?
To keep your cookies fresh, store them in an airtight container at room temperature. They should last about a week. If you want to keep them longer, consider freezing them!
Can I use a different type of chocolate for dipping?
Definitely! Feel free to experiment with dark chocolate, white chocolate, or even milk chocolate. Each type will bring its own flavor profile to your Irresistible Peppermint Meltaways.
What’s the best way to decorate these cookies?
For a festive touch, sprinkle crushed candy canes on top of the chocolate before it sets. You can also drizzle melted chocolate over the cookies for an elegant finish!
Final Thoughts
Creating these Irresistible Peppermint Meltaways is more than just baking; it’s about sharing joy and warmth during the holiday season. Each bite transports you to a cozy winter wonderland, where the refreshing peppermint dances with rich chocolate. Whether you’re enjoying them with family or gifting them to friends, these cookies are sure to bring smiles. I love how simple ingredients can create such delightful memories. So, roll up your sleeves, embrace the holiday spirit, and let these meltaways become a cherished tradition in your home. Happy baking!
Print
Irresistible Peppermint Meltaways that Satisfy Your Sweet Tooth!
- Total Time: 32 minutes
- Yield: 24 cookies 1x
- Diet: Vegetarian
Description
Irresistible Peppermint Meltaways are a delightful festive treat that combines the refreshing flavor of peppermint with a creamy, melt-in-your-mouth texture, perfect for satisfying your sweet tooth during the holiday season.
Ingredients
- 1 cup unsalted butter, softened
- 2 cups powdered sugar
- 1/2 teaspoon peppermint extract
- 2 cups all-purpose flour
- 1/4 teaspoon salt
- 1 cup semi-sweet chocolate chips
- 1 tablespoon vegetable oil
Instructions
- Preheat your oven to 350°F (175°C).
- In a large bowl, cream together the softened butter and powdered sugar until light and fluffy.
- Add the peppermint extract and mix well.
- Gradually add the flour and salt, mixing until just combined.
- Shape the dough into small balls and place them on a baking sheet lined with parchment paper.
- Bake for 10-12 minutes or until the edges are lightly golden.
- Let the cookies cool completely on a wire rack.
- In a microwave-safe bowl, melt the chocolate chips and vegetable oil together until smooth.
- Dip the cooled cookies into the melted chocolate, allowing excess to drip off.
- Place the chocolate-dipped cookies back on the parchment paper and let them set until the chocolate hardens.
Notes
- For a stronger peppermint flavor, increase the peppermint extract to 1 teaspoon.
- Store the meltaways in an airtight container at room temperature for up to a week.
- These cookies can be decorated with crushed candy canes for an extra festive touch.
- Prep Time: 20 minutes
- Cook Time: 12 minutes
- Category: Dessert
- Method: Baking
- Cuisine: American
Nutrition
- Serving Size: 1 cookie
- Calories: 120
- Sugar: 10g
- Sodium: 50mg
- Fat: 7g
- Saturated Fat: 4g
- Unsaturated Fat: 2g
- Trans Fat: 0g
- Carbohydrates: 15g
- Fiber: 0g
- Protein: 1g
- Cholesterol: 20mg