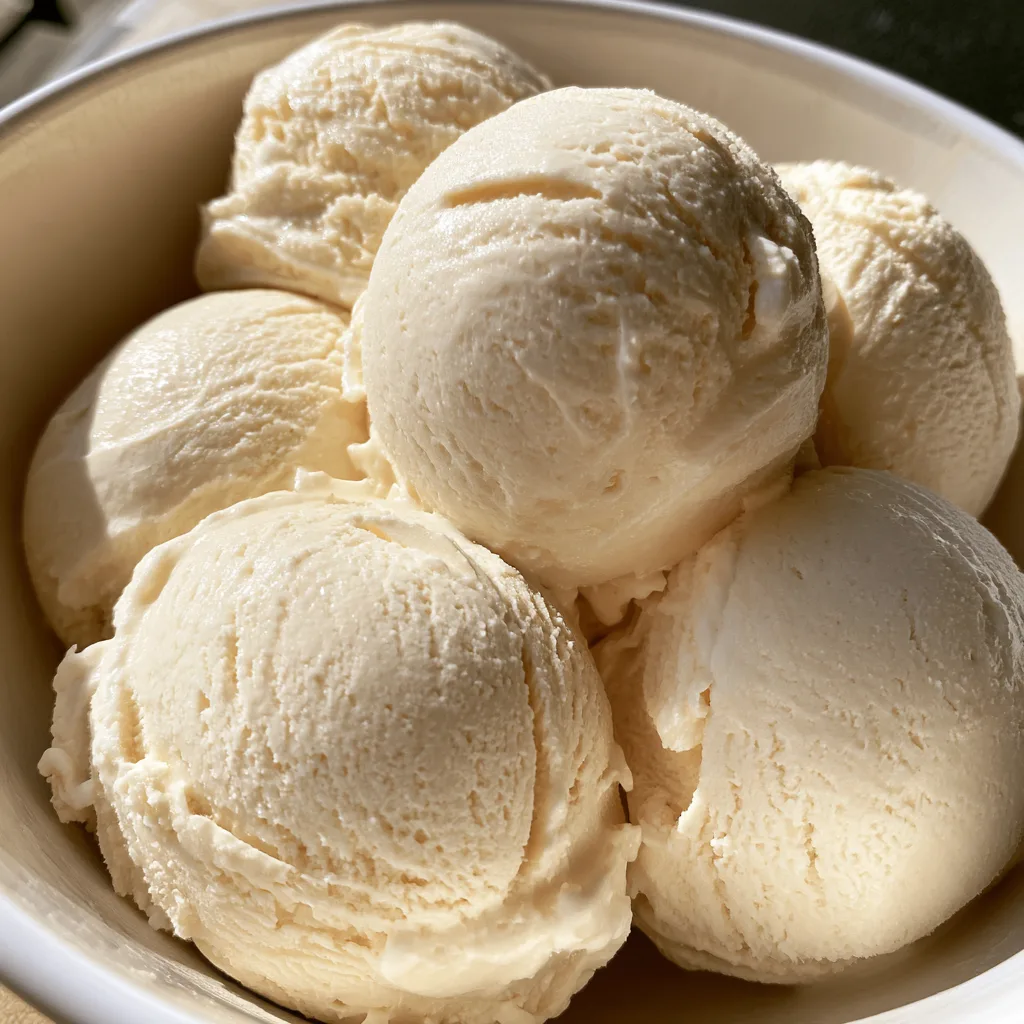
Introduction to Ninja Creami High-Protein Vanilla Ice Cream
As a busy mom, I know how challenging it can be to find time for a sweet treat that doesn’t derail my healthy eating goals. That’s why I’m excited to share my Ninja Creami High-Protein Vanilla Ice Cream recipe with you! This delightful dessert is not only delicious but also packed with protein, making it a guilt-free indulgence. Whether you’re looking for a quick solution after a long day or a way to impress your loved ones, this ice cream is sure to satisfy your sweet tooth while keeping your nutrition on track.
Why You’ll Love This Ninja Creami High-Protein Vanilla Ice Cream
This Ninja Creami High-Protein Vanilla Ice Cream is a game-changer for busy lifestyles. It’s incredibly easy to whip up, taking just 10 minutes of your time. Plus, it’s a healthier alternative to store-bought ice creams, allowing you to indulge without the guilt. The creamy texture and rich vanilla flavor will have your family begging for seconds. Trust me, this is one dessert you’ll want to keep on repeat!
Ingredients for Ninja Creami High-Protein Vanilla Ice Cream
Gathering the right ingredients is key to making this delightful Ninja Creami High-Protein Vanilla Ice Cream. Here’s what you’ll need:
- Unsweetened almond milk: A low-calorie base that adds creaminess without the dairy. You can substitute with coconut milk for a richer flavor.
- Vanilla protein powder: This is the star of the show, providing that high-protein boost. Choose your favorite brand, or try a plant-based option if you prefer.
- Greek yogurt: Adds creaminess and tang, plus a protein punch. For a richer texture, opt for full-fat Greek yogurt.
- Honey or maple syrup: Natural sweeteners that enhance the flavor. Adjust the amount based on your sweetness preference.
- Vanilla extract: A must-have for that classic vanilla flavor. Pure extract is best, but imitation works in a pinch.
- Pinch of salt: This little addition balances the sweetness and enhances the overall flavor.
For those who love to experiment, feel free to add cocoa powder for a chocolate twist or fruit puree for a fruity flair. The exact quantities of these ingredients are available at the bottom of the article for easy printing!
How to Make Ninja Creami High-Protein Vanilla Ice Cream
Making your own Ninja Creami High-Protein Vanilla Ice Cream is a breeze! Follow these simple steps, and you’ll be enjoying a creamy, protein-packed treat in no time. Let’s dive in!
Step 1: Combine Ingredients
Start by gathering all your ingredients. In a mixing bowl, combine the unsweetened almond milk, vanilla protein powder, Greek yogurt, honey or maple syrup, vanilla extract, and a pinch of salt. This is where the magic begins! Make sure to use a bowl that’s large enough to hold everything comfortably.
Step 2: Whisk Until Smooth
Now, grab a whisk and mix everything together. You want to whisk until the mixture is smooth and well combined. This step is crucial because it ensures that the protein powder dissolves completely, giving you a creamy texture. If you notice any lumps, keep whisking until they disappear!
Step 3: Freeze the Mixture
Once your mixture is smooth, pour it into the Ninja Creami container. Make sure to seal it tightly. Now, it’s time for the waiting game! Place the container in the freezer for at least 24 hours. This step is essential for achieving that perfect ice cream consistency. Patience is key here!
Step 4: Process in the Ninja Creami
After your mixture has frozen solid, it’s time to bring out the Ninja Creami! Follow the manufacturer’s instructions to process the frozen mixture. This is where the magic happens, transforming your frozen block into creamy ice cream. You’ll love watching it come to life!
Step 5: Serve and Enjoy
Finally, scoop out your delicious Ninja Creami High-Protein Vanilla Ice Cream into bowls or cones. You can serve it immediately for a soft-serve experience or store it in the freezer for later. Don’t forget to add your favorite toppings, like fresh fruit or a drizzle of chocolate sauce. Enjoy every creamy bite!
Tips for Success
- Make sure all ingredients are at room temperature for easier mixing.
- Use a whisk or electric mixer to ensure a smooth consistency.
- For a creamier texture, consider using full-fat Greek yogurt.
- Don’t rush the freezing process; 24 hours is key for the best results.
- Experiment with flavors by adding spices like cinnamon or nutmeg!
Equipment Needed
- Ninja Creami: The star of the show! If you don’t have one, a traditional ice cream maker can work too.
- Mixing bowl: A large bowl for combining ingredients. Any size will do, just ensure it’s sturdy.
- Whisk: Essential for mixing. A fork can work in a pinch!
- Freezer-safe container: To store your mixture before processing. A glass or plastic container will suffice.
Variations of Ninja Creami High-Protein Vanilla Ice Cream
- Chocolate Delight: Add 1/4 cup of cocoa powder to the mixture for a rich chocolate flavor that still packs a protein punch.
- Berry Bliss: Stir in 1/2 cup of your favorite fruit puree, like strawberries or blueberries, for a fruity twist that’s bursting with flavor.
- Nutty Banana: Mash one ripe banana and mix it in for a creamy, banana-flavored ice cream that’s naturally sweet.
- Mint Chocolate Chip: Add a few drops of peppermint extract and fold in dark chocolate chips for a refreshing minty treat.
- Spiced Pumpkin: In the fall, mix in 1/2 cup of pumpkin puree and a teaspoon of pumpkin pie spice for a seasonal favorite.
Serving Suggestions for Ninja Creami High-Protein Vanilla Ice Cream
- Top with fresh berries for a burst of color and flavor.
- Drizzle with honey or chocolate sauce for added sweetness.
- Serve alongside a slice of warm pie for a delightful contrast.
- Pair with a refreshing iced coffee for a perfect afternoon treat.
- Garnish with crushed nuts or granola for a satisfying crunch.
FAQs about Ninja Creami High-Protein Vanilla Ice Cream
Can I use a different type of milk?
Absolutely! While unsweetened almond milk is my go-to, you can use coconut milk or oat milk for a different flavor. Just keep in mind that the nutritional values may change slightly.
How long does the ice cream last in the freezer?
Your Ninja Creami High-Protein Vanilla Ice Cream can last up to two weeks in the freezer. Just make sure it’s stored in an airtight container to maintain its creamy texture.
Can I make this recipe dairy-free?
Yes! This recipe is already dairy-free thanks to the almond milk and Greek yogurt. Just ensure you choose a dairy-free protein powder to keep it completely dairy-free.
What if I don’t have a Ninja Creami?
No worries! You can use a traditional ice cream maker instead. Just follow the manufacturer’s instructions for churning the mixture after freezing it.
Can I add mix-ins like chocolate chips or nuts?
Definitely! Feel free to fold in your favorite mix-ins after processing the ice cream in the Ninja Creami. Just be cautious not to overload it, as it may affect the texture.
Final Thoughts
Creating your own Ninja Creami High-Protein Vanilla Ice Cream is more than just a recipe; it’s a delightful experience that brings joy to your kitchen. Each scoop is a reminder that healthy eating doesn’t have to be boring or bland. With its creamy texture and rich flavor, this ice cream is perfect for satisfying cravings without the guilt. Plus, it’s a fantastic way to bond with family over a homemade treat. So, grab your Ninja Creami and let the fun begin! You’ll be amazed at how easy it is to whip up this delicious dessert that everyone will love.
Print
Ninja Creami High-Protein Vanilla Ice Cream: Taste the Difference!
- Total Time: 24 hours 10 minutes
- Yield: 4 servings 1x
- Diet: High Protein
Description
A delicious and healthy high-protein vanilla ice cream made using the Ninja Creami, perfect for satisfying your sweet tooth while maintaining a nutritious diet.
Ingredients
- 2 cups unsweetened almond milk
- 1 cup vanilla protein powder
- 1/2 cup Greek yogurt
- 1/4 cup honey or maple syrup
- 1 tablespoon vanilla extract
- Pinch of salt
Instructions
- In a mixing bowl, combine almond milk, protein powder, Greek yogurt, honey or maple syrup, vanilla extract, and salt.
- Whisk the mixture until smooth and well combined.
- Pour the mixture into the Ninja Creami container and freeze for at least 24 hours.
- Once frozen, process the mixture in the Ninja Creami according to the manufacturer’s instructions.
- Serve immediately or store in the freezer for later enjoyment.
Notes
- For a creamier texture, use full-fat Greek yogurt.
- Adjust sweetness according to your preference.
- Experiment with different flavors by adding cocoa powder or fruit puree.
- Prep Time: 10 minutes
- Cook Time: N/A
- Category: Dessert
- Method: Ice Cream Maker
- Cuisine: American
Nutrition
- Serving Size: 1/2 cup
- Calories: 150
- Sugar: 5g
- Sodium: 100mg
- Fat: 3g
- Saturated Fat: 0.5g
- Unsaturated Fat: 2.5g
- Trans Fat: 0g
- Carbohydrates: 15g
- Fiber: 1g
- Protein: 15g
- Cholesterol: 5mg