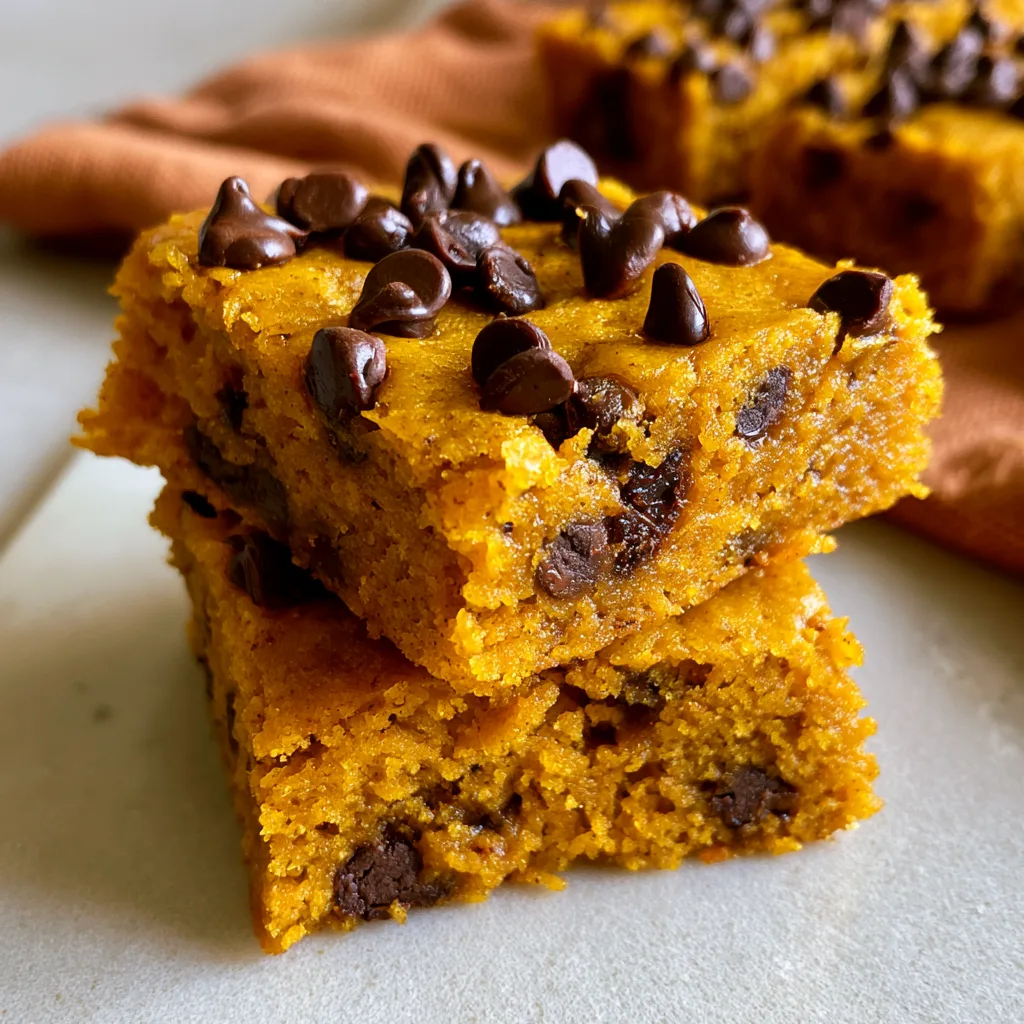
Introduction to Pumpkin Chocolate Chip Bars
As the leaves turn and the air gets crisp, I find myself craving the warm, cozy flavors of fall. That’s where these delightful Pumpkin Chocolate Chip Bars come in! They’re not just any dessert; they’re a quick solution for busy days when you want to impress your loved ones without spending hours in the kitchen. With their moist texture and rich chocolatey goodness, these pumpkin blondies are perfect for any occasion. Whether it’s a family gathering or a simple treat for yourself, these bars will surely bring smiles and warmth to your home.
Why You’ll Love This Pumpkin Chocolate Chip Bars
These Pumpkin Chocolate Chip Bars are a dream come true for busy moms and professionals alike. They come together in just 45 minutes, making them a perfect last-minute dessert. The combination of pumpkin and chocolate creates a flavor explosion that’s hard to resist. Plus, they’re incredibly versatile—great for lunchboxes, cozy gatherings, or a sweet treat after dinner. Trust me, once you try them, you’ll be hooked!
Ingredients for Pumpkin Chocolate Chip Bars
Gathering the right ingredients is the first step to creating these delicious Pumpkin Chocolate Chip Bars. Here’s what you’ll need:
- Pumpkin puree: This is the star of the show! It adds moisture and that lovely fall flavor.
- Brown sugar: For a hint of caramel sweetness that complements the pumpkin perfectly.
- Granulated sugar: Balances the flavors and helps achieve that delightful texture.
- Melted butter: Adds richness and helps bind everything together.
- Eggs: These are essential for structure and moisture, giving the bars a soft, chewy texture.
- Vanilla extract: A splash of vanilla enhances the overall flavor, making it even more irresistible.
- All-purpose flour: This is the base of the bars, providing the necessary structure.
- Baking powder and baking soda: These leavening agents help the bars rise and become fluffy.
- Ground cinnamon: A warm spice that brings out the cozy flavors of fall.
- Ground nutmeg: Just a pinch adds depth and a hint of warmth.
- Salt: Enhances all the flavors and balances the sweetness.
- Chocolate chips: The sweet, melty goodness that makes these bars truly decadent.
Feel free to get creative! You can add chopped nuts for crunch or even swap in whole wheat flour for a healthier twist. If you’re looking for a dairy-free option, try using coconut oil instead of butter. For exact measurements, check the bottom of the article where you can find everything you need for printing.
How to Make Pumpkin Chocolate Chip Bars
Step 1: Preheat and Prepare
First things first, preheat your oven to 350°F (175°C). While it warms up, grab a 9×13 inch baking pan and grease it well. This will ensure your Pumpkin Chocolate Chip Bars come out easily and don’t stick. Trust me, no one wants a bar that’s stuck to the pan!
Step 2: Mix Wet Ingredients
In a large mixing bowl, combine the pumpkin puree, brown sugar, granulated sugar, and melted butter. Stir them together until everything is well blended. The mixture should be smooth and creamy, like a cozy fall day in a bowl. This is where the magic begins!
Step 3: Add Eggs and Vanilla
Next, crack in the eggs and pour in the vanilla extract. Mix everything together until it’s smooth and well combined. The eggs will add richness, while the vanilla will elevate the flavor. It’s like a warm hug for your taste buds!
Step 4: Combine Dry Ingredients
In a separate bowl, whisk together the all-purpose flour, baking powder, baking soda, ground cinnamon, ground nutmeg, and salt. This step is crucial! It ensures that your dry ingredients are evenly distributed, which helps the bars rise beautifully. Plus, the spices will fill your kitchen with a heavenly aroma.
Step 5: Mix Wet and Dry Ingredients
Now, it’s time to combine the wet and dry mixtures. Gradually add the dry ingredients to the pumpkin mixture, stirring gently until just combined. Be careful not to overmix! You want your bars to be tender and soft, not tough. Think of it as a gentle dance between the two mixtures.
Step 6: Fold in Chocolate Chips
Once your batter is ready, fold in the chocolate chips. This is where the fun happens! The chocolate will melt slightly during baking, creating pockets of gooey goodness. Make sure they’re evenly distributed throughout the batter for that perfect chocolatey bite.
Step 7: Bake the Bars
Pour the batter into your prepared baking pan and spread it evenly. Pop it into the preheated oven and bake for 25-30 minutes. You’ll know they’re done when a toothpick inserted in the center comes out clean. The smell will be irresistible, so be prepared for some eager taste testers!
Step 8: Cool and Serve
Once baked, remove the pan from the oven and let it cool for a bit. After about 10-15 minutes, cut the bars into squares. Serve them warm or at room temperature. These Pumpkin Chocolate Chip Bars are perfect for sharing, but I won’t judge if you keep them all to yourself!
Tips for Success
- Use fresh pumpkin puree for the best flavor; canned works too, but fresh is unbeatable!
- Don’t overmix the batter; it should be just combined for soft, tender bars.
- Let the bars cool completely before cutting for cleaner edges.
- Experiment with spices; a dash of ginger or cloves can add a delightful twist.
- Store leftovers in an airtight container to keep them moist and delicious.
Equipment Needed
- 9×13 inch baking pan: A standard size for these bars; you can use a glass or metal pan.
- Mixing bowls: A large bowl for wet ingredients and a medium bowl for dry ingredients.
- Whisk: Perfect for combining dry ingredients; a fork works in a pinch!
- Spatula: Great for folding in chocolate chips and spreading the batter.
- Measuring cups and spoons: Essential for accurate ingredient measurements.
Variations
- Nutty Delight: Add 1/2 cup of chopped walnuts or pecans for a crunchy texture that complements the soft bars.
- Spiced Up: Incorporate a teaspoon of ground ginger or cloves for an extra kick of warmth and flavor.
- Dairy-Free Option: Substitute melted butter with coconut oil or a dairy-free margarine for a deliciously rich taste.
- Gluten-Free Version: Use a gluten-free all-purpose flour blend to make these bars suitable for gluten-sensitive friends.
- Chocolate Lovers: Swap in dark chocolate chips or even white chocolate chips for a different flavor profile.
Serving Suggestions
- Pair these Pumpkin Chocolate Chip Bars with a scoop of vanilla ice cream for a delightful dessert.
- Serve with a warm cup of spiced chai or coffee to enhance the cozy flavors.
- For a festive touch, dust with powdered sugar before serving.
- Cut into fun shapes for a playful presentation at gatherings.
FAQs about Pumpkin Chocolate Chip Bars
Can I use fresh pumpkin instead of canned?
Absolutely! Fresh pumpkin puree can elevate the flavor of your Pumpkin Chocolate Chip Bars. Just make sure to cook and puree the pumpkin until smooth before using it in the recipe.
How do I store leftover Pumpkin Chocolate Chip Bars?
Store your bars in an airtight container at room temperature for up to three days. If you want to keep them longer, they can be frozen for up to three months. Just make sure to wrap them well!
Can I make these bars gluten-free?
Yes! Simply swap out the all-purpose flour for a gluten-free flour blend. This way, everyone can enjoy these delicious Pumpkin Chocolate Chip Bars without worry.
What can I add to enhance the flavor?
Feel free to experiment! Adding nuts, extra spices like ginger or cloves, or even a swirl of cream cheese can take your bars to the next level. The possibilities are endless!
How do I know when the bars are done baking?
Check for doneness by inserting a toothpick into the center of the bars. If it comes out clean or with a few moist crumbs, they’re ready to be taken out of the oven. Enjoy the heavenly aroma!
Final Thoughts
Making these Pumpkin Chocolate Chip Bars is more than just baking; it’s about creating moments of joy and warmth in your home. The delightful aroma wafting through your kitchen will bring everyone running, eager to taste the deliciousness. Each bite is a perfect blend of pumpkin and chocolate, making it a treat for all ages. Whether you’re sharing them with family or enjoying a quiet moment with a cup of tea, these bars are sure to become a cherished recipe in your collection. So, roll up your sleeves and let the baking adventure begin!
Print
Pumpkin Chocolate Chip Bars: Discover Irresistible Flavor!
- Total Time: 45 minutes
- Yield: 12-16 bars 1x
- Diet: Vegetarian
Description
Deliciously moist and flavorful pumpkin chocolate chip bars, also known as pumpkin blondies, perfect for fall or any time of the year.
Ingredients
- 1 cup pumpkin puree
- 1/2 cup brown sugar
- 1/2 cup granulated sugar
- 1/2 cup melted butter
- 2 large eggs
- 1 teaspoon vanilla extract
- 1 1/2 cups all-purpose flour
- 1 teaspoon baking powder
- 1 teaspoon baking soda
- 1 teaspoon ground cinnamon
- 1/2 teaspoon ground nutmeg
- 1/2 teaspoon salt
- 1 cup chocolate chips
Instructions
- Preheat your oven to 350°F (175°C) and grease a 9×13 inch baking pan.
- In a large bowl, mix together the pumpkin puree, brown sugar, granulated sugar, and melted butter until well combined.
- Add the eggs and vanilla extract, and mix until smooth.
- In another bowl, whisk together the flour, baking powder, baking soda, cinnamon, nutmeg, and salt.
- Gradually add the dry ingredients to the wet ingredients, mixing until just combined.
- Fold in the chocolate chips.
- Pour the batter into the prepared baking pan and spread evenly.
- Bake for 25-30 minutes, or until a toothpick inserted in the center comes out clean.
- Allow to cool before cutting into bars and serving.
Notes
- Store leftovers in an airtight container at room temperature for up to 3 days.
- For a richer flavor, add chopped nuts or additional spices.
- These bars can be frozen for up to 3 months.
- Prep Time: 15 minutes
- Cook Time: 30 minutes
- Category: Dessert
- Method: Baking
- Cuisine: American
Nutrition
- Serving Size: 1 bar
- Calories: 180
- Sugar: 12g
- Sodium: 150mg
- Fat: 7g
- Saturated Fat: 4g
- Unsaturated Fat: 2g
- Trans Fat: 0g
- Carbohydrates: 25g
- Fiber: 1g
- Protein: 2g
- Cholesterol: 30mg