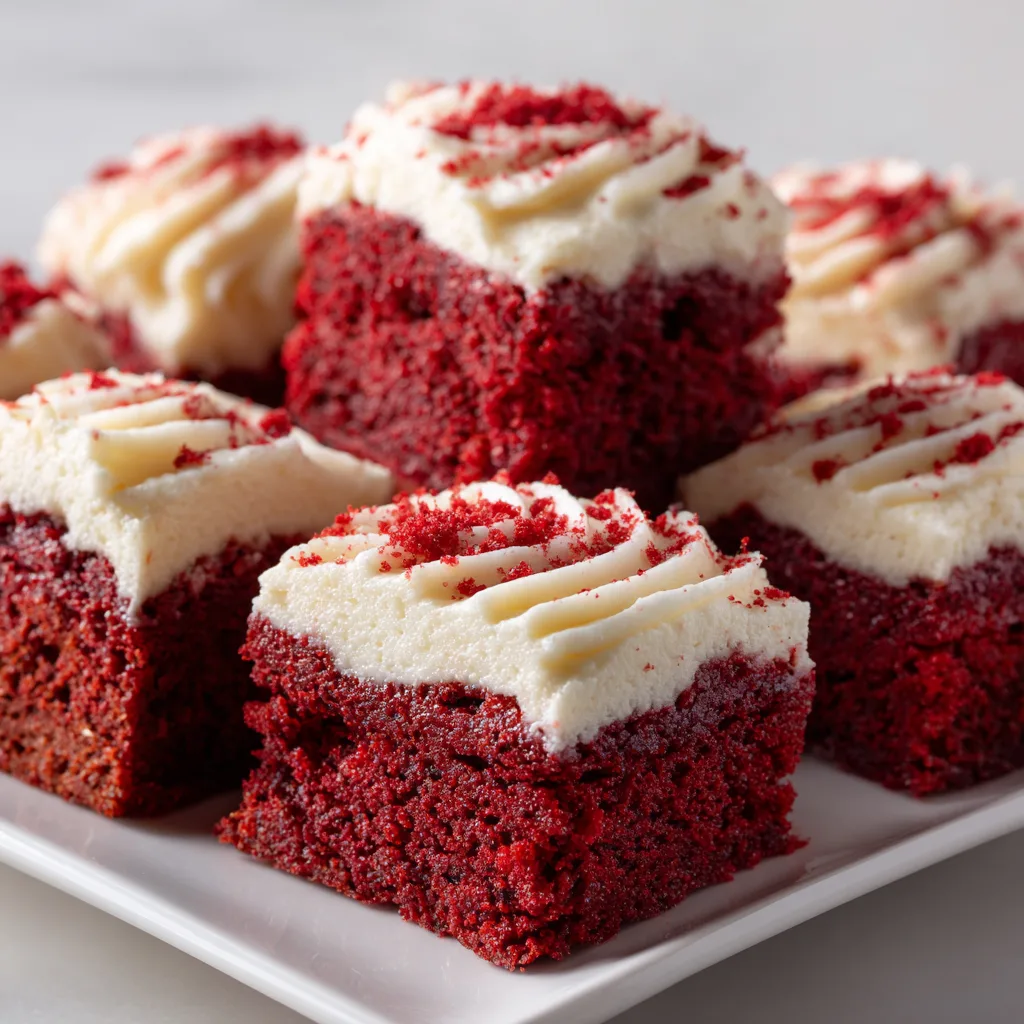
Introduction to Red Velvet Cupcake Tray Bake
As a busy mom, I know how precious time can be, especially when it comes to baking. That’s why I absolutely adore this Red Velvet Cupcake Tray Bake! It’s not just a treat; it’s a delightful solution for those hectic days when you want to impress your loved ones without spending hours in the kitchen. The vibrant red color and rich flavor make it perfect for any occasion, from birthday parties to cozy family gatherings. Plus, it’s so easy to whip up, you’ll wonder why you didn’t try it sooner!
Why You’ll Love This Red Velvet Cupcake Tray Bake
This Red Velvet Cupcake Tray Bake is a game-changer for busy lives. It combines the classic taste of red velvet with the convenience of a tray bake, making it a breeze to prepare. In just 45 minutes, you can have a stunning dessert that’s sure to impress. The moist, fluffy texture and rich cream cheese frosting will have everyone coming back for seconds. Trust me, it’s a crowd-pleaser!
Ingredients for Red Velvet Cupcake Tray Bake
Gathering the right ingredients is the first step to creating this delightful Red Velvet Cupcake Tray Bake. Here’s what you’ll need:
- All-purpose flour: This is the backbone of your bake, providing structure and texture.
- Granulated sugar: Sweetness is key! It helps balance the flavors and keeps the cupcakes moist.
- Baking soda: This leavening agent gives your cupcakes that lovely rise.
- Salt: A pinch enhances the flavors and balances the sweetness.
- Cocoa powder: Just a hint of cocoa adds depth to the flavor without overpowering the red velvet essence.
- Vegetable oil: This keeps the cupcakes moist and tender. You can substitute with melted coconut oil for a different flavor.
- Buttermilk: It adds a tangy flavor and helps create a soft texture. If you don’t have buttermilk, mix regular milk with a splash of vinegar.
- Large eggs: Eggs bind everything together and add richness.
- Red food coloring: This is what gives your cupcakes that iconic red hue. Feel free to use natural alternatives if you prefer.
- Vanilla extract: A splash of vanilla enhances the overall flavor profile.
- White vinegar: This reacts with the baking soda to create a fluffy texture.
For exact measurements, check the bottom of the article where you can find everything listed for easy printing. Happy baking!
How to Make Red Velvet Cupcake Tray Bake
Now that you have your ingredients ready, let’s dive into the fun part—making this delightful Red Velvet Cupcake Tray Bake! Follow these simple steps, and you’ll have a beautiful dessert in no time.
Step 1: Preheat the Oven
First things first, preheat your oven to 350°F (175°C). This step is crucial because it ensures even baking. While the oven warms up, grease your tray bake pan. You can use cooking spray or butter to make sure your cupcakes come out easily.
Step 2: Mix Dry Ingredients
In a large bowl, combine the all-purpose flour, granulated sugar, baking soda, salt, and cocoa powder. Whisk them together until they’re well mixed. This step is important because it helps distribute the leavening agents evenly, ensuring your cupcakes rise beautifully.
Step 3: Combine Wet Ingredients
In another bowl, whisk together the vegetable oil, buttermilk, eggs, red food coloring, vanilla extract, and white vinegar. Make sure everything is well blended. The oil and buttermilk will keep your cupcakes moist, while the vinegar reacts with the baking soda for that perfect fluffy texture.
Step 4: Combine Wet and Dry Ingredients
Now, it’s time to bring the two mixtures together. Pour the wet ingredients into the dry ingredients. Gently mix until just combined. Be careful not to overmix; a few lumps are perfectly fine. This will keep your cupcakes light and airy!
Step 5: Pour and Smooth the Batter
Pour the batter into your prepared tray bake pan. Use a spatula to smooth the top, ensuring it’s even. This helps the cupcakes bake uniformly, giving you that lovely, flat surface for frosting later.
Step 6: Bake
Place the pan in the preheated oven and bake for 25-30 minutes. To check for doneness, insert a toothpick into the center. If it comes out clean or with a few crumbs, your cupcakes are ready! If not, give them a few more minutes.
Step 7: Cool and Frost
Once baked, remove the pan from the oven and let it cool completely. This is key! If you frost them too soon, the frosting will melt. Once cool, top with your favorite cream cheese frosting for that classic red velvet experience. Enjoy every bite!
Tips for Success
- Always use room temperature ingredients for better mixing and texture.
- Don’t overmix the batter; it can lead to dense cupcakes.
- Check your oven temperature with an oven thermometer for accuracy.
- Let the cupcakes cool completely before frosting to avoid melting.
- Experiment with different frostings like chocolate or vanilla for a twist!
Equipment Needed
- Tray bake pan: A standard 9×13 inch pan works perfectly. You can also use a larger baking dish if needed.
- Mixing bowls: Use at least two—one for dry and one for wet ingredients.
- Whisk: A hand whisk or electric mixer will do the job.
- Spatula: Great for pouring and smoothing the batter.
- Toothpick: Essential for checking doneness.
Variations of Red Velvet Cupcake Tray Bake
- Chocolate Chip Red Velvet: Add a cup of semi-sweet chocolate chips to the batter for a delightful twist.
- Nutty Delight: Incorporate chopped walnuts or pecans for a crunchy texture and nutty flavor.
- Gluten-Free Option: Substitute all-purpose flour with a gluten-free blend to make it suitable for gluten-sensitive friends.
- Vegan Version: Replace eggs with flaxseed meal and use plant-based milk and oil for a vegan-friendly treat.
- Spiced Red Velvet: Add a teaspoon of cinnamon or nutmeg for a warm, spiced flavor that’s perfect for fall.
Serving Suggestions for Red Velvet Cupcake Tray Bake
- Pair with a scoop of vanilla ice cream for a delightful contrast.
- Serve alongside a cup of rich coffee or a refreshing iced tea.
- Garnish with fresh berries for a pop of color and flavor.
- Present on a decorative platter for an eye-catching display.
- Top with chocolate shavings for an extra touch of elegance.
FAQs about Red Velvet Cupcake Tray Bake
Can I make this Red Velvet Cupcake Tray Bake ahead of time?
Absolutely! You can bake the tray bake a day in advance. Just store it in an airtight container at room temperature. Frost it right before serving for the best flavor and texture.
What can I use instead of buttermilk?
If you don’t have buttermilk on hand, you can easily make a substitute. Just mix one cup of regular milk with a tablespoon of vinegar or lemon juice. Let it sit for about 5 minutes, and you’re good to go!
How do I store leftovers?
Store any leftover Red Velvet Cupcake Tray Bake in an airtight container. It will stay fresh for up to three days at room temperature or up to a week in the fridge. Just remember to let it come to room temperature before serving!
Can I freeze the Red Velvet Cupcake Tray Bake?
Yes, you can freeze it! Wrap the cooled tray bake tightly in plastic wrap and then in aluminum foil. It can be frozen for up to three months. Thaw it in the fridge overnight before serving.
What frosting pairs best with Red Velvet Cupcake Tray Bake?
The classic choice is cream cheese frosting, which complements the rich flavor perfectly. However, you can also try chocolate or vanilla buttercream for a delicious twist!
Final Thoughts
Making this Red Velvet Cupcake Tray Bake is more than just baking; it’s about creating sweet memories with loved ones. The vibrant color and rich flavor bring joy to any gathering, making it a centerpiece of celebration. I love how easy it is to whip up, even on the busiest days. Each bite is a reminder that life’s little pleasures can be simple yet delightful. So, whether it’s a birthday, a family dinner, or just a treat for yourself, this recipe is sure to bring smiles and satisfaction. Happy baking, and enjoy every delicious moment!
Print
Red Velvet Cupcake Tray Bake: Delightful and Easy Recipe!
- Total Time: 45 minutes
- Yield: 24 servings 1x
- Diet: Vegetarian
Description
A delightful and easy recipe for Red Velvet Cupcake Tray Bake, perfect for any occasion.
Ingredients
- 2 cups all-purpose flour
- 1 ½ cups granulated sugar
- 1 teaspoon baking soda
- 1 teaspoon salt
- 1 teaspoon cocoa powder
- 1 cup vegetable oil
- 1 cup buttermilk
- 2 large eggs
- 2 tablespoons red food coloring
- 1 teaspoon vanilla extract
- 1 teaspoon white vinegar
Instructions
- Preheat the oven to 350°F (175°C) and grease a tray bake pan.
- In a large bowl, mix together the flour, sugar, baking soda, salt, and cocoa powder.
- In another bowl, whisk together the oil, buttermilk, eggs, food coloring, vanilla extract, and vinegar.
- Combine the wet and dry ingredients until just mixed.
- Pour the batter into the prepared pan and smooth the top.
- Bake for 25-30 minutes or until a toothpick comes out clean.
- Let cool completely before frosting.
Notes
- For best results, use room temperature ingredients.
- Store leftovers in an airtight container.
- Top with cream cheese frosting for added flavor.
- Prep Time: 15 minutes
- Cook Time: 30 minutes
- Category: Dessert
- Method: Baking
- Cuisine: American
Nutrition
- Serving Size: 1 cupcake
- Calories: 250
- Sugar: 20g
- Sodium: 200mg
- Fat: 12g
- Saturated Fat: 2g
- Unsaturated Fat: 8g
- Trans Fat: 0g
- Carbohydrates: 35g
- Fiber: 1g
- Protein: 3g
- Cholesterol: 30mg