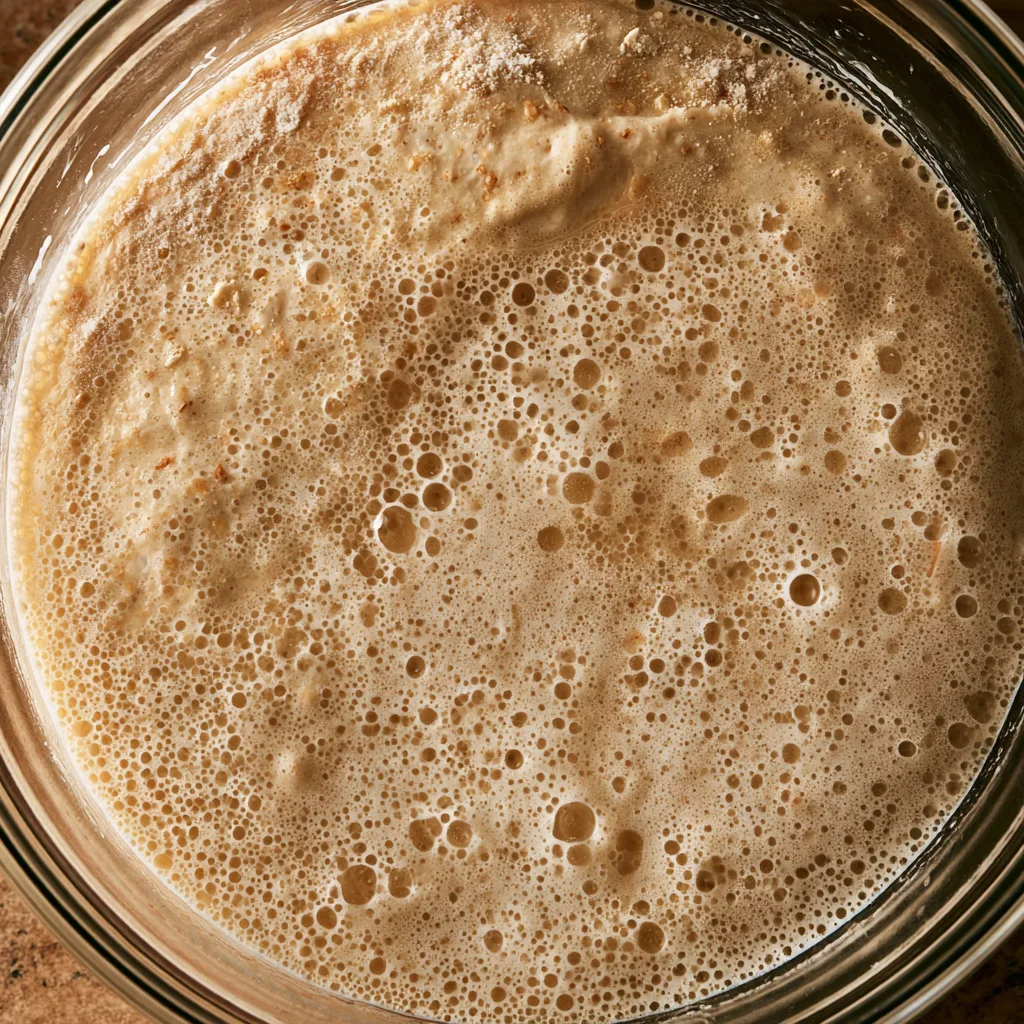
Introduction to Easy Sourdough Starter for Homemade Artisan Bread
Welcome to the wonderful world of baking! If you’ve ever dreamed of creating your own delicious artisan bread, then this guide to making an easy sourdough starter for homemade artisan bread is just for you. I know how busy life can get, especially for moms and professionals juggling a million things. This simple recipe is a quick solution that fits perfectly into your hectic schedule. Imagine the joy of pulling a warm, crusty loaf from your oven, filling your home with that irresistible aroma. Trust me, your loved ones will be impressed!
Why You’ll Love This Easy Sourdough Starter for Homemade Artisan Bread
This easy sourdough starter for homemade artisan bread is a game-changer! It’s incredibly simple, requiring just two ingredients and minimal effort. You’ll love how quickly it comes together, making it perfect for busy days. Plus, the taste? Oh, it’s out of this world! The tangy flavor and chewy texture of your homemade bread will have everyone asking for seconds. It’s a delightful way to bring warmth and comfort to your kitchen!
Ingredients for Easy Sourdough Starter for Homemade Artisan Bread
Creating your own sourdough starter is a breeze with just a couple of ingredients. Here’s what you’ll need:
- All-Purpose Flour: This is the backbone of your starter. It provides the necessary starches for fermentation. You can also experiment with whole wheat or rye flour for a different flavor profile.
- Water: Use filtered water for the best results. Tap water can contain chlorine, which may hinder the fermentation process. The water helps to hydrate the flour and kickstart the fermentation.
These ingredients are simple and easy to find at your local grocery store. If you’re feeling adventurous, you can even try adding a bit of whole grain flour to enhance the flavor and nutrition of your starter. For exact measurements, check the bottom of the article where you can find everything available for printing!
How to Make Easy Sourdough Starter for Homemade Artisan Bread
Now that you have your ingredients ready, let’s dive into the fun part—making your easy sourdough starter for homemade artisan bread! Follow these simple steps, and you’ll be on your way to baking delicious bread in no time.
Step 1: Combine Flour and Water
Start by grabbing a clean glass jar. In it, combine 1 cup of all-purpose flour with 1 cup of filtered water. This mixture is the foundation of your sourdough starter. The flour provides the food for the wild yeast and bacteria, while the water activates them. It’s like a little party for your ingredients!
Step 2: Stir Until Smooth
Next, take a spoon and stir the mixture until it’s smooth. You want to make sure there are no dry lumps left behind. This step is crucial because it ensures that the flour is fully hydrated. Think of it as giving your starter a good workout to get it ready for fermentation!
Step 3: Cover and Let Sit
Once your mixture is smooth, cover the jar loosely with a lid or a clean cloth. This allows airflow while keeping out unwanted pests. Let it sit at room temperature for 24 hours. During this time, the wild yeast will start to wake up and get to work. It’s like watching a magic show unfold right in your kitchen!
Step 4: Feed Your Starter
After 24 hours, it’s time to feed your starter. Discard half of the mixture—don’t worry, this helps keep it healthy! Then, add another cup of flour and a cup of water. Stir well to combine. This feeding process gives your starter the nutrients it needs to grow strong and bubbly.
Step 5: Repeat the Feeding Process
Continue this feeding process every 24 hours for about 5 to 7 days. You’ll notice your starter becoming more active, bubbling up, and doubling in size. It’s like watching a little pet grow! If it’s not bubbling yet, don’t fret. Just keep feeding it and give it some time.
Step 6: Ready to Use or Store
Once your starter is bubbly and has doubled in size, it’s ready to use! You can bake with it right away or store it in the refrigerator for later. If you choose to store it, remember to feed it at least once a week to keep it alive and kicking. Your easy sourdough starter for homemade artisan bread is now your new best friend in the kitchen!
Tips for Success
- Keep your starter in a warm spot, around 70-75°F, for optimal fermentation.
- Use filtered water to avoid chlorine, which can slow down the fermentation process.
- Be patient! It may take a few days for your starter to become bubbly and active.
- Adjust the feeding ratio if your starter is too thick or too runny.
- Label your jar with the date to track its progress easily.
Equipment Needed
- Glass Jar: A clean glass jar is ideal for visibility. You can also use a plastic container if needed.
- Spoon: A regular spoon works perfectly for stirring. A wooden spoon can be a nice touch!
- Cloth or Lid: Use a clean cloth or a loose lid to cover the jar, allowing airflow.
Variations
- Whole Wheat Flour: Substitute all-purpose flour with whole wheat flour for a nuttier flavor and added nutrition.
- Rye Flour: Incorporate rye flour for a unique taste and a boost in fermentation activity.
- Herb-Infused Starter: Add dried herbs like rosemary or thyme to your starter for a fragrant twist.
- Gluten-Free Option: Use a gluten-free flour blend to create a gluten-free sourdough starter.
- Fruit Juice: Replace some water with apple or pineapple juice to introduce natural sugars and enhance fermentation.
Serving Suggestions
- Cheese Platter: Pair your artisan bread with a selection of cheeses for a delightful appetizer.
- Fresh Salads: Serve alongside a crisp salad drizzled with vinaigrette for a light meal.
- Homemade Soup: Enjoy your bread dipped in a warm bowl of homemade soup for comfort.
- Herb Butter: Spread herb-infused butter on warm slices for an extra flavor boost.
- Wine Pairing: Complement your bread with a glass of red or white wine for a sophisticated touch.
FAQs about Easy Sourdough Starter for Homemade Artisan Bread
How long does it take to make a sourdough starter?
Typically, it takes about 5 to 7 days for your easy sourdough starter for homemade artisan bread to become bubbly and ready for baking. Patience is key, as the wild yeast needs time to develop!
Can I use tap water for my sourdough starter?
While you can use tap water, I recommend using filtered water. Tap water often contains chlorine, which can slow down the fermentation process. Filtered water helps your starter thrive!
What should I do if my starter isn’t bubbling?
If your starter isn’t bubbling, don’t worry! Just keep feeding it daily and ensure it’s in a warm spot. Sometimes, it just needs a little more time to wake up and get active.
Can I store my sourdough starter in the fridge?
Absolutely! Once your starter is active, you can store it in the refrigerator. Just remember to feed it at least once a week to keep it healthy and ready for baking.
What can I bake with my sourdough starter?
Your easy sourdough starter for homemade artisan bread can be used for various recipes! Think delicious loaves of bread, pancakes, waffles, or even pizza dough. The possibilities are endless!
Final Thoughts
Creating your easy sourdough starter for homemade artisan bread is more than just a recipe; it’s an experience filled with anticipation and joy. Each day brings a new opportunity to nurture your starter, watching it grow and bubble with life. The satisfaction of baking your first loaf, with its crusty exterior and soft, chewy interior, is simply unmatched. It’s a delightful way to connect with your kitchen and your loved ones. So, roll up your sleeves, embrace the process, and let the aroma of freshly baked bread fill your home. Happy baking!
Easy Sourdough Starter for Homemade Artisan Bread Made Simple!
- Total Time: 7 days
- Yield: 1 sourdough starter 1x
- Diet: Vegetarian
Description
A simple guide to creating your own sourdough starter for delicious homemade artisan bread.
Ingredients
- 1 cup all-purpose flour
- 1 cup water
Instructions
- In a clean glass jar, combine 1 cup of all-purpose flour with 1 cup of water.
- Stir the mixture until there are no dry lumps.
- Cover the jar loosely with a lid or cloth to allow airflow.
- Let the mixture sit at room temperature for 24 hours.
- After 24 hours, discard half of the starter and feed it with another 1 cup of flour and 1 cup of water.
- Repeat the feeding process every 24 hours for about 5-7 days until the starter is bubbly and has doubled in size.
- Once ready, use the starter for baking or store it in the refrigerator.
Notes
- Use filtered water for best results.
- Keep the starter in a warm place for optimal fermentation.
- Adjust the feeding ratio based on the activity of your starter.
- Prep Time: 5 minutes
- Cook Time: 0 minutes
- Category: Baking
- Method: Fermentation
- Cuisine: American
Nutrition
- Serving Size: 1 tablespoon
- Calories: 30
- Sugar: 0g
- Sodium: 0mg
- Fat: 0g
- Saturated Fat: 0g
- Unsaturated Fat: 0g
- Trans Fat: 0g
- Carbohydrates: 7g
- Fiber: 0g
- Protein: 1g
- Cholesterol: 0mg