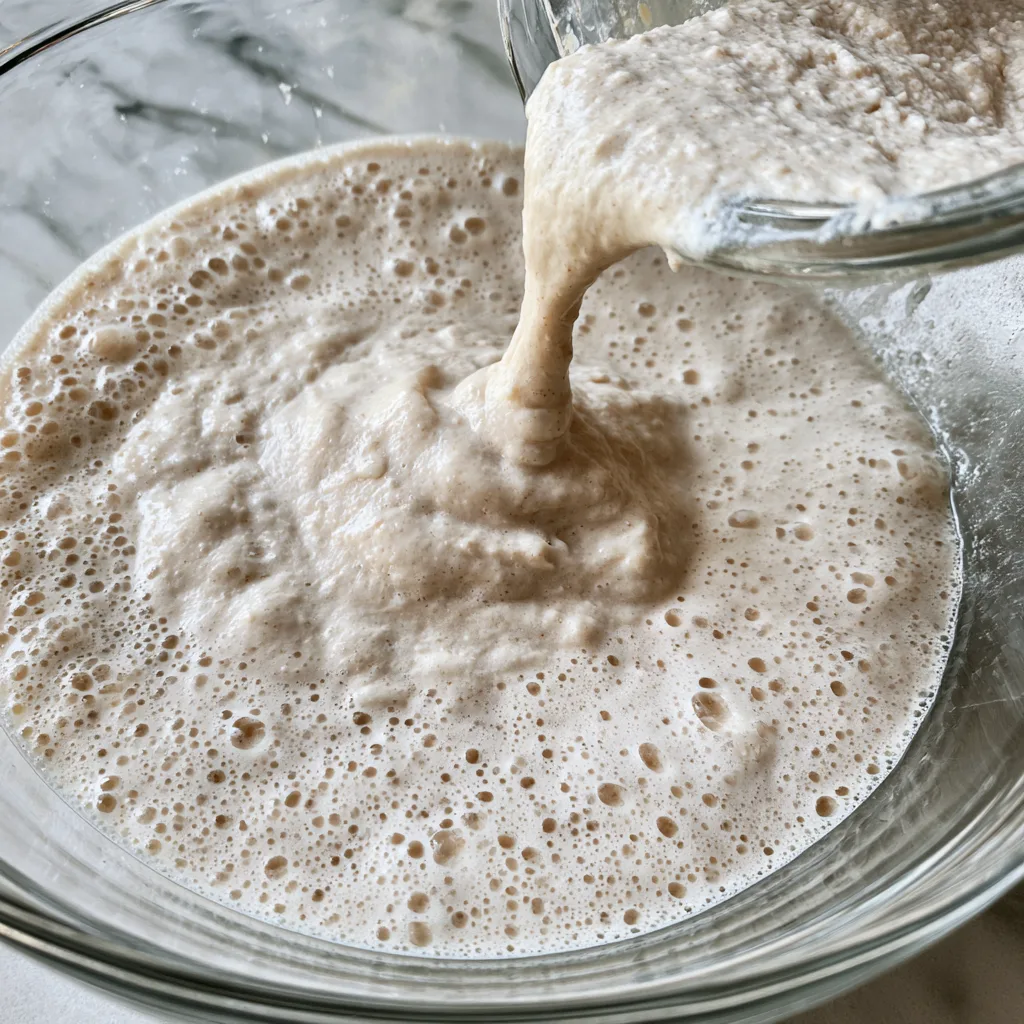
Introduction to How to Revive a Weak Sourdough Starter
Have you ever found yourself staring at a sad, sluggish sourdough starter, wondering how to revive a weak sourdough starter? Trust me, you’re not alone! As a passionate home cook, I’ve been there too. Life gets busy, and sometimes our beloved starters need a little TLC to bounce back. This guide is your quick solution for those moments when you need your starter to be active and bubbly again. With just a few simple steps, you can bring your starter back to life and impress your loved ones with delicious homemade bread!
Why You’ll Love This How to Revive a Weak Sourdough Starter
This method is not only easy but also incredibly quick! In just a few hours, you can transform your weak sourdough starter into a bubbly powerhouse ready for baking. Plus, reviving your starter is a rewarding experience that connects you to the art of bread-making. You’ll feel accomplished as you watch it grow, and the taste of fresh sourdough bread is simply unbeatable!
Ingredients for How to Revive a Weak Sourdough Starter
Reviving your sourdough starter is simple, and it all begins with just a few key ingredients. Here’s what you’ll need:
- Weak sourdough starter: This is your base. It may look lifeless now, but with a little care, it can spring back to life!
- Flour: I recommend using all-purpose or bread flour for the best results. These flours provide the necessary nutrients for your yeast to thrive. If you’re feeling adventurous, you can also experiment with whole wheat or rye flour for added flavor.
- Water: Use filtered or bottled water to avoid any chemicals that might hinder the fermentation process. Warm water can help activate the yeast more effectively, giving your starter a boost.
For exact quantities, check the bottom of the article where you can find everything you need for printing. Remember, the quality of your ingredients can make a big difference in the revival process!
How to Make How to Revive a Weak Sourdough Starter
Reviving your sourdough starter is a straightforward process. Follow these simple steps, and soon you’ll have a lively starter ready for baking!
Step 1: Discard Half of Your Weak Sourdough Starter
First things first, you need to discard half of your weak sourdough starter. This may seem counterintuitive, but it’s crucial for refreshing the starter. By removing some of it, you’re giving the remaining yeast a better chance to thrive. Think of it as pruning a plant; it helps the healthy parts grow stronger!
Step 2: Add Equal Parts Flour and Water
Next, add equal parts flour and water to the remaining starter. I usually stick with all-purpose or bread flour for the best results. These flours are packed with nutrients that your yeast will love. When it comes to water, opt for filtered or bottled water. This helps avoid any chemicals that might slow down the fermentation process. Warm water can also give your starter a little extra kick!
Step 3: Mix Thoroughly
Now, it’s time to mix! Stir the flour and water into the starter until you have a smooth mixture. Make sure there are no dry bits of flour left. A well-mixed starter is essential for even fermentation. Think of it as giving your starter a good workout; it needs to be strong and ready to rise!
Step 4: Cover the Jar Loosely
Cover your jar loosely with a lid or a cloth. This is important because your starter needs airflow to ferment properly. If you seal it too tightly, it won’t be able to breathe, and that can hinder the fermentation process. It’s like letting your starter enjoy a little fresh air while it works its magic!
Step 5: Let It Sit at Room Temperature
Let your starter sit at room temperature for about 6 to 12 hours. During this time, keep an eye on it. You want to see it bubble and double in size. This is a sign that your yeast is waking up and getting ready to party! The warmer the environment, the faster it will rise, so find a cozy spot for it.
Step 6: Repeat the Feeding Process
If your starter isn’t quite where you want it after the first feeding, don’t worry! Just repeat the feeding process every 12 hours until it’s strong and active. Patience is key here. Sometimes it takes a few feedings to revive a weak sourdough starter fully. But trust me, the wait is worth it when you finally see that bubbly goodness!
Tips for Success
- Use warm water to help activate the yeast more effectively.
- Keep your starter in a warm place, ideally between 75°F and 85°F, for optimal fermentation.
- Be patient; it may take a few feedings to see significant improvement.
- Consider using a kitchen scale for precise measurements, ensuring consistency.
- Keep a feeding schedule to maintain your starter’s health and activity.
Equipment Needed
- Mixing bowl: A medium-sized bowl works well, but any container will do.
- Jar or container: Use a glass jar for visibility, or any container with a loose lid.
- Spoon or spatula: A sturdy spoon or spatula is perfect for mixing.
- Kitchen scale: Optional, but helpful for precise measurements.
Variations
- Whole Wheat Flour: Swap out all-purpose flour for whole wheat flour to add a nutty flavor and extra nutrients.
- Rye Flour: Incorporate rye flour for a tangier taste and a boost in fermentation activity, as rye is known to be yeast-friendly.
- Herb-Infused Water: Use water infused with herbs like rosemary or thyme for a unique flavor twist in your starter.
- Gluten-Free Option: If you’re gluten-sensitive, try using a gluten-free flour blend, but be aware that the fermentation may differ.
- Fruit Juice: Add a splash of fruit juice, like apple or pineapple, to the water for a hint of sweetness and additional yeast stimulation.
Serving Suggestions
- Freshly Baked Bread: Serve your revived sourdough starter as a base for delicious homemade bread.
- Cheese Pairing: Enjoy slices of sourdough with a variety of cheeses for a delightful appetizer.
- Soup Companion: Pair your bread with a warm bowl of soup for a comforting meal.
- Salad Side: Serve alongside a fresh salad for a balanced lunch.
- Presentation: Slice the bread and arrange it on a wooden board for a rustic touch.
FAQs about How to Revive a Weak Sourdough Starter
What should I do if my sourdough starter doesn’t bubble after feeding?
If your sourdough starter isn’t bubbling after feeding, don’t panic! It may just need more time or a warmer environment. Ensure you’re using warm water and keep it in a cozy spot. Sometimes, it takes a few feedings to revive a weak sourdough starter fully.
How often should I feed my sourdough starter?
Feeding your sourdough starter every 12 hours is a good rule of thumb, especially when trying to revive it. Consistency is key! Once it’s active, you can adjust the feeding schedule based on how often you bake.
Can I use tap water for my sourdough starter?
While you can use tap water, it’s best to avoid it if possible. Tap water may contain chlorine or other chemicals that can hinder fermentation. Filtered or bottled water is a safer choice for reviving your sourdough starter.
How do I know when my sourdough starter is ready to use?
Your sourdough starter is ready to use when it has doubled in size, is bubbly, and has a pleasant, slightly tangy aroma. This indicates that the yeast is active and ready to help you bake delicious bread!
Can I store my revived sourdough starter in the fridge?
Yes, once your sourdough starter is strong and active, you can store it in the fridge. Just remember to feed it once a week to keep it healthy. When you’re ready to bake, take it out and feed it a few hours before use to wake it up!
Final Thoughts
Reviving a weak sourdough starter is more than just a baking task; it’s a delightful journey filled with anticipation and joy. Watching your starter bubble back to life is like witnessing a small miracle in your kitchen. Each feeding brings you closer to that first slice of warm, homemade bread, and the aroma that fills your home is simply irresistible. So, embrace the process, be patient, and enjoy the little victories along the way. With this guide on how to revive a weak sourdough starter, you’ll soon be creating delicious memories with every loaf you bake!

How to Revive a Weak Sourdough Starter Easily Today!
- Total Time: 6-12 hours (depending on the starter's condition)
- Yield: 1 active sourdough starter
- Diet: Vegetarian
Description
A guide on how to effectively revive a weak sourdough starter to ensure it becomes active and bubbly again.
Ingredients
- Weak sourdough starter
- Flour (preferably all-purpose or bread flour)
- Water (filtered or bottled)
Instructions
- Discard half of your weak sourdough starter.
- Add equal parts flour and water to the remaining starter (for example, 100g of each).
- Mix thoroughly until there are no dry bits of flour.
- Cover the jar loosely with a lid or cloth to allow airflow.
- Let it sit at room temperature for 6-12 hours until it becomes bubbly and doubles in size.
- If necessary, repeat the feeding process every 12 hours until the starter is strong and active.
Notes
- Use warm water to help activate the yeast.
- Keep the starter in a warm place for optimal fermentation.
- Be patient; it may take a few feedings to revive the starter fully.
- Prep Time: 5 minutes
- Cook Time: 0 minutes
- Category: Baking
- Method: Fermentation
- Cuisine: American
Nutrition
- Serving Size: 1 tablespoon
- Calories: 20
- Sugar: 0g
- Sodium: 0mg
- Fat: 0g
- Saturated Fat: 0g
- Unsaturated Fat: 0g
- Trans Fat: 0g
- Carbohydrates: 5g
- Fiber: 0g
- Protein: 1g
- Cholesterol: 0mg