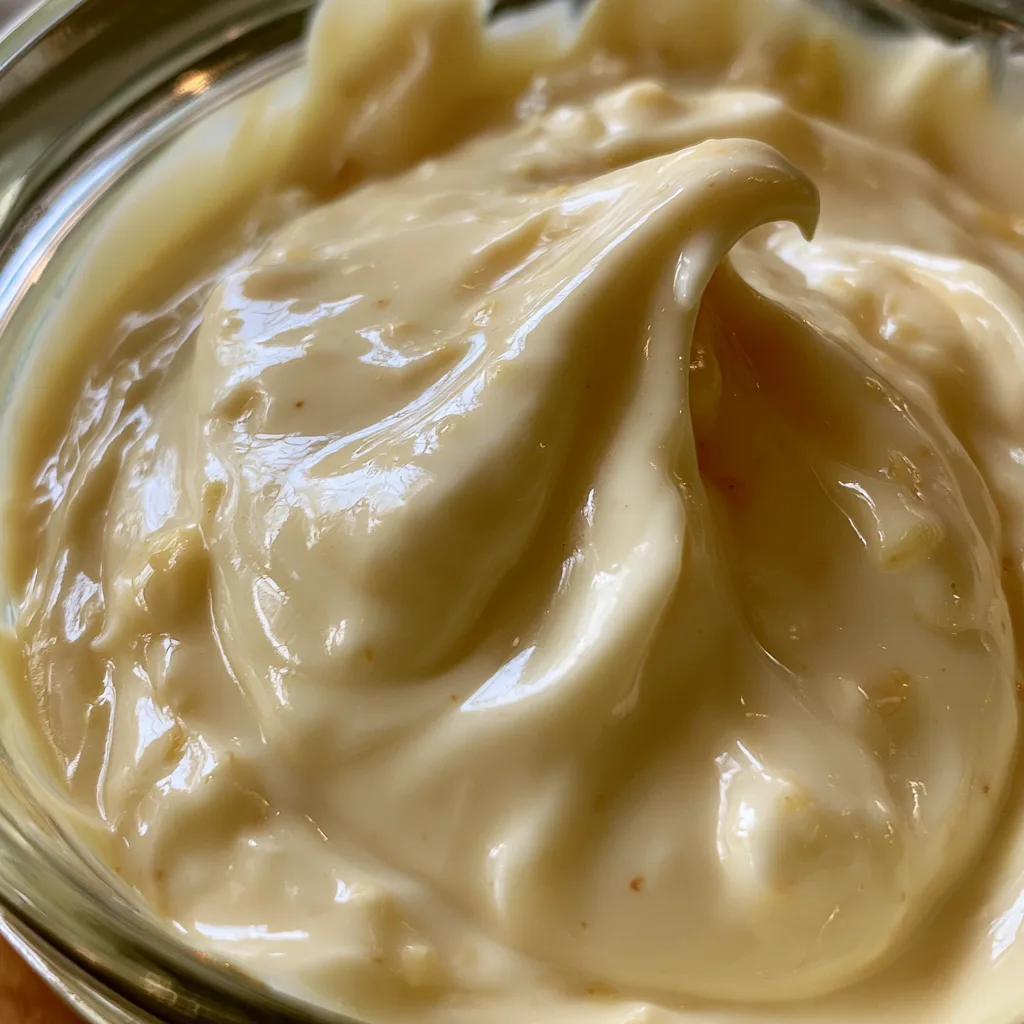
Introduction to Garlic Aioli from Scratch
Welcome to the world of homemade delights! If you’re like me, juggling a busy life while trying to whip up something delicious can feel overwhelming. That’s where this garlic aioli from scratch comes in. It’s a quick solution for a busy day, transforming simple meals into something extraordinary. Imagine dipping crispy fries or fresh veggies into this creamy, garlicky goodness. Not only is it easy to make, but it also impresses your loved ones. Trust me, once you try this recipe, you’ll wonder why you ever settled for store-bought versions!
Why You’ll Love This Garlic Aioli from Scratch
This garlic aioli from scratch is a game-changer in the kitchen! It’s incredibly easy to whip up, taking just 10 minutes of your time. The taste? Oh, it’s a flavor explosion that elevates any dish. Whether you’re a busy mom or a professional on the go, this recipe fits seamlessly into your life. Plus, it’s a healthier alternative to store-bought sauces, giving you peace of mind with every dip!
Ingredients for Garlic Aioli from Scratch
Gathering the right ingredients is key to making a fantastic garlic aioli from scratch. Here’s what you’ll need:
- Egg Yolk: This is the base of your aioli, providing richness and helping to create that creamy texture.
- Dijon Mustard: Adds a tangy kick and helps with emulsification, making your aioli smooth and luscious.
- Lemon Juice: Freshly squeezed lemon juice brightens the flavor and balances the richness of the oil.
- Olive Oil: The star of the show! Use high-quality extra virgin olive oil for the best taste and health benefits.
- Garlic: Minced garlic gives your aioli that signature flavor. Feel free to adjust the amount based on your love for garlic!
- Salt: A pinch of salt enhances all the flavors, making your aioli irresistible.
For those looking to experiment, consider adding herbs like basil or parsley for a fresh twist. You can also substitute the olive oil with avocado oil for a different flavor profile. Remember, all ingredient quantities are listed at the bottom of the article for easy reference and printing!
How to Make Garlic Aioli from Scratch
Step 1: Whisk the Base
Start by grabbing a medium-sized bowl. In it, whisk together the egg yolk, Dijon mustard, and lemon juice. This combination is the foundation of your garlic aioli from scratch. Whisk vigorously until everything is well blended and smooth. You want to create a creamy base that will hold the flavors together. It’s like setting the stage for a delicious performance! Don’t rush this step; take your time to ensure the ingredients are fully incorporated. Trust me, this little effort pays off in the final taste!
Step 2: Emulsify the Mixture
Now comes the fun part! Slowly drizzle in the olive oil while continuously whisking. This is where the magic of emulsification happens. As you whisk, the oil will blend with the egg yolk mixture, creating a thick and creamy texture. It’s like watching a beautiful dance unfold! If you pour the oil too quickly, the mixture may not emulsify properly, leading to a runny aioli. So, take it slow and steady. You’ll know it’s ready when it’s thick and luscious, just begging to be tasted!
Step 3: Add Garlic and Season
Once your aioli is beautifully emulsified, it’s time to add the minced garlic and a pinch of salt. Stir these in gently, ensuring they’re evenly distributed throughout the mixture. This is where the flavor really comes alive! Taste your aioli and adjust the seasoning as needed. If you’re a garlic lover like me, feel free to add more minced garlic for an extra kick. Remember, this is your creation, so make it as bold as you like!
Step 4: Serve or Store
Your garlic aioli from scratch is now ready to shine! You can serve it immediately with your favorite dippers, like crispy fries or fresh veggies. If you’re not using it right away, store it in an airtight container in the refrigerator. It will keep well for up to a week, allowing you to enjoy this creamy delight whenever you want. Just give it a quick stir before serving, and you’re good to go! Enjoy the compliments that come your way!
Tips for Success
- Ensure all ingredients are at room temperature for better emulsification.
- Whisk continuously while adding the olive oil to achieve the perfect texture.
- Don’t rush the process; take your time to blend everything well.
- Taste as you go! Adjust garlic and salt to suit your preference.
- Store in an airtight container to keep it fresh for up to a week.
Equipment Needed
- Medium-sized bowl: A mixing bowl is essential. A large glass or ceramic bowl works well too.
- Whisk: A standard whisk is perfect, but you can use a fork in a pinch.
- Measuring spoons: For accurate ingredient measurements, especially for mustard and lemon juice.
- Airtight container: To store your aioli, any container with a tight lid will do.
Variations of Garlic Aioli from Scratch
- Herbed Aioli: Add fresh herbs like basil, dill, or parsley for a vibrant twist. This adds a fresh flavor that pairs beautifully with grilled meats and veggies.
- Spicy Aioli: Mix in a dash of cayenne pepper or a few drops of hot sauce for a kick. This variation is perfect for those who love a little heat!
- Lemon Aioli: Increase the lemon juice for a zesty version. This brightens the flavor and makes it a refreshing dip for seafood.
- Roasted Garlic Aioli: Substitute fresh garlic with roasted garlic for a sweeter, milder flavor. Roasting mellows the garlic, creating a rich, caramelized taste.
- Avocado Aioli: Blend in ripe avocado for a creamy, nutrient-packed version. This adds a lovely green color and a buttery texture.
Serving Suggestions for Garlic Aioli from Scratch
- Pair with crispy French fries or sweet potato fries for a delightful dip.
- Serve alongside fresh vegetable sticks like carrots, cucumbers, and bell peppers for a healthy snack.
- Use as a spread on sandwiches or wraps for added flavor.
- Drizzle over grilled chicken or fish for a gourmet touch.
- Enjoy with crusty bread for a simple yet elegant appetizer.
FAQs about Garlic Aioli from Scratch
Can I make garlic aioli from scratch without raw eggs?
Absolutely! If you’re concerned about using raw eggs, you can substitute the egg yolk with mayonnaise. This will still give you that creamy texture and flavor, making it a great alternative.
How long does homemade garlic aioli last?
Your garlic aioli from scratch can be stored in an airtight container in the refrigerator for up to one week. Just remember to give it a good stir before serving!
Can I use a blender instead of whisking by hand?
Yes, using a blender or food processor can make the emulsification process even easier! Just add all the ingredients and blend until smooth. It’s a great time-saver for busy days.
What can I serve with garlic aioli?
This versatile garlic sauce pairs wonderfully with crispy fries, fresh veggies, or grilled meats. You can even use it as a spread on sandwiches for an extra flavor boost!
Can I adjust the garlic flavor in the aioli?
Definitely! If you love garlic, feel free to add more minced garlic to your aioli. For a milder flavor, you can reduce the amount or use roasted garlic instead.
Final Thoughts
Making garlic aioli from scratch is not just about creating a delicious condiment; it’s about the joy of cooking and sharing. This simple recipe transforms everyday meals into something special, bringing smiles to the table. Whether you’re dipping crispy fries or spreading it on a sandwich, each bite is a reminder of the love and care you put into your cooking. Plus, it’s a fantastic way to impress family and friends without spending hours in the kitchen. So, roll up your sleeves, embrace the process, and enjoy the delightful flavors of your homemade garlic aioli!
Print
Garlic aioli from scratch: Discover the easiest recipe!
- Total Time: 10 minutes
- Yield: 1 cup 1x
- Diet: Vegetarian
Description
A simple and delicious recipe for making garlic aioli from scratch, perfect for dipping or as a condiment.
Ingredients
- 1 large egg yolk
- 1 tablespoon Dijon mustard
- 1 tablespoon lemon juice
- 1 cup olive oil
- 2–3 cloves garlic, minced
- Salt to taste
Instructions
- In a bowl, whisk together the egg yolk, Dijon mustard, and lemon juice until well combined.
- Slowly drizzle in the olive oil while continuously whisking to emulsify the mixture.
- Add the minced garlic and salt, and mix until fully incorporated.
- Taste and adjust seasoning if necessary.
- Serve immediately or refrigerate for later use.
Notes
- Make sure all ingredients are at room temperature for better emulsification.
- For a stronger garlic flavor, add more minced garlic.
- Store in an airtight container in the refrigerator for up to one week.
- Prep Time: 10 minutes
- Cook Time: 0 minutes
- Category: Condiment
- Method: Whisking
- Cuisine: Mediterranean
Nutrition
- Serving Size: 1 tablespoon
- Calories: 100
- Sugar: 0g
- Sodium: 50mg
- Fat: 11g
- Saturated Fat: 1.5g
- Unsaturated Fat: 8g
- Trans Fat: 0g
- Carbohydrates: 0g
- Fiber: 0g
- Protein: 0g
- Cholesterol: 37mg